
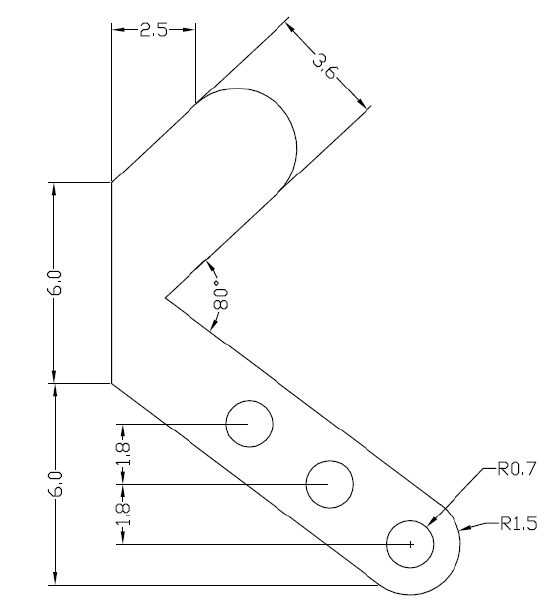
We have reached Day #10, and it is time to bring something tricky to the table to challenge yourself. Here is today’s 2D exercise. As you can see, all members are neither vertically positioned nor horizontally positioned. All dimensions are vertical and horizontal.
How do you think you can go about finishing this exercise? where do you think you can start for things to be easy?

Tips
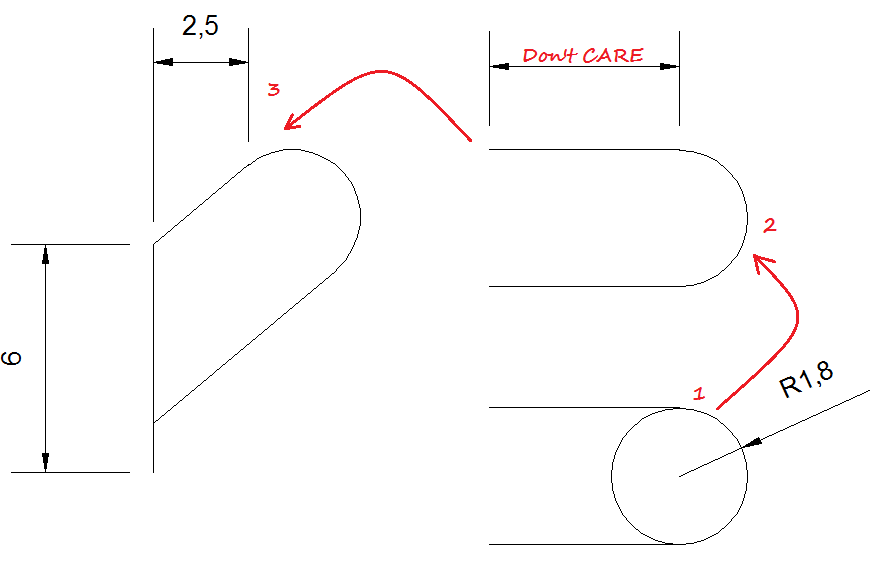
Start by drawing the upper side. Start from 1, then 2. And lastly, rotate from one leg with an angle of 40 degrees. Play with the line and position it like in 3.
Don not CARE just means that when you are drawing that object lying down, you do not have to bother with the dimension of the line where this is mentioned. The objective of this is to get the shape right. However, after you rotate it then you need to figure out how to stick it to the line of length 6 at the right position, which is actually easy following the process below.
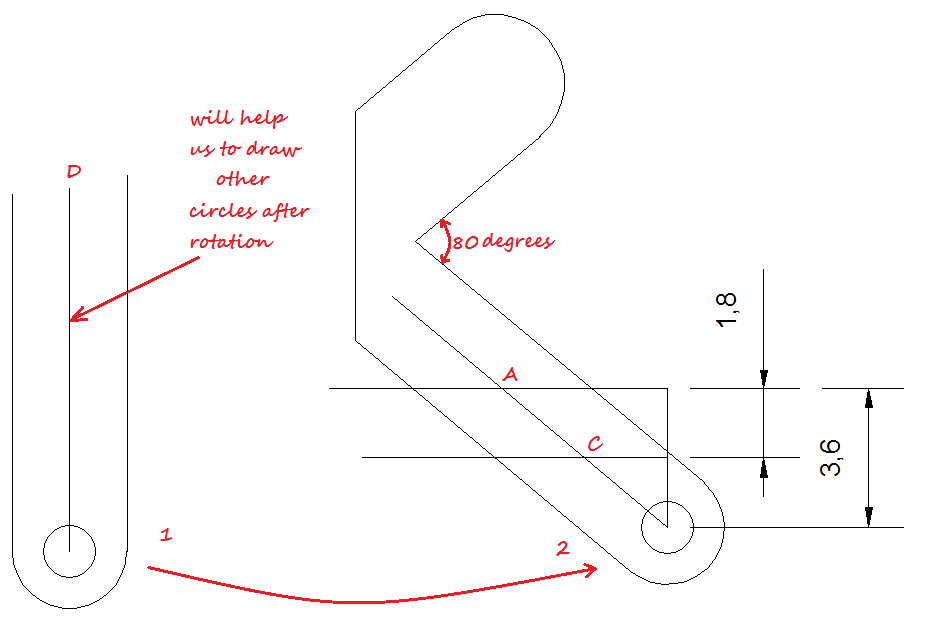
Now, you may use the same technique to get the second part. Draw it standing up, and then you can rotate it with an angle of 50 degrees. The point D will be used as the BASE Point of the rotation. After rotation, find a way to put it at its right position, and use the trick demonstrated on the figure below to find the center of the remaining circles.
Note that the 2 other circles are identical to the first one. This means that R = 0.7. In addition, A and C represent the centers of other circles.
I believe we tackle this the easiest way possible, but it is not the only way, so feel free to try it your way first. If you get stuck, try it the way outlined in this exercise. If you found a better way to solve this exercises, share your discovery so everyone can benefit. Feel free to drop me a note down below.
See you on 2D AutoCAD exercise Day #11

[ws_table id=”3″]
Comments
3 responses to “20 Days of 2D AutoCAD exercises #10”
Hello, can you explain in further detail how you got the second half to connect to the first half can’t figure out have to make them fit properly. Any help would be much appreciated.
how you got angles 40 degree and 50 degree angles in exercise 10
I like how the author is pretending like he’s actually explaining how to do anything. Making references to things that aren’t in the drawings and talking about stuff that you just assume the beginner would know about software they’ve never used. On the other hand, it’s actually quite effective at teaching the material because I’m forced to figure it out on my own and I learn it better that way.