
Welcome to Day #3 of this series of learning AutoCAD with exercises. Today, we have a but more complex exercise compared to the two previous ones.
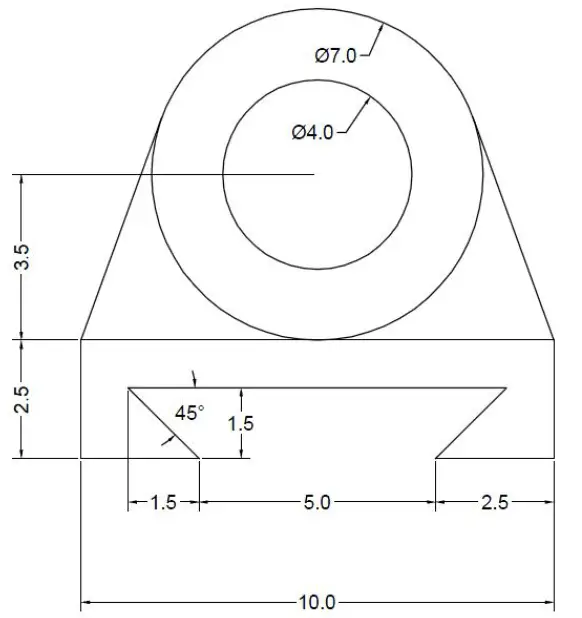
On Day #2, you learned how to draw lines with specific distances. In this exercise, all distances are given but remember that while drawing a circle in AutoCAD that by default, the software will ask you to enter the radius of the circle. In this exercise, however, we are given diameters.

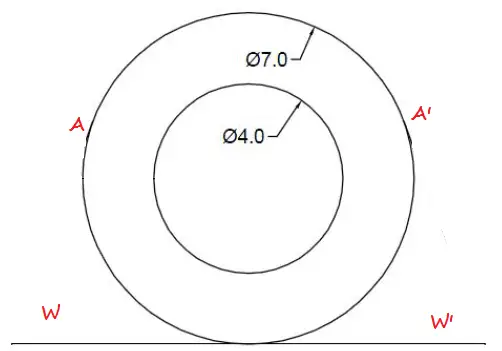
Make sure to learn and understand the Day 1 exercise so you will be able to stick your line on the circle at A and A’ the proper way.
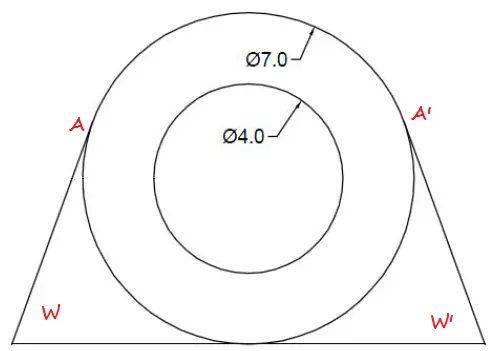
The TANGENT should be activated. Start from the bottom, meaning start the line at the point W’ and end it at A’. While approaching the circle, AutoCAD will help you snap the end of the line on a right tangentially to the circle.
9 tips you should know on your Day 1 of Using AutoCAD
You should notice the green circle in AutoCAD, as shown below.

Using this technique, you should be able to draw the complete figure below.
We reached the end of today’s exercise, feel free to comment, like and share.
Check out AutoCAD Exercise Day #4.

[ws_table id=”3″]
Leave a Reply