
Today we are going to learn how to use the CHAMFER command.
This exercise can be done with everything you learned in the previous AutoCAD exercises, since Day #1. We will add the CHAMFER command as on of your skills today.

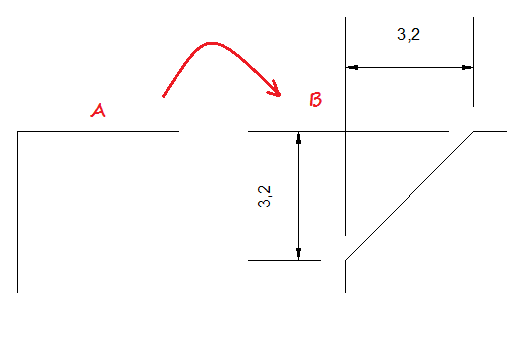
The CHAMFER command helps us in getting from point A to B in the figure below:
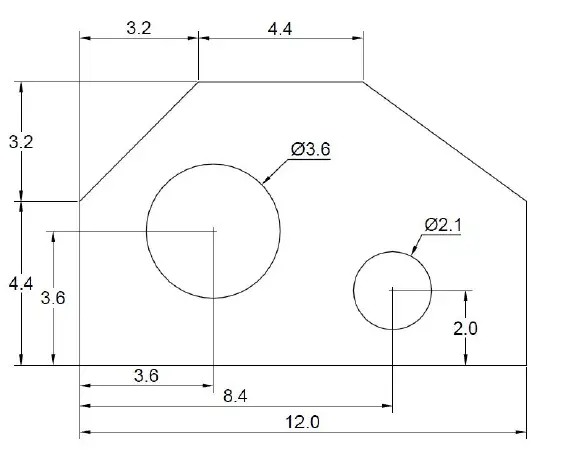
This being said, we will try creating the following figure:
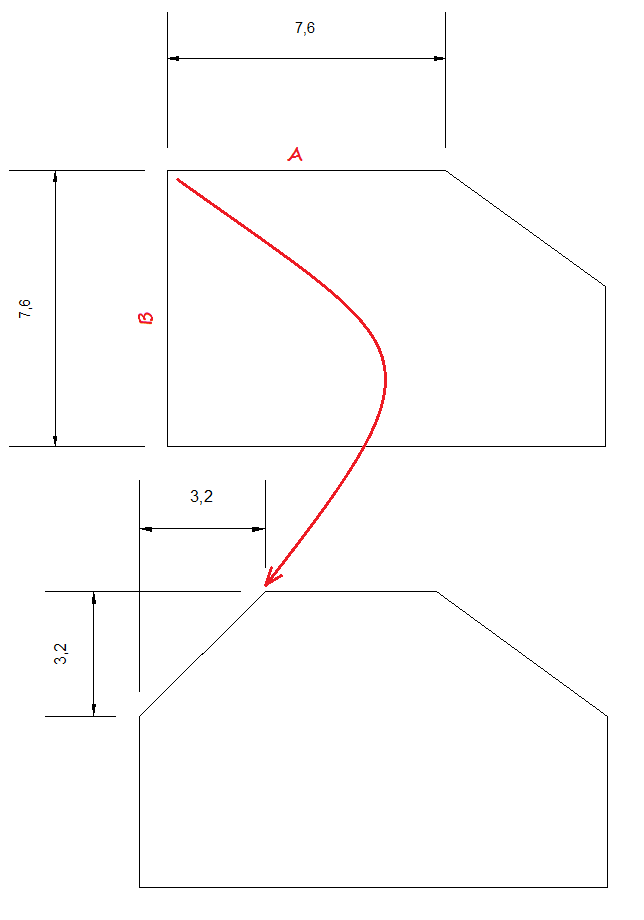
To get this result, you will have to apply a CHAMFER of 3.2 x 3.2 to the indicated corner.
Follow these steps to use the CHAMFER command:

1 – Click on a CHAMFER icon
2 – (TRIM mode) Current chamfer Dist1 = 0.0000, Dist2 = 0.0000
Select first line or [Undo/Polyline/Distance/Angle/Trim/mEthod/Multiple]: d
3 – Specify first chamfer distance <0.0000>: 3.2
4 – Specify second chamfer distance <3.2000>: 3.2
5 – Select first line or [Undo/Polyline/Distance/Angle/Trim/mEthod/Multiple]: Select A
6 – Select second line or shift-select to apply corner: Select B
On step 4, you could decide to hit the ENTER key without typing 3.2, since the default distance has been already set to that distance from our entry in step 2. AutoCAD will remember Dist1 = 3.2 and Dist2 = 3.2 as a default distance for next use in this file. You are free to change it if in the next use of this command you want Dist1 and Dist2 with different dimensions. That’s it for this exercise.
Talk to you in the next AutoCAD 2d Exercise. Don’t forget to like and comment.

[ws_table id=”3″]
Leave a Reply