
Today’s exercise will help us utilize the HATCH command and understand it. One thing that is interesting about this exercise is the “angle game” this exercise will teach you.
There is more than a couple of segments in the exercise that will make you use some techniques we learned in AutoCAD exercise Day #4, feel free to check how to draw a line with precise angle, you will need it today.
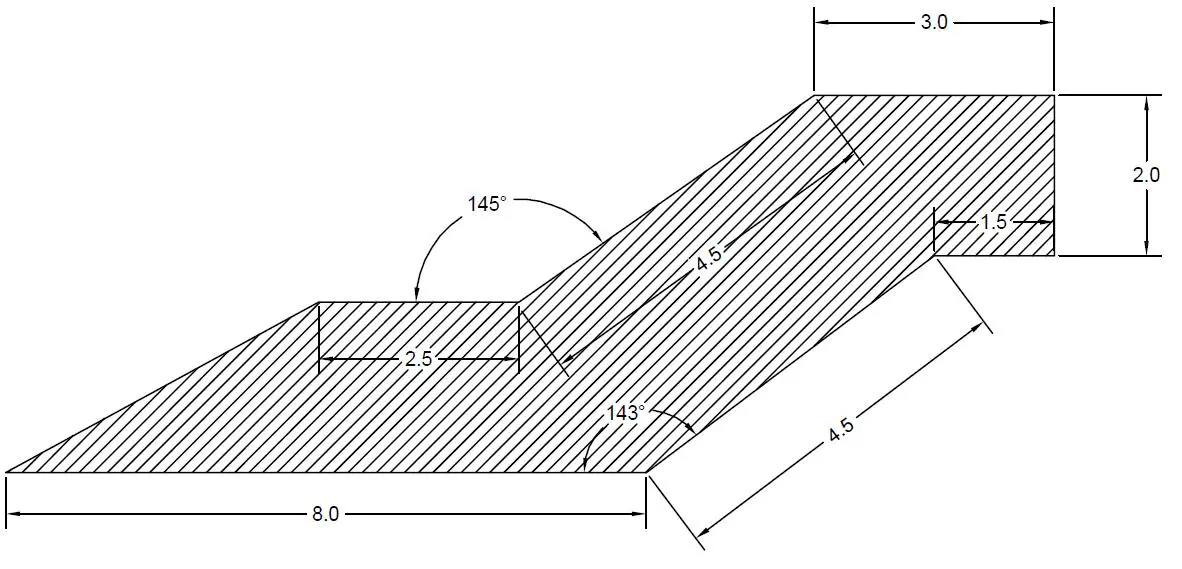

After finishing drawing, which you will do without problem if you followed from Day #1, you will learn how to use the HATCH command. This command helps you create a pattern like the one in the image above.
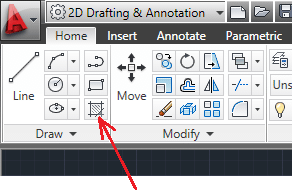
To use the HATCH command in AutoCAD
- Click on the HATCH icon
- Select the Hatch pattern you want
- Click to determine the HATCH boundary
- Hit the ENTER key
After activation of the HATCH command in Step 1, the HATCH creation bar appears and allows you to fix the settings of the HATCH you are creating.

The HATCH pattern used for this exercise is ANSI32. You can navigate through the available patterns using the HATCH creation bar shown above. You can also change the angle, the transparency, and other settings.
See you at 2D AutoCAD exercise Day #8. Don’t forget to comment, like and share.

[ws_table id=”3″]
Leave a Reply