We are moving difficulties one step further in this AutoCAD 3D tutorial. Here is a good 3D AutoCAD exercise for beginners.
Quick reminder. This is the fifth 3D exercise we are working on, and if you haven’t followed previous ones, and are a beginner, I will recommend you have a look at AutoCAD 3D tutorial 1 , AutoCAD 3D tutorial 2 ,AutoCAD 3D tutorial 3 and AutoCAD 3D tutorial 4.

This tutorial will be a quick and simple one.
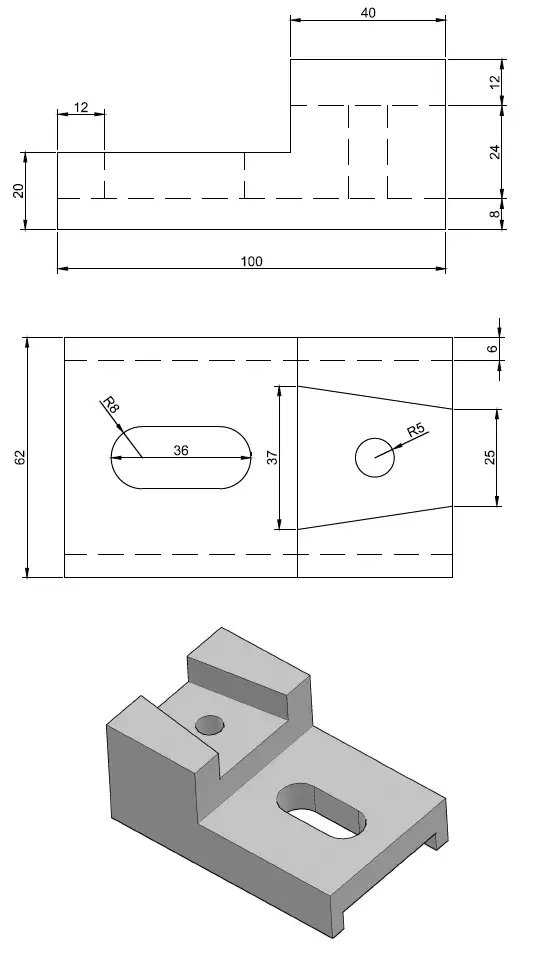
The first steps should be to draw 1, 2, 3, 4, 5 shown on the figure below. You can find dimensions on the figure above.
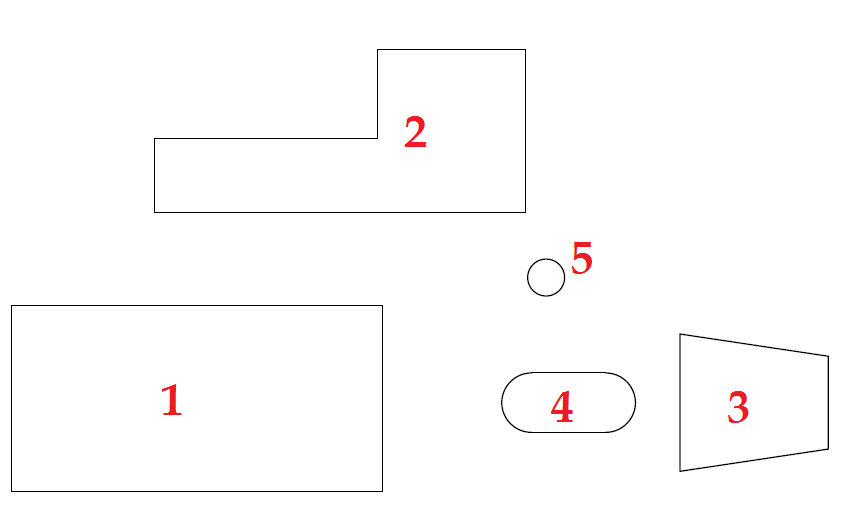
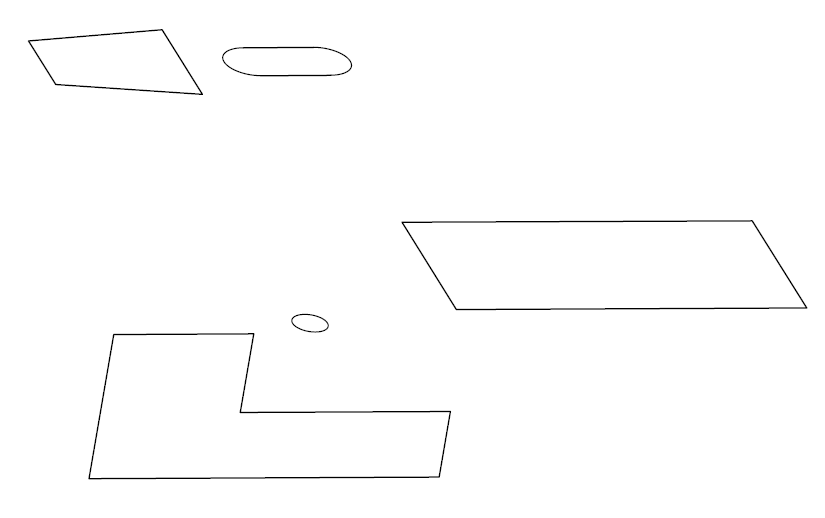
Use the REGION command on 1, 2 , 3 and 4. You will need to rotate 2 using the 3DROTATE command for it to be in a plan perpendicular to other objects. I used the 3DROTATE command when I created a spring in AutoCAD.
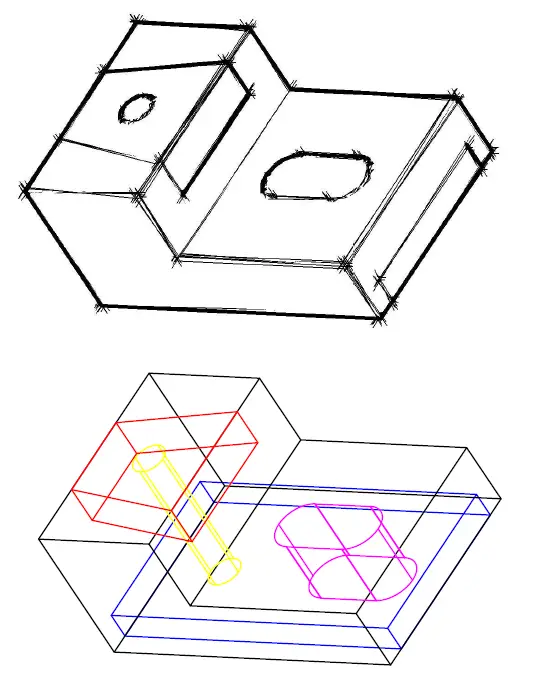
If you do so, your project should look like this in an isometric view.
Now you need to use the EXTRUDE command to transform all these object into 3D objects. Extrusion length are given in the table below (you can also figure them out using the first image above)
[ws_table id=”5″]
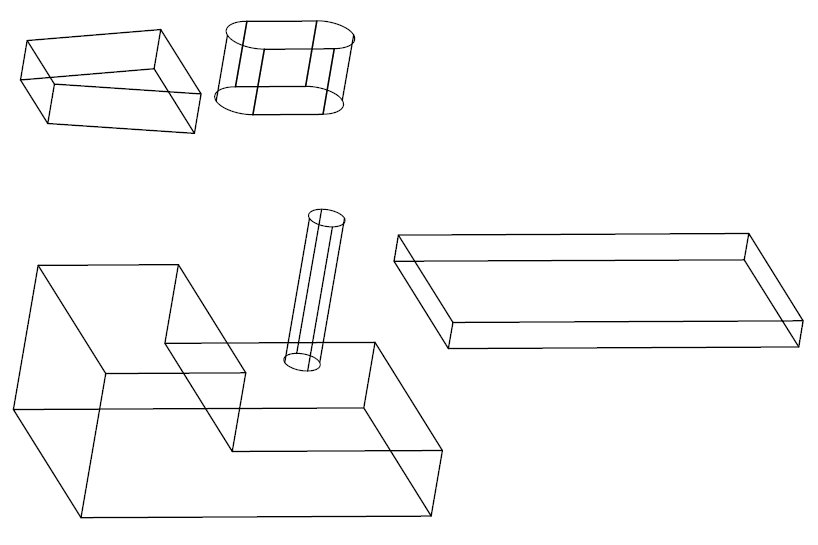
The most tricky part! You have to be able to place each object in such a way your project looks like the 3D figure below. This is a crucial part which will allow you subtract all the unneeded geometry from the principal object.
Final Step!
You need to subtract everything from 2 which is the principal object. Use the SUBTRACT command. And this will give you the result expected.
Going through previous exercises will help you master these techniques in case you are still having problem placing and moving objects in 3D space in AutoCAD. Remember you can always use reference lines, to help you stick an object according to some parameter previously set.