We have seen briefly how you can draw a line in Draftsight when we’ve learned how to draw basic shapes in Draftsight.
It is clear that knowing how to draw a line is the first thing first to know while learning Draftsight and this is true for any CAD software out there. Today, we are going to look at few things that need to be known while drawing a line.
How do you draw a line with angles, I mean straight line forming a specific angle with the horizontal/vertical in Draftsight?

Here is what I am talking about:
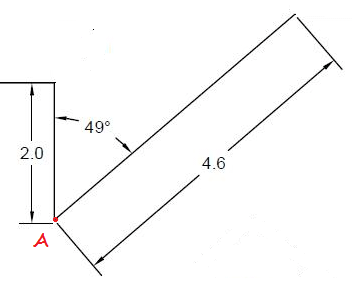
On the figure above, we have two lines of length 2.0 and 4.6 and the angle between them is 49 degrees.
How do you get this done in Draftsight?
1. Using the @ sign
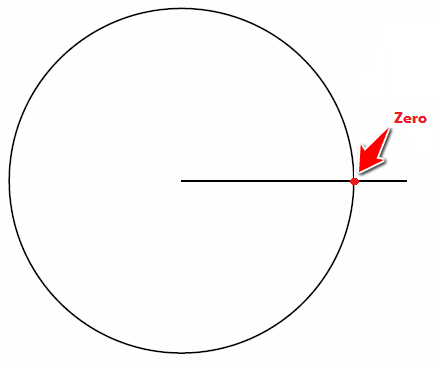
There is a 0 degree angle reference in Draftsight, and you are free to set it to be wherever you want. Do you remember the trigonometric circle? it comes all down to the same thing.
By default, the zero angle is the same with the zero Angle on a trigonometric circle.
That being said, if we want to draw the figure above, to find the inclination angle of the oblique line from the zero degree angle, we will do 90-49 which is 41 degrees. NB. The Line of 2.0 of length is vertical, meaning it forms 90 degrees with the zero degree angle.
- Activate the Line Command
- Specify Start Point
- type @4.6<41
- Hit ENTER twice
Then you can draw the second Line by starting over with the point A as Start point, Make sure the ORTHO mode is activated, give a proper direction, type “2” and hit ENTER.
NB: Angles are counted anti clockwise
Notice that to draw a line with specific dimension, Activate the Line command, Activate the ORTHO mode if it is not activated, move the mouse on the direction you want the line to be, type the distance of the line and hit ENTER to finish the command.
2. Using Drawing Settings >> Unit System >> Base Angle and Polar tracking
Let say, you are working on a project where you need to draw many inclined Lines with an angle of 20 degrees for example.
You can tell Draftsight to help you draw lines with 20 degrees angle by changing the reference angle in your Settings.
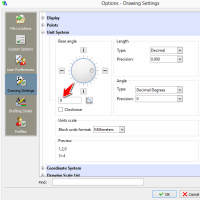
Right click on the Drawing window, and click on Options…
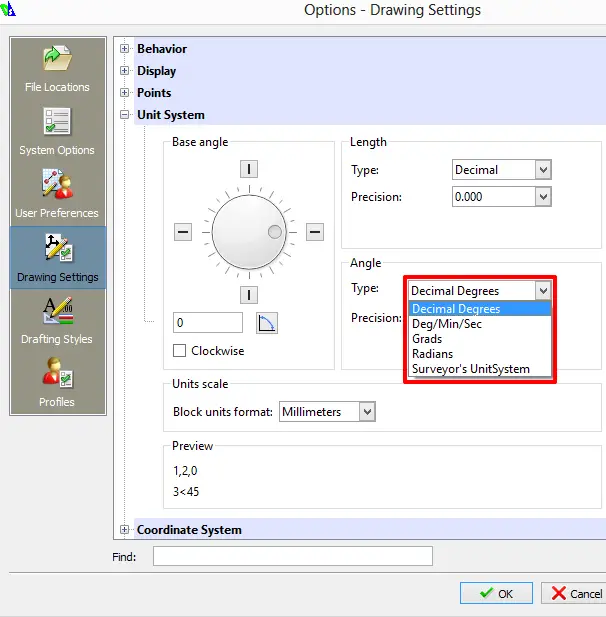
go on Drawing Settings >> Unit System

And change the number highlighted on the image above to 20 in order to tell Draftsight that you want to be able to draw Line inclined with 20 degrees with no hassle and all you will need to indicate then is the distance of the line you are drawing while drawing the line.
Make sure to activate the POLAR mode for this feature to work while drawing.
3. Polar tracking
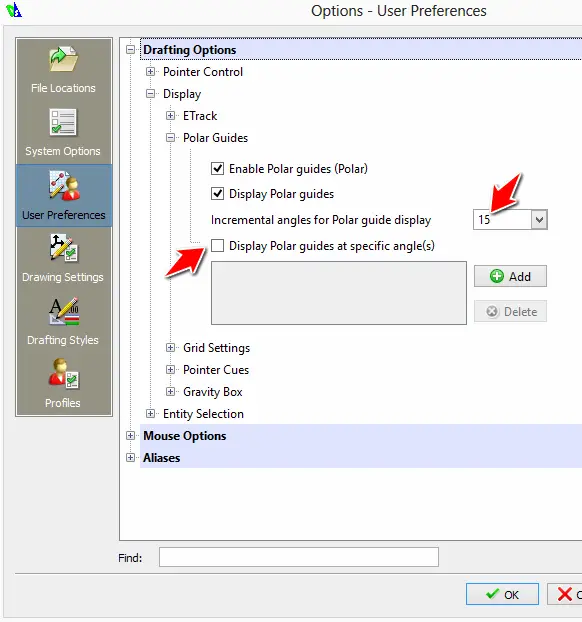
You can as well activate the angle tracking by right clicking on POLAR >> Settings…
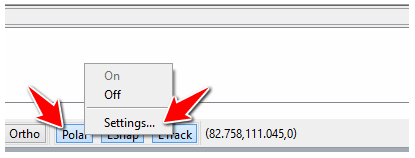
Then you can decide to Display Polar Guide at specific angle(s) or change the Incremental angles for Polar guide display.
4. Pay attention to the Angle unit
You can work with Angles in different unit like Grads and Radians in Draftsight. All you have to do is change the Angle Units.
Leave a Reply