We have learned earlier how to create basic objects in Draftsight.
The next most important thing to learn after that is: How modifying objects in Draftsight is done.
Most time you need to combine basic shapes to create complex shapes, and here is where the Modify toolbar comes to help.

We together will be going through the most important tools you should master now to further walk toward you being an efficient Draftsight user.
Modifying objects in Draftsight
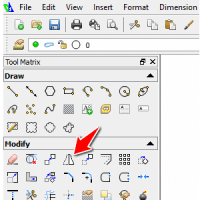
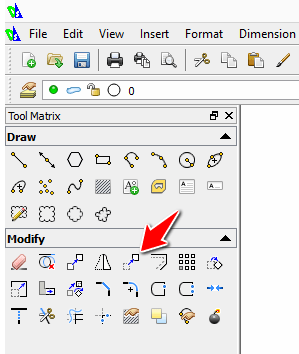
Delete
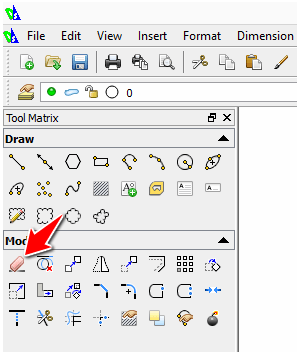
The Delete command simply helps to delete object.
To use the Delete command in Draftsight:
- Select the object to delete
- Click on the Delete icon shown on the image above.
or
- Click on the Delete icon
- Select the object to delete and hit ENTER on your keyboard
Two simple steps in each case to help you delete objects from you drawing window. Another way to delete objects is to select them and click on the DELETE key of your keyboard which I find more convenient than the preceding.
Copy
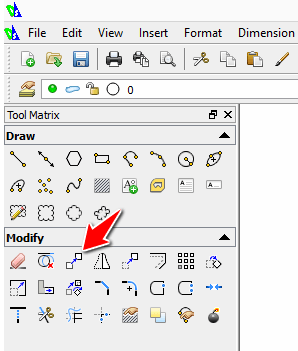
The Copy command is similar to Ctrl+C we all are familiar with (windows users) and this technique works well as a shortcut to this command.
To copy an object in Draftsight:
- Select the object
- Click on the Copy icon
- Specify the base-point of displacement
- Specify the end point and Hit ENTER
The base-point indicated in step 3 can be any point, but choosing it depends on where you want to snap the image-object in your drawing window. Most time, snapping the image-object requires you to use either the center or one of the ends of the copied object to easily place it at the wanted location afterward.
Mirror
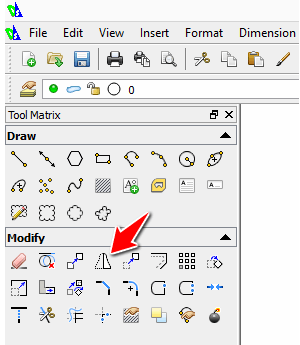
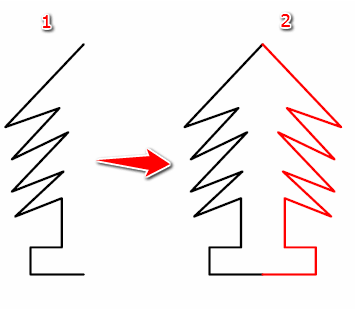
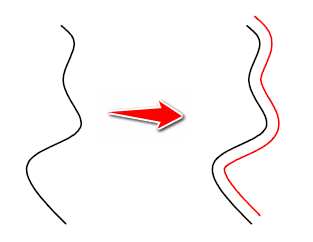
The Mirror command allows you to create a mirrored copy of an object. Look at the image below, the original image is the one in black, and the mirror command helped me create the one in red, which is the identical version of the image in black but mirrored around a center of symmetry.
One way to use the Mirror command is:
- Select the Original object
- Click on the Mirror icon
- Specify start point of mirror line
- move your mouse to have a preview of the final image and Specify end point of mirror line.
- Click and Hit ENTER
Understand that the line formed by the start point and the end point is the axe of symmetry. It is easier to use this command when the ORTHO mode is activated.
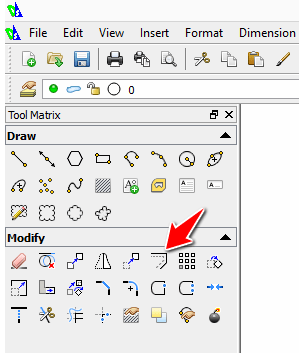
Move
The Move command helps relocate an object.
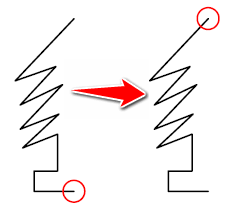
On the image above, the red circle was moved from one position to the other thanks to the Move command.
To move an object:
- Select the object to move
- Click on the Move icon
- Specify the base-point of displacement
- Specify the destination by moving the mouse or entering the distance by which the object will be moved
- Click to drop the object on its new position.
Offset
The Offset command helps you create parallel lines, parallel curves or concentric circles
The parallel curve in red was create by Offset-ing the original curve (in black) with a specify dimension.
To use the Offset command:
- Click on the Offset command
- Specify distance
- Specify source entity
- Click inward or outward to specify the side destination.
Pattern
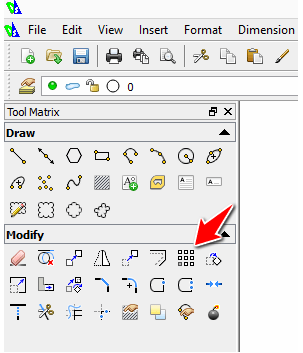
The Pattern command creates either rectangular patterns of circular (polar) patterns.
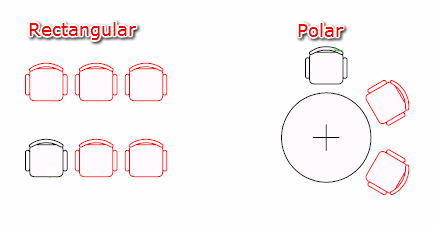
Note that the object in black color is the reference object that allows to create other objects.
To use this command, first draw your reference object, click on the Pattern command and fill in the pattern window to complete the command.
Rotate
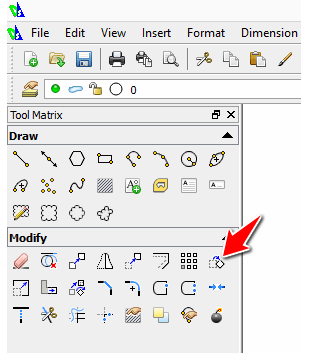
This command helps to rotate objects.
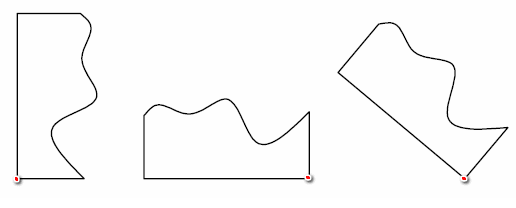
Like shown on the image above, an object is rotated to different degrees. (The Red dot denotes the pivot point)
To rotate in Draftsight:
- Select the image to rotate
- Click on the Rotate icon
- Specify the pivot point
- Specify the rotation angle
- Click to drop.
The rotation angle is counted anti clockwise, so if you wish to rotate clockwise, you need to place – (minis sign) before the value of the rotation angle.
Here you had few things that needed to be known about the Modify toolbar in Draftsight, coming soon the second part of this Draftsight tutorial where we will talk about other tools present on this toolbar.