AutoCAD is a 2D drawing and drafting tool. Hence any drawing that you draw, you want to have control over the elements, no matter how complex or overlapped the lines/elements are. So, even though all other types of controls are available in either the context menus or in the ribbon up top, the options for selecting drawing elements are hidden from the user’s view.
Why, that is so, we do not know. But what we’re more than sure about is that these options are a handy set of tools for any designer/drafter’s arsenal. Let’s review each options one by one. For reference, all screenshots are from AutoCAD 2016.
Note: click on the image screenshots to see a zoomed in version.

1. Single selection
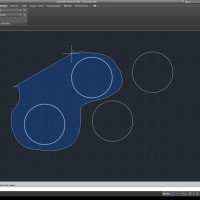
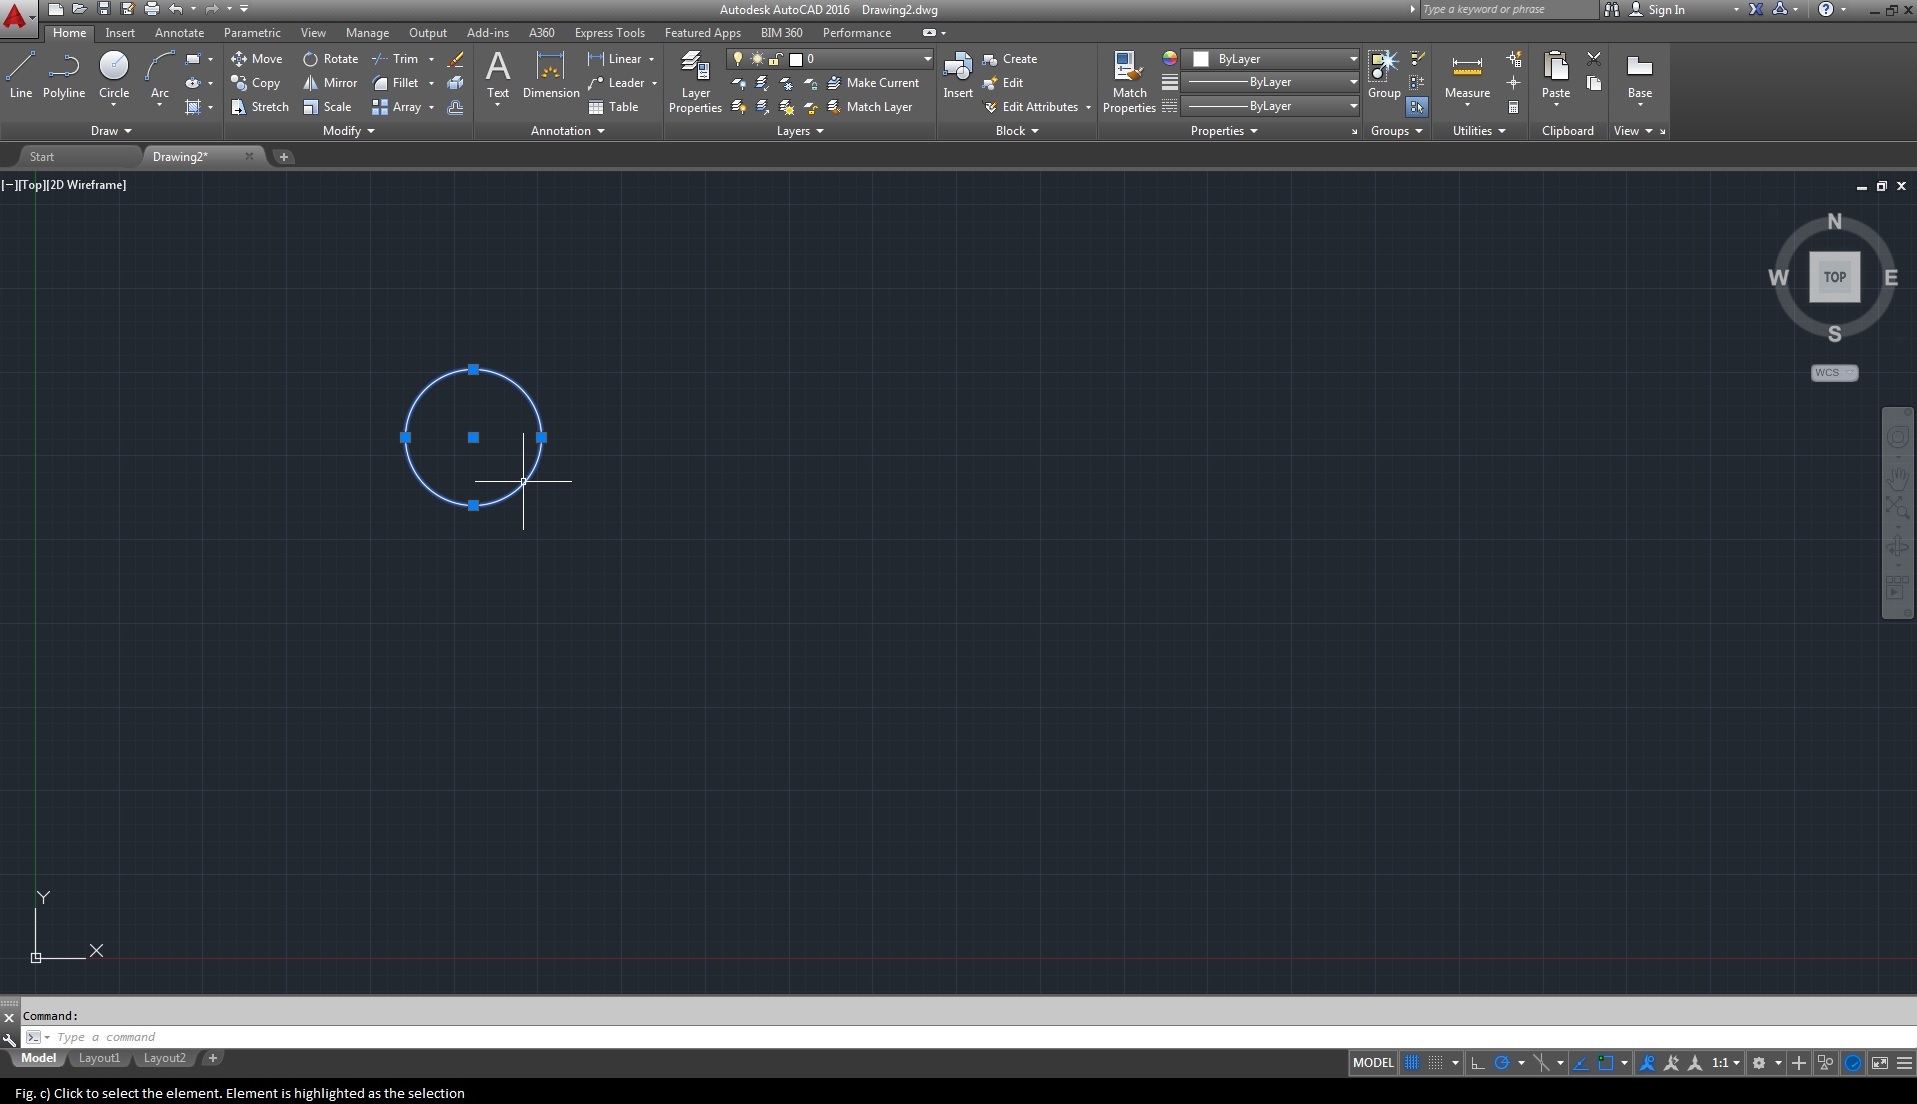
The first and foremost is the obvious click and select. Just click on any part of the element you want to select and it’s all yours. See below for the demo (fig. a, b & c).
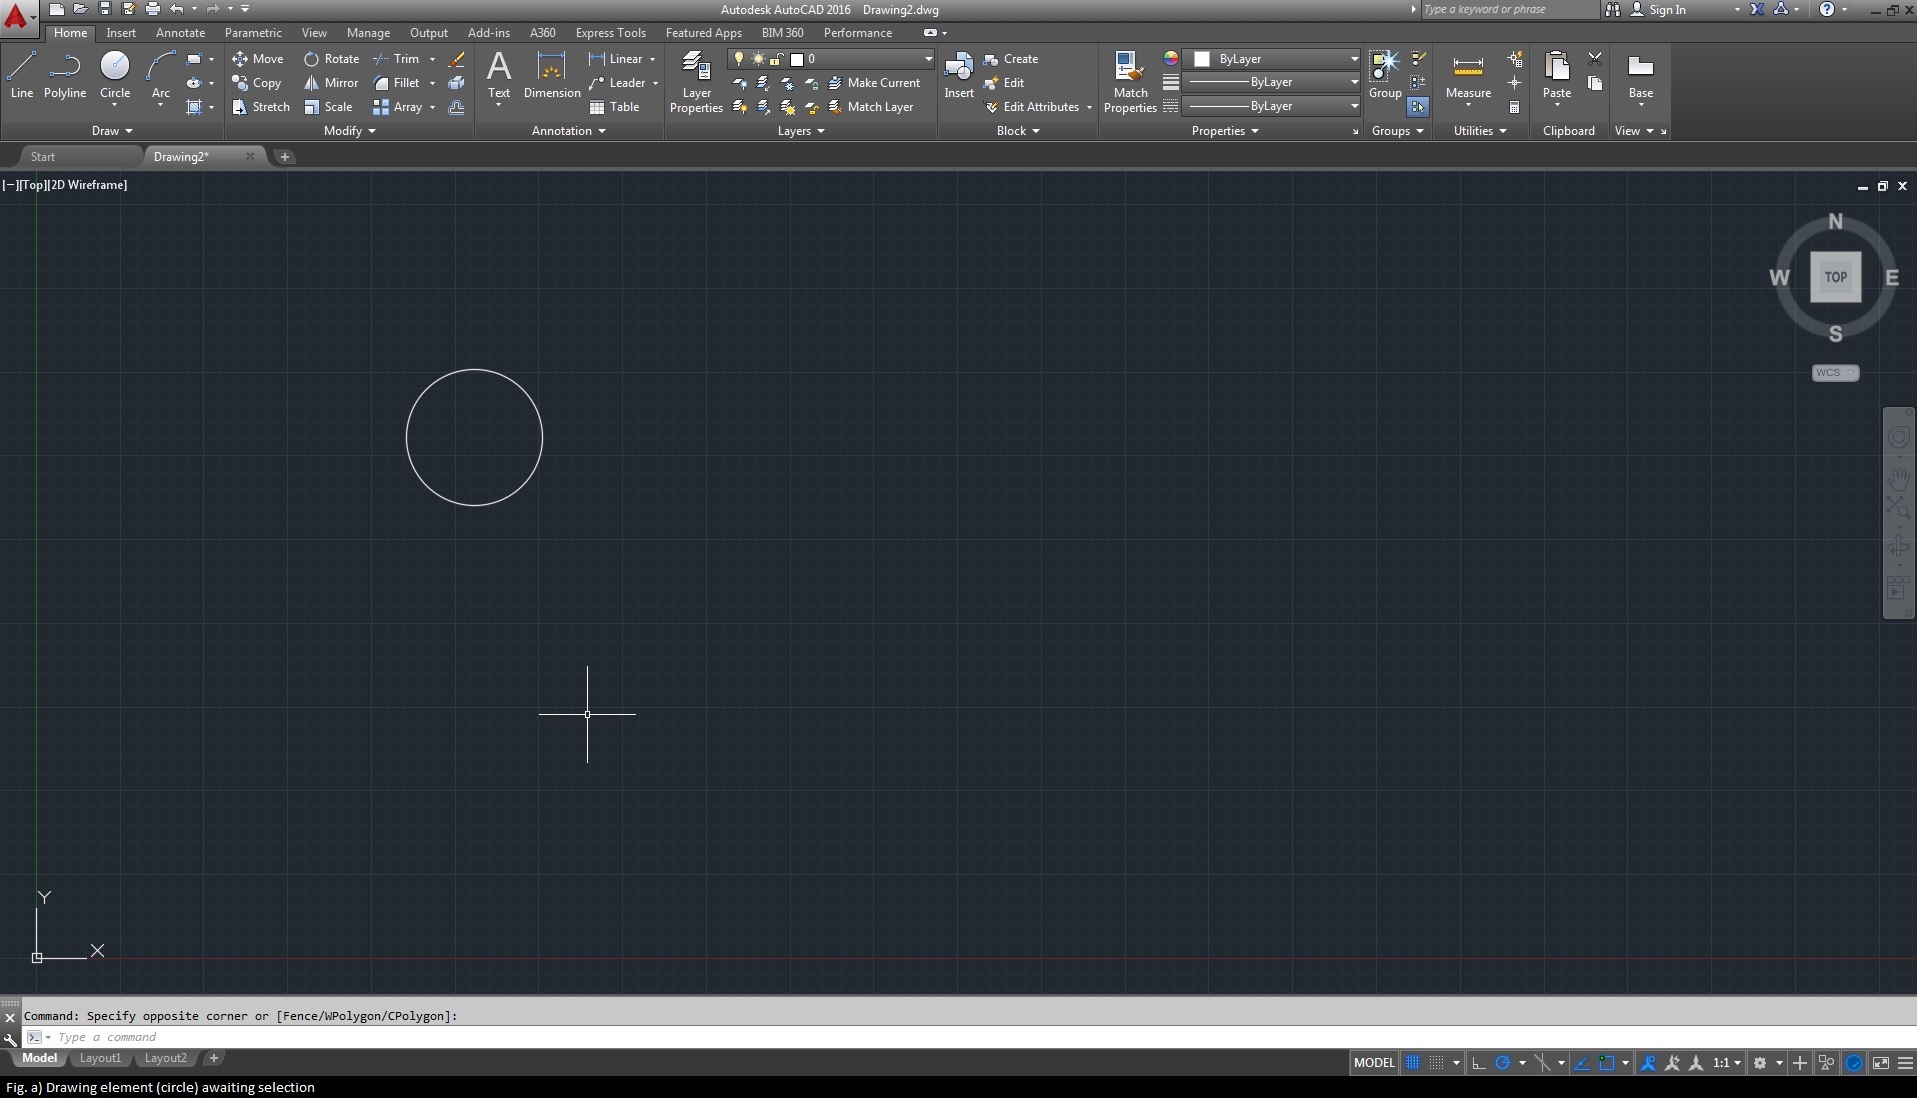
Hover over the element you want to select for it to get highlighted. This means you ca directly access the object for selection.
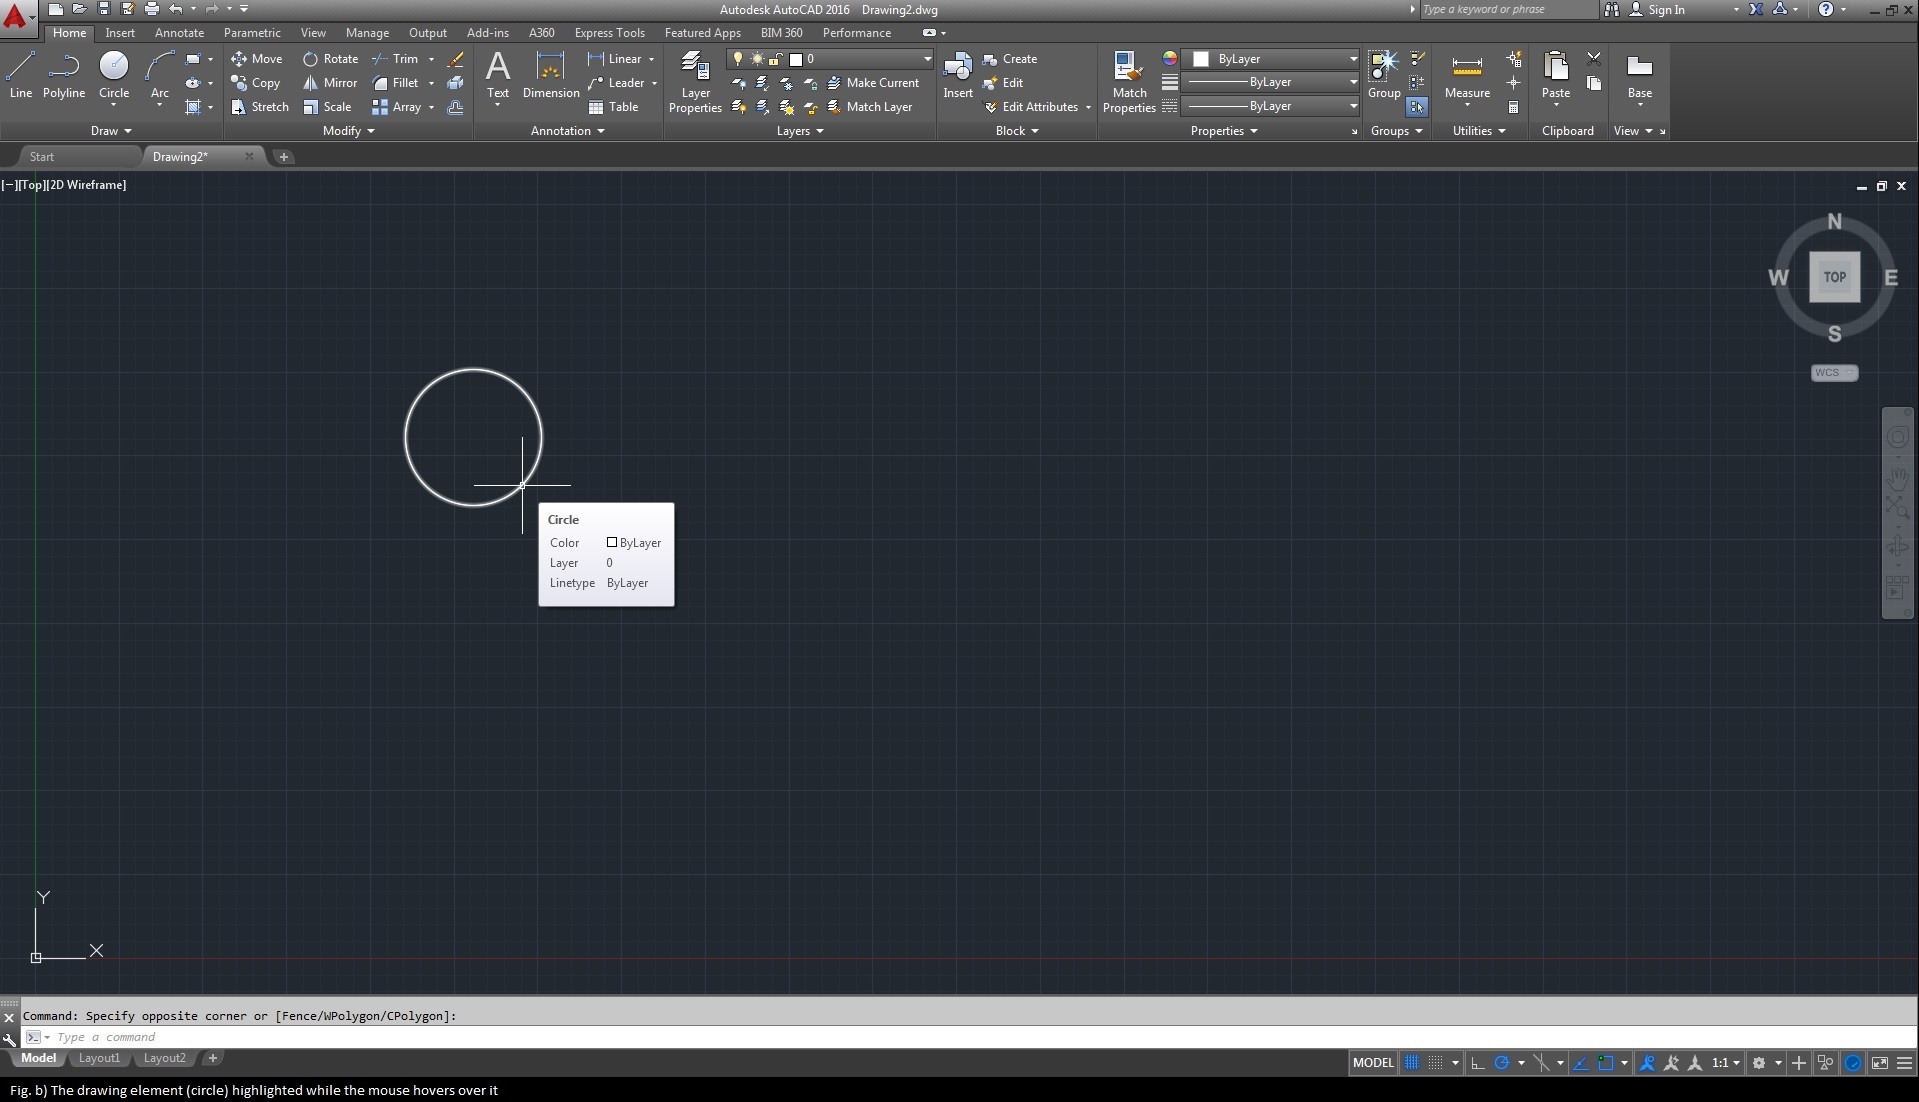
Click on the object to select it. Upon selection, it will acquire a blue hue with selection grips. Your object, as shown below is selected.
On a side note, if that specific part of the element is overlapping another element then make sure the element you want to select is in front of the other object.
2. Window selection
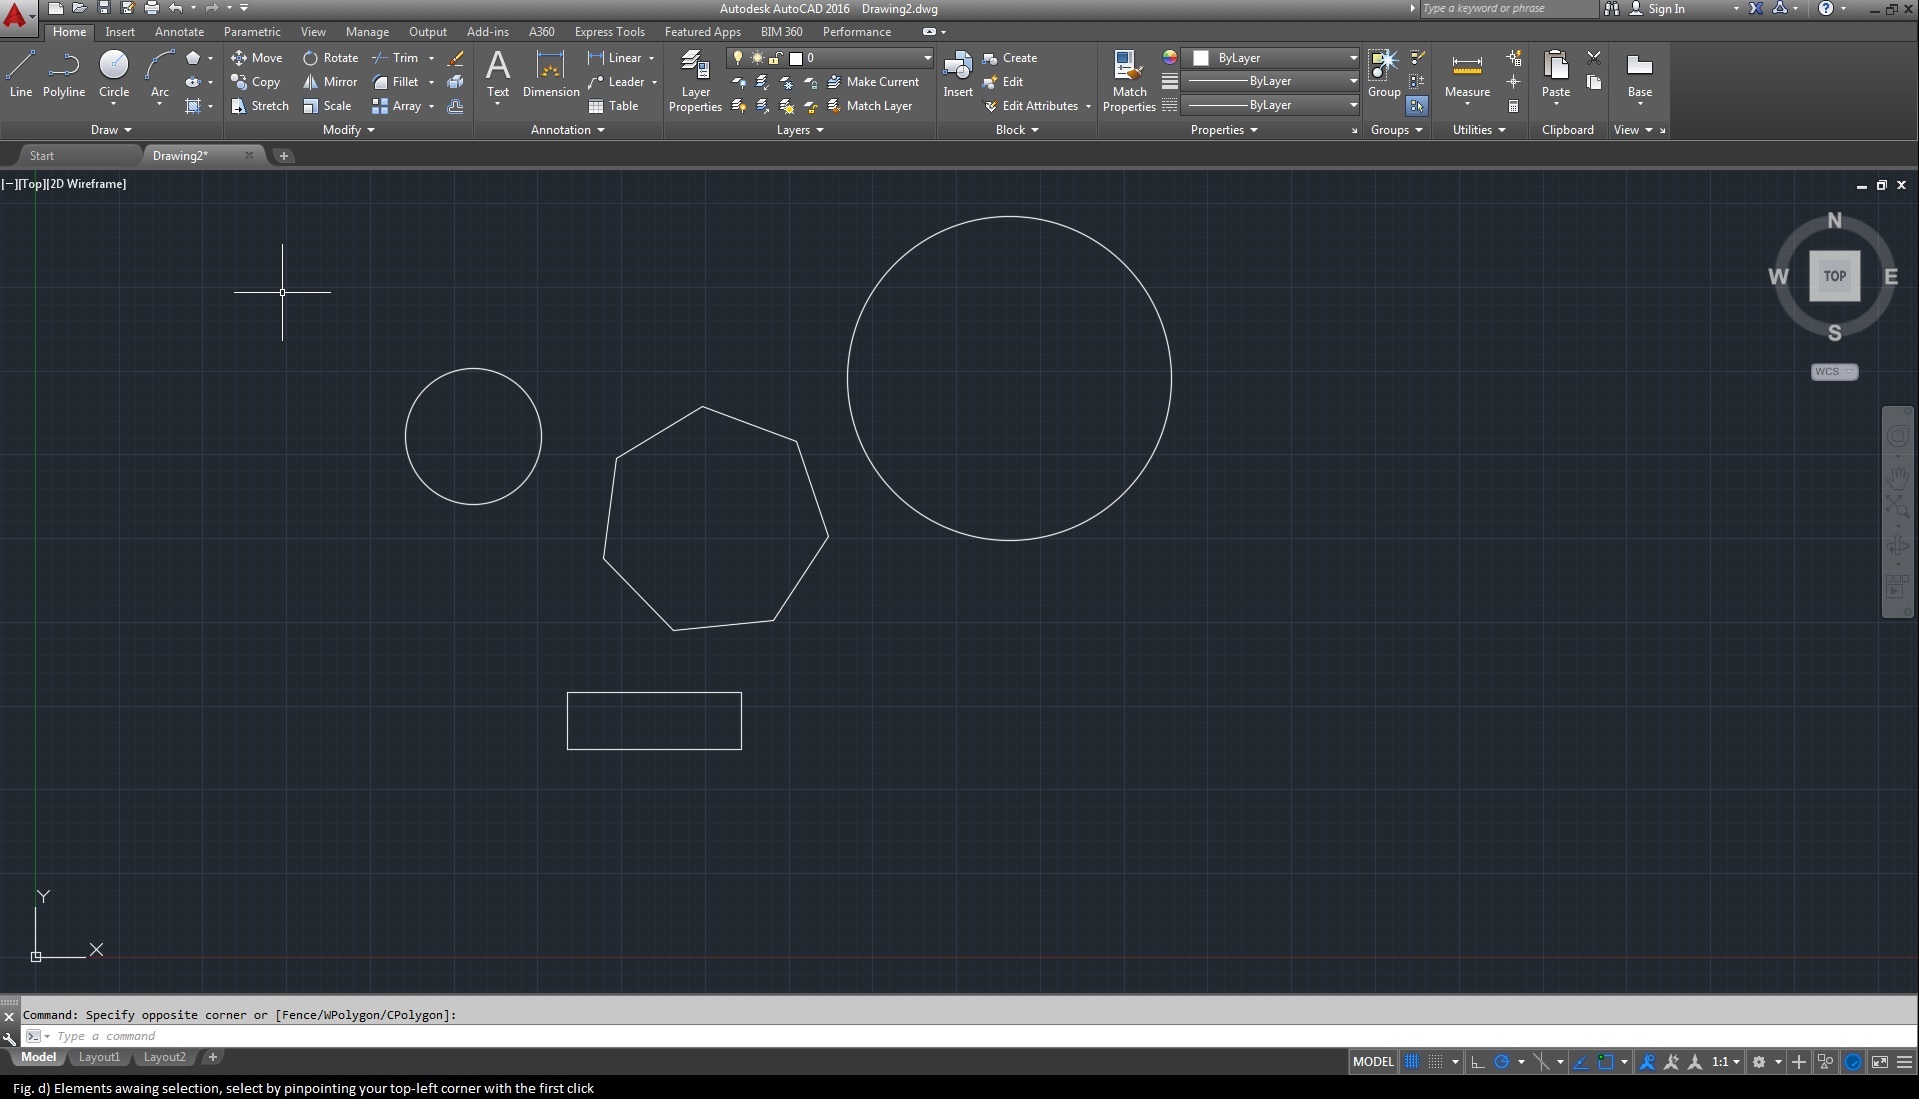
The next easiest and most common way of selecting objects in AutoCAD is the window selection. With two consecutive clicks you can define the top-left and the bottom-right corners of the selection window, respectively. Any elements that fall into the window completely gets selected. On the first click, AutoCAD asks you to define the selection beginning, see below for demo (fig. d & e).
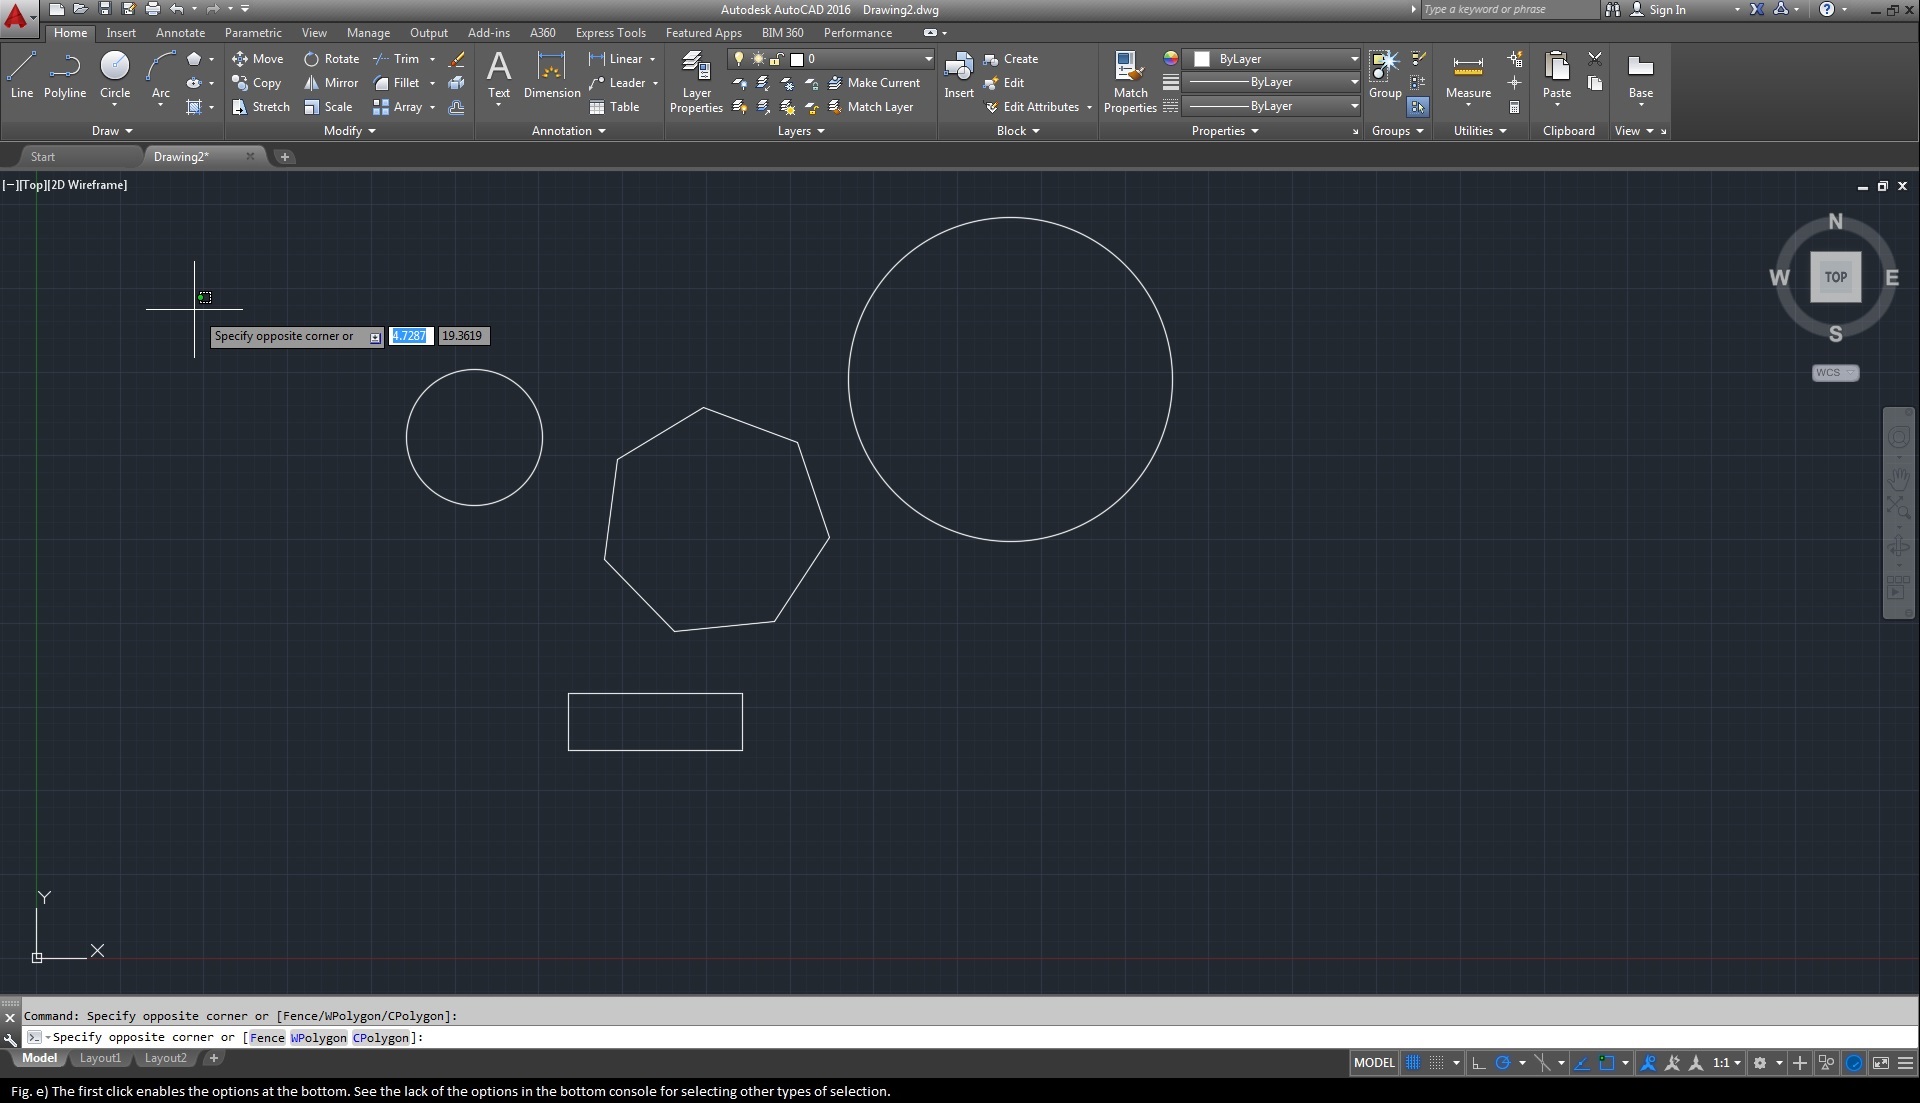
As the elements are ready for selection, press the left button of your mouse for your top-left coordinates. Upon pressing, the label next to the cursor asks for the bottom-right coordinates as shown below.
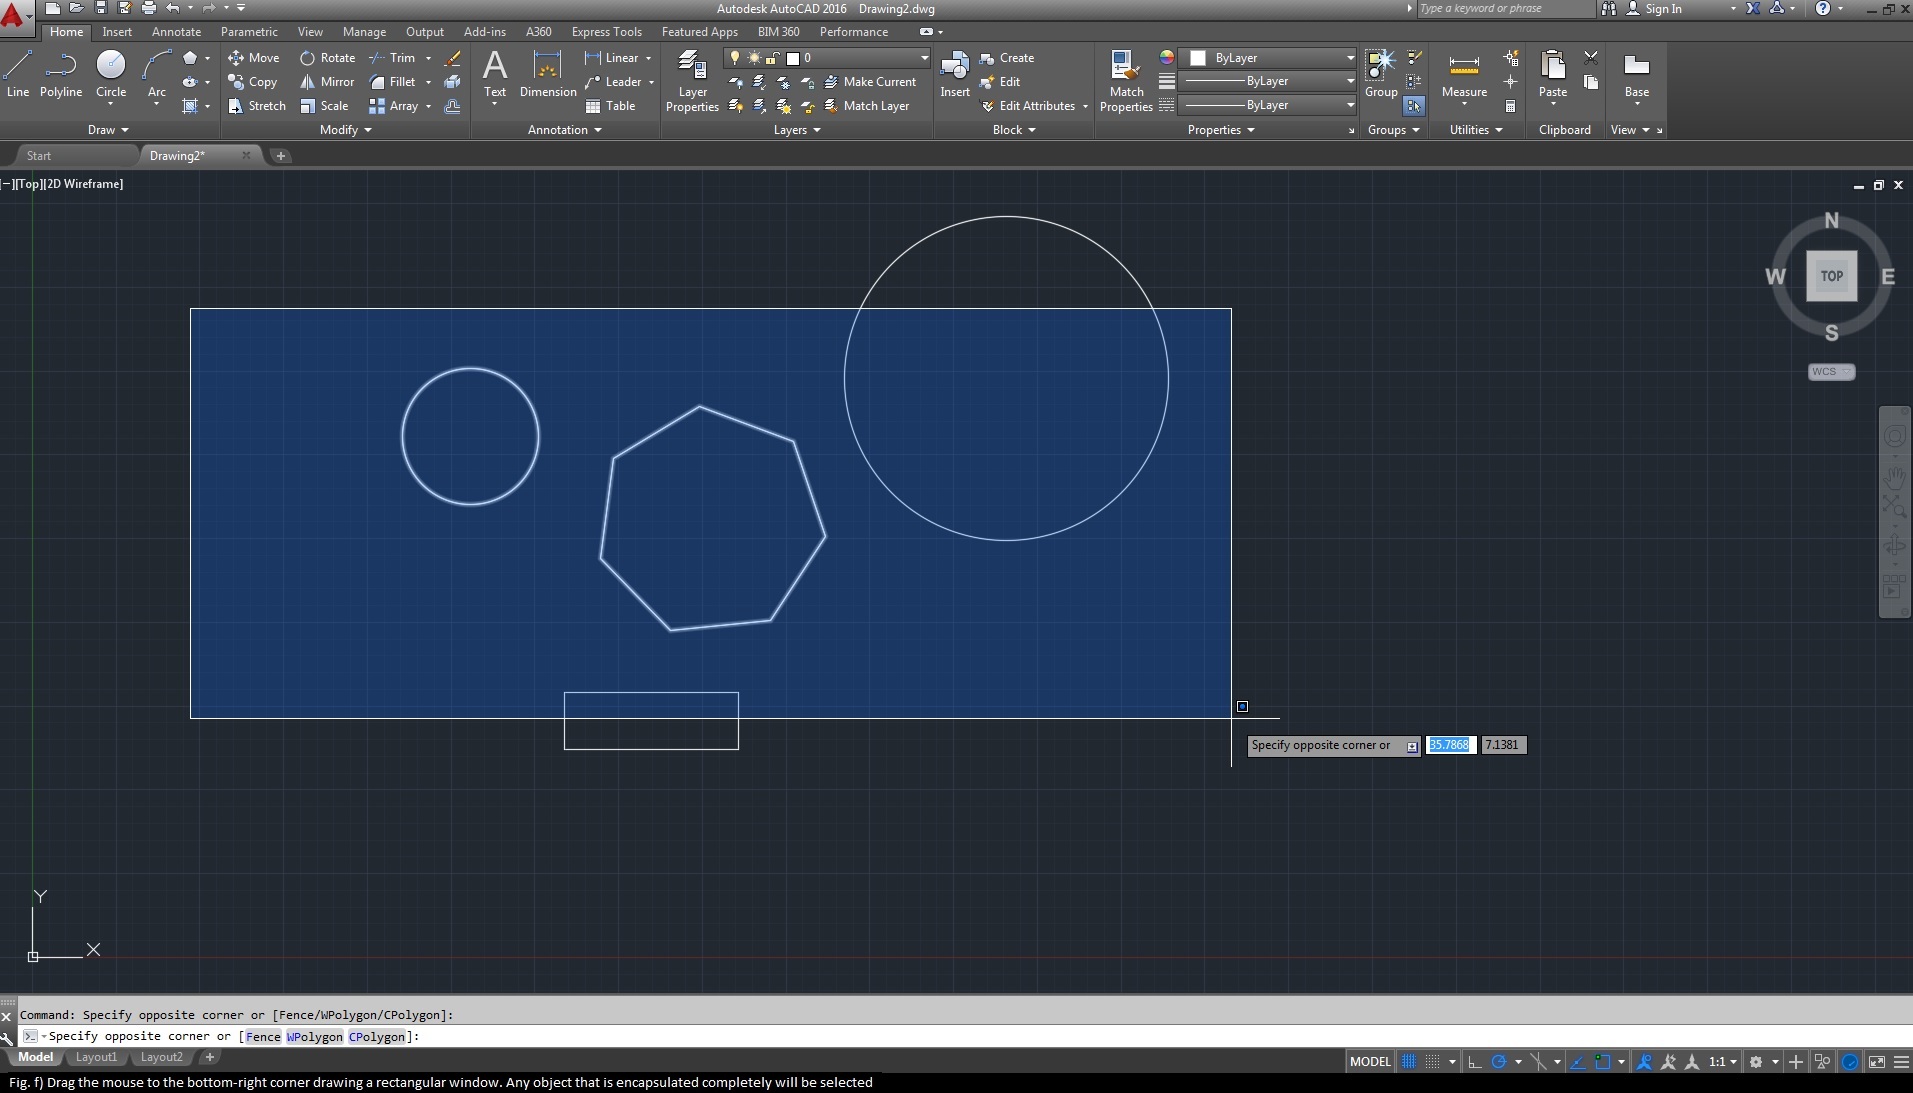
On the next click, AutoCAD asks you to select the opposite corner. See below for demo (fig. f).
That’s the default window selection function.
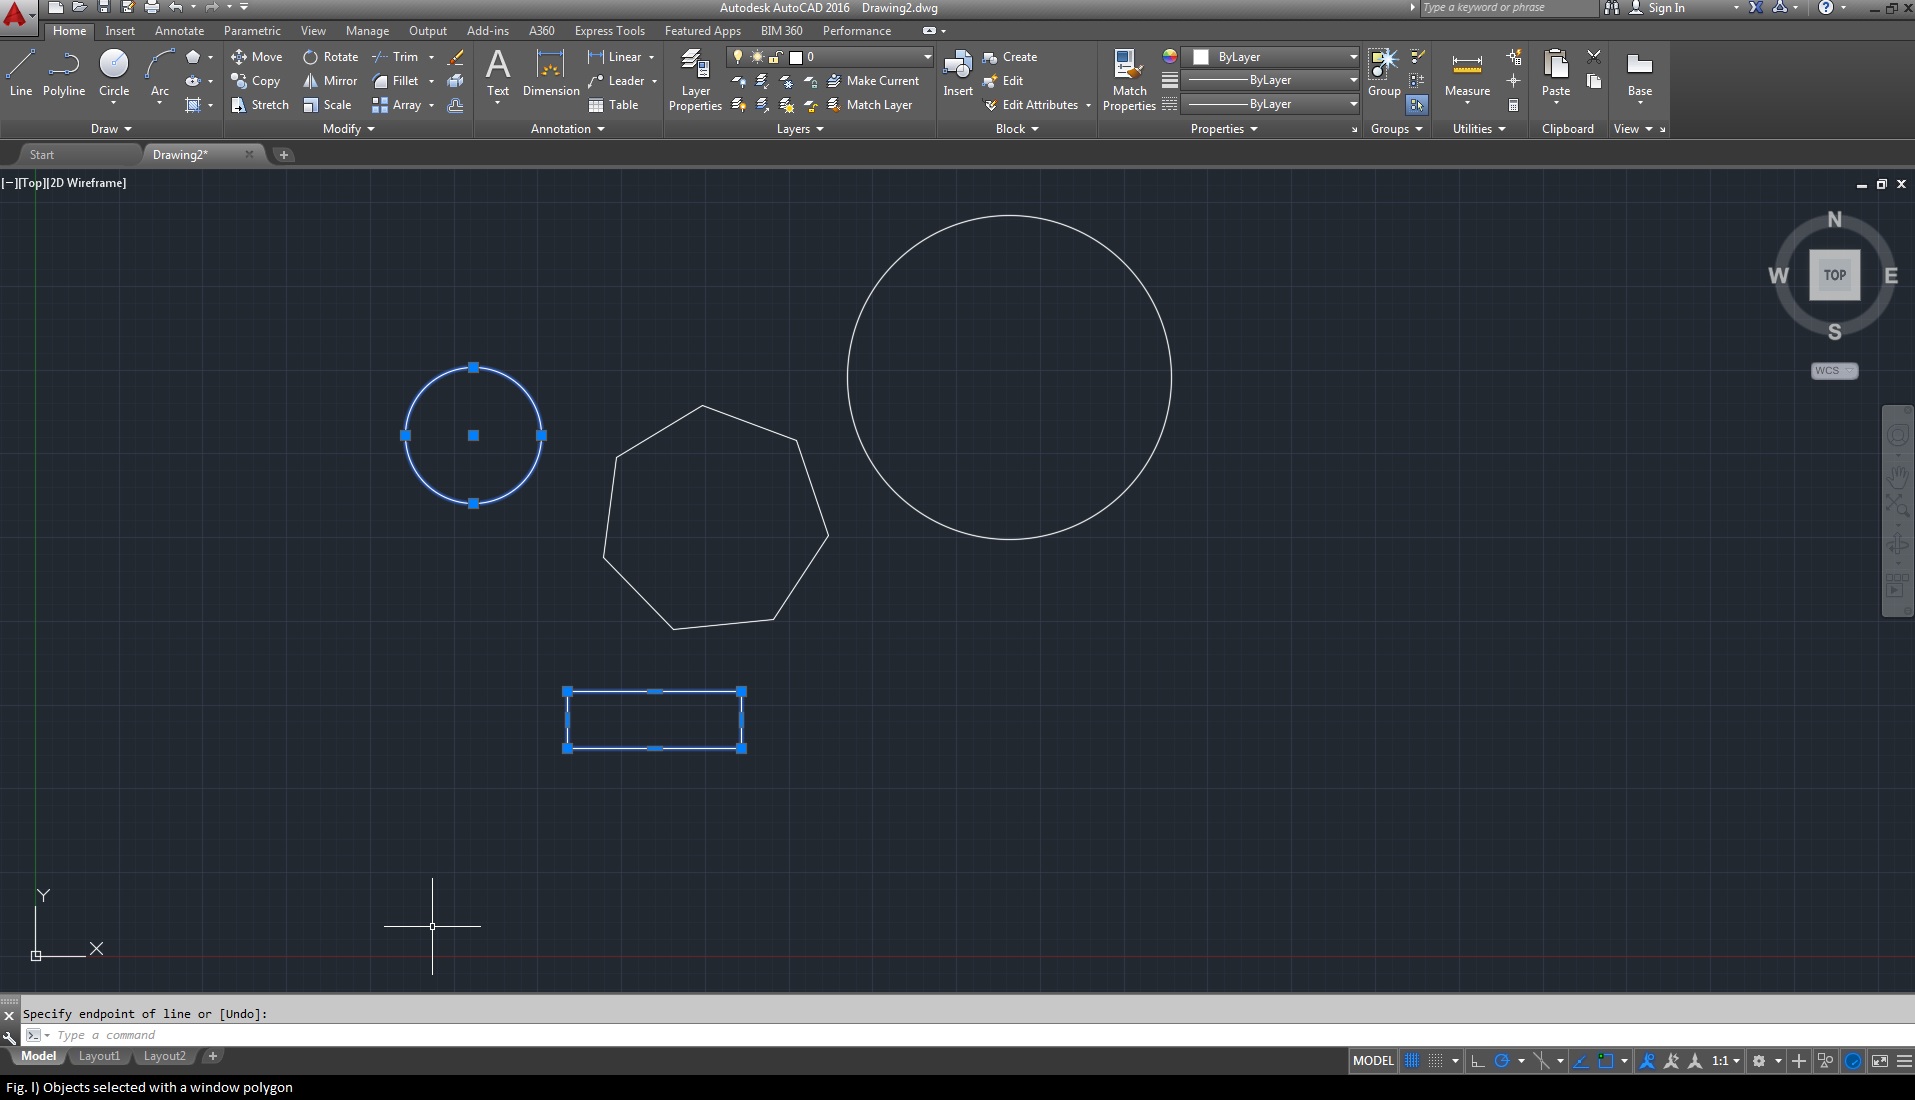
3. Window polygon selection
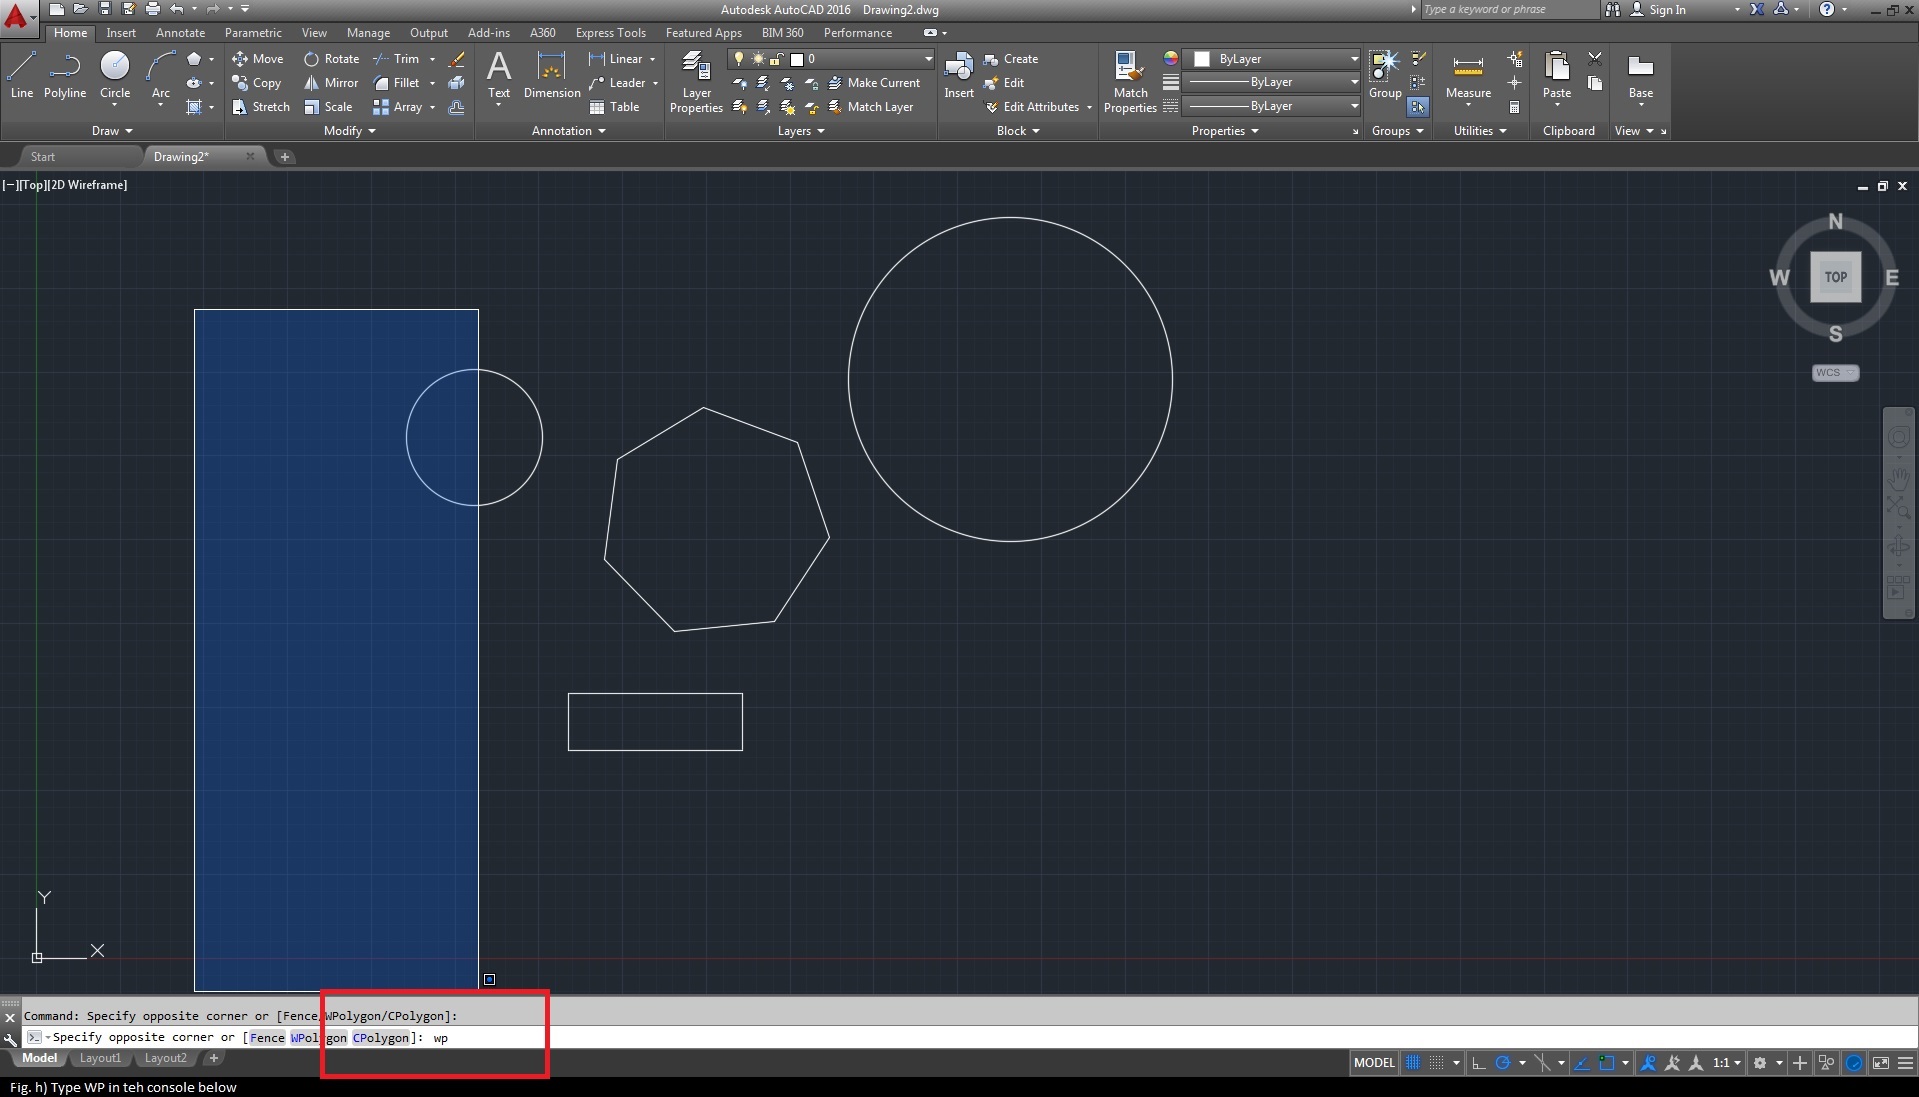
One further abstraction of the Widow selection is the window-polygon selection. To enable this option you type WP and press [Enter]. This allows you add further corners to your window making a/an regular/irregular shaped polygon which selects anything completely inside it. See demo below (fig. g to l).
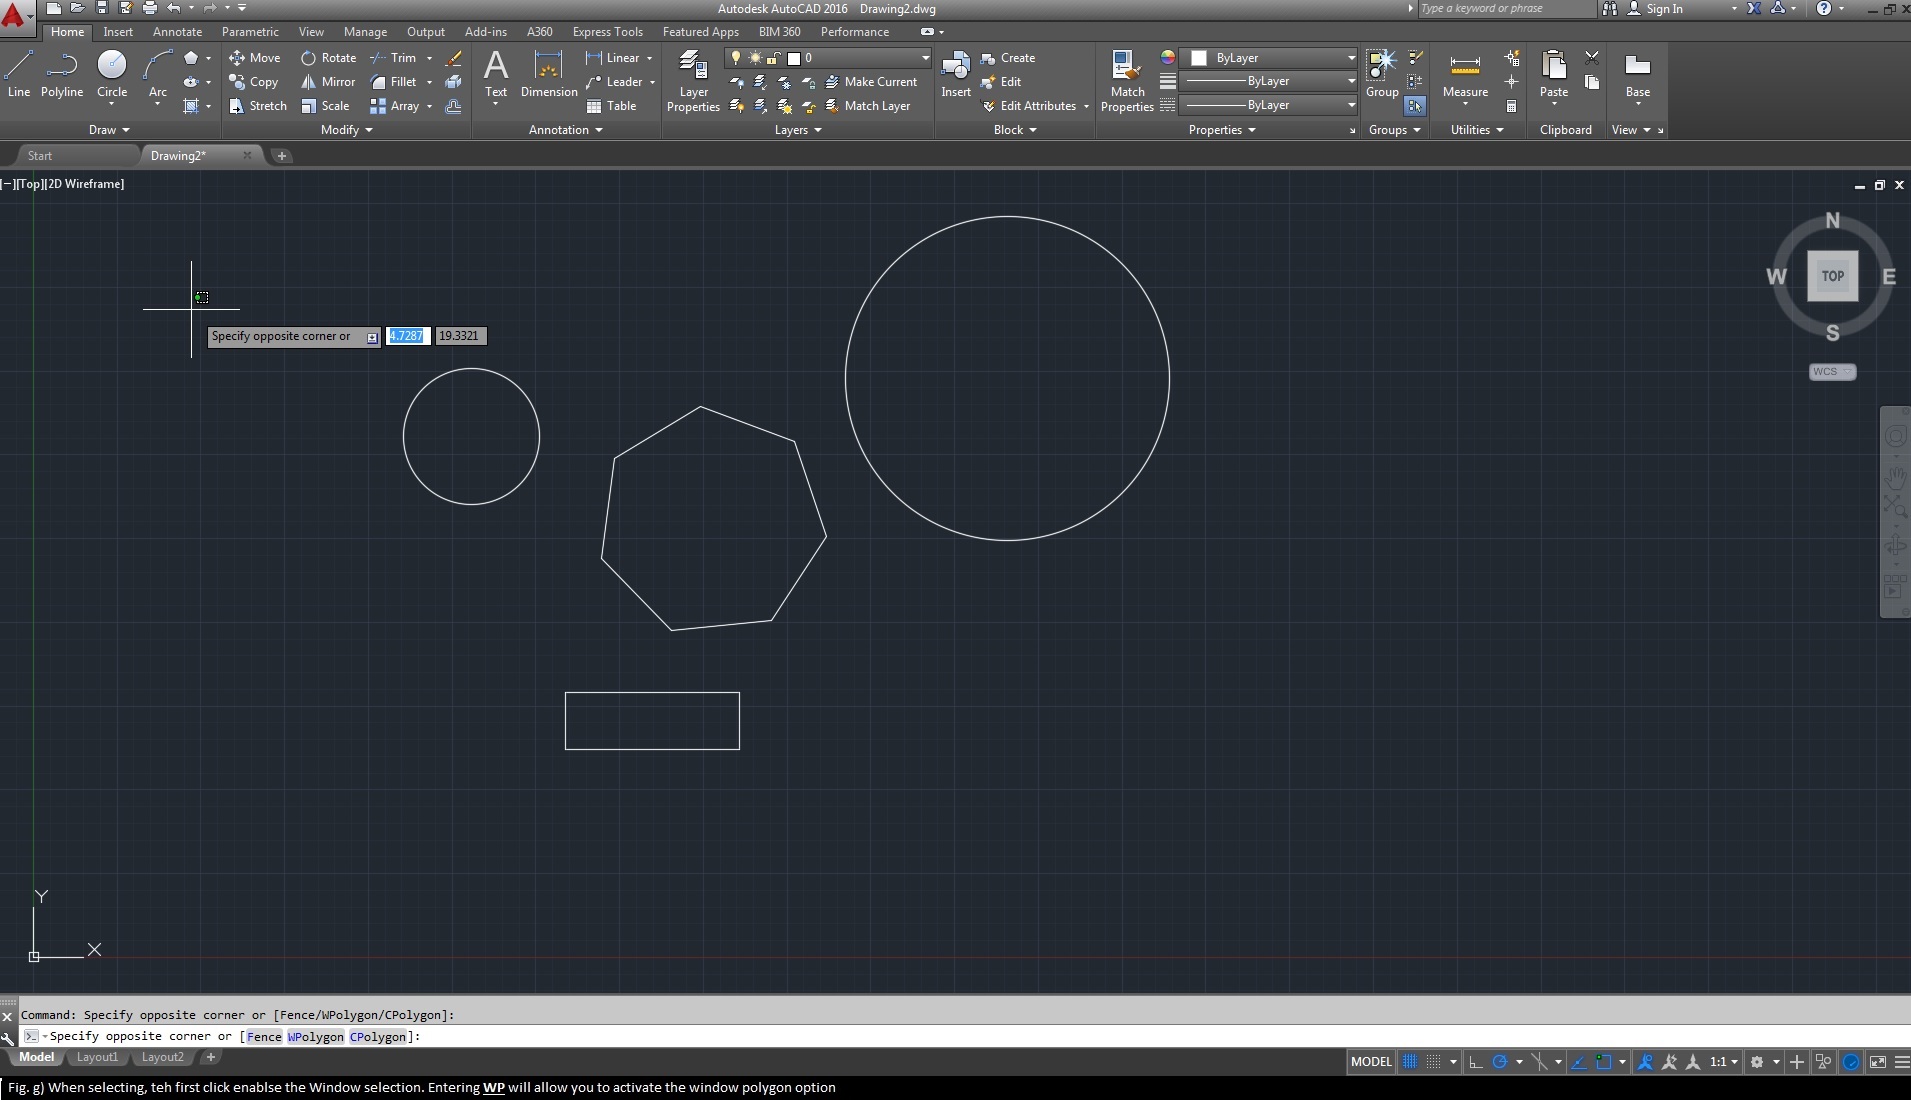
Selecting the [WP] option by typing WP will enable the Window Polygon option as the preview shows below:
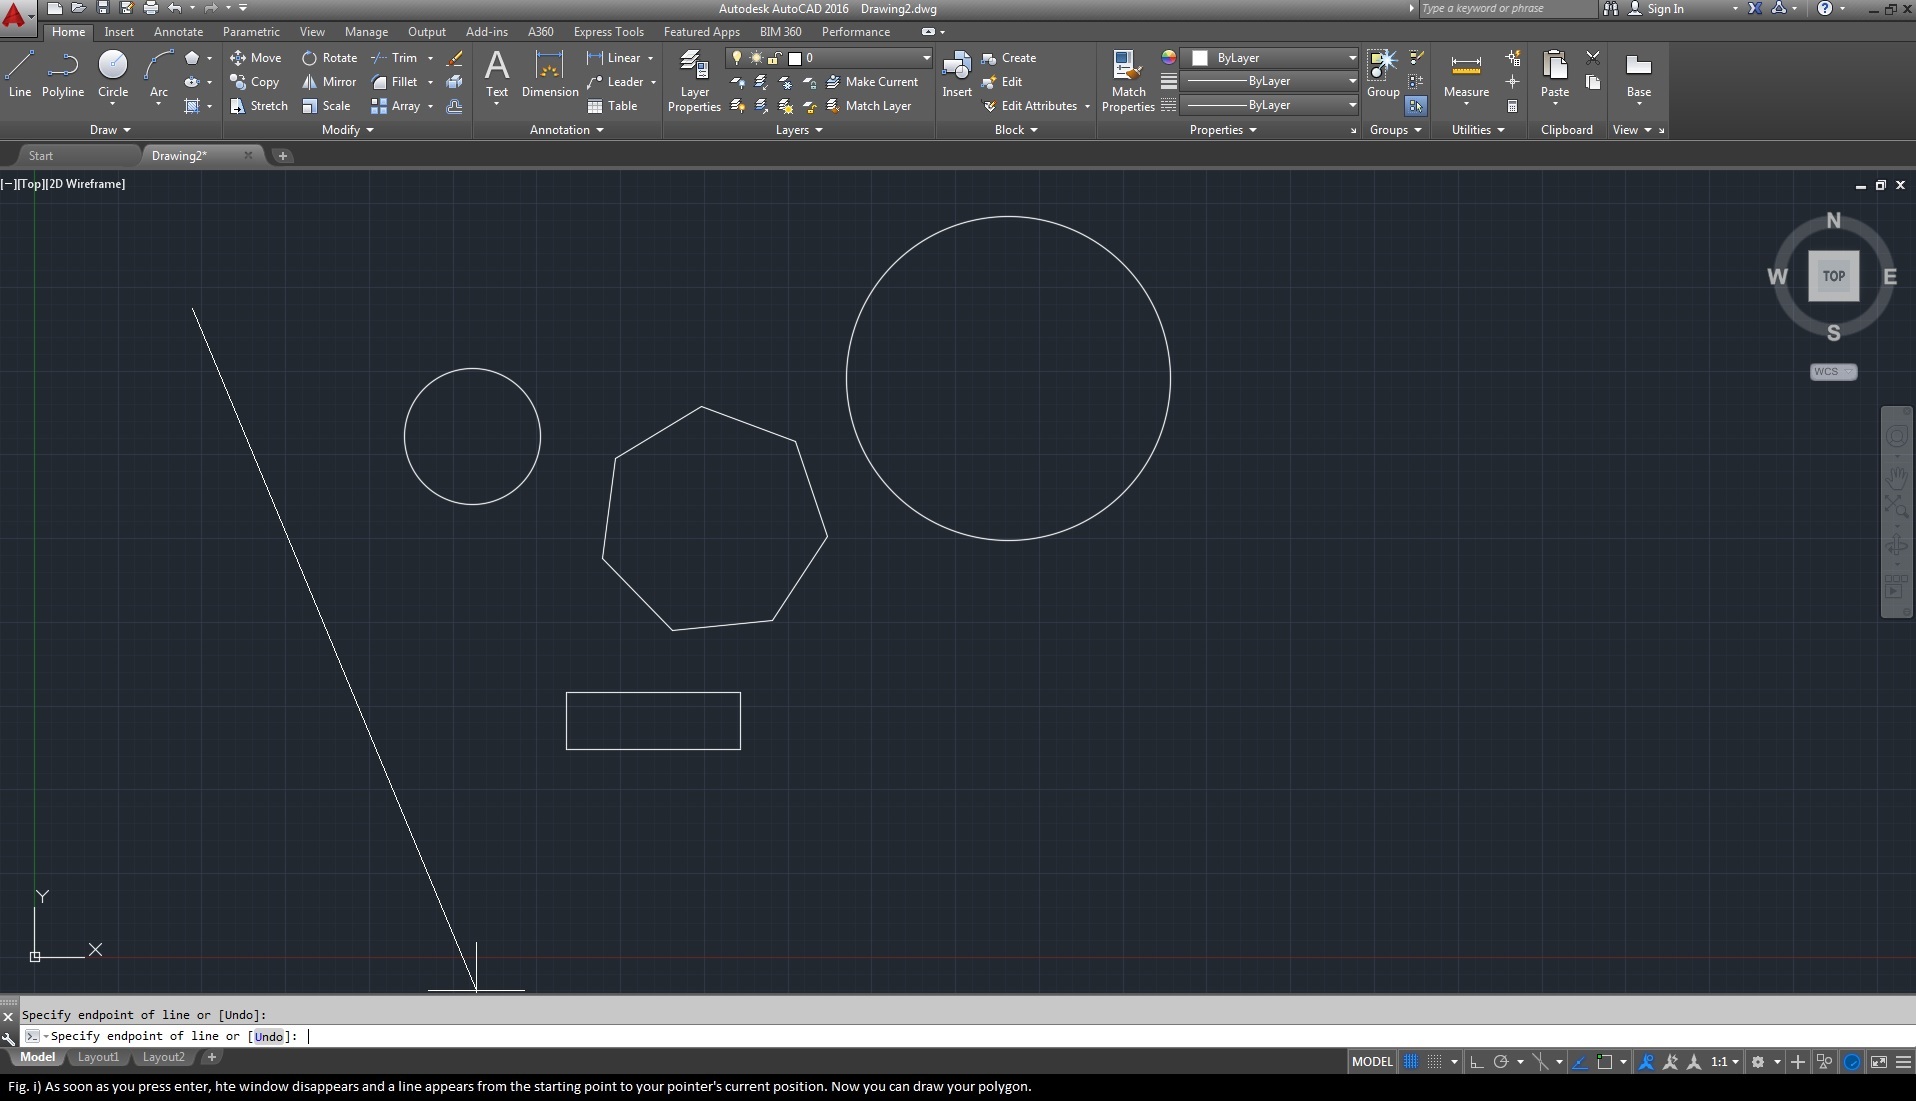
Upon pressing [Enter], the window drawn initially disappears having been replaced by the first arc of the window, like so:
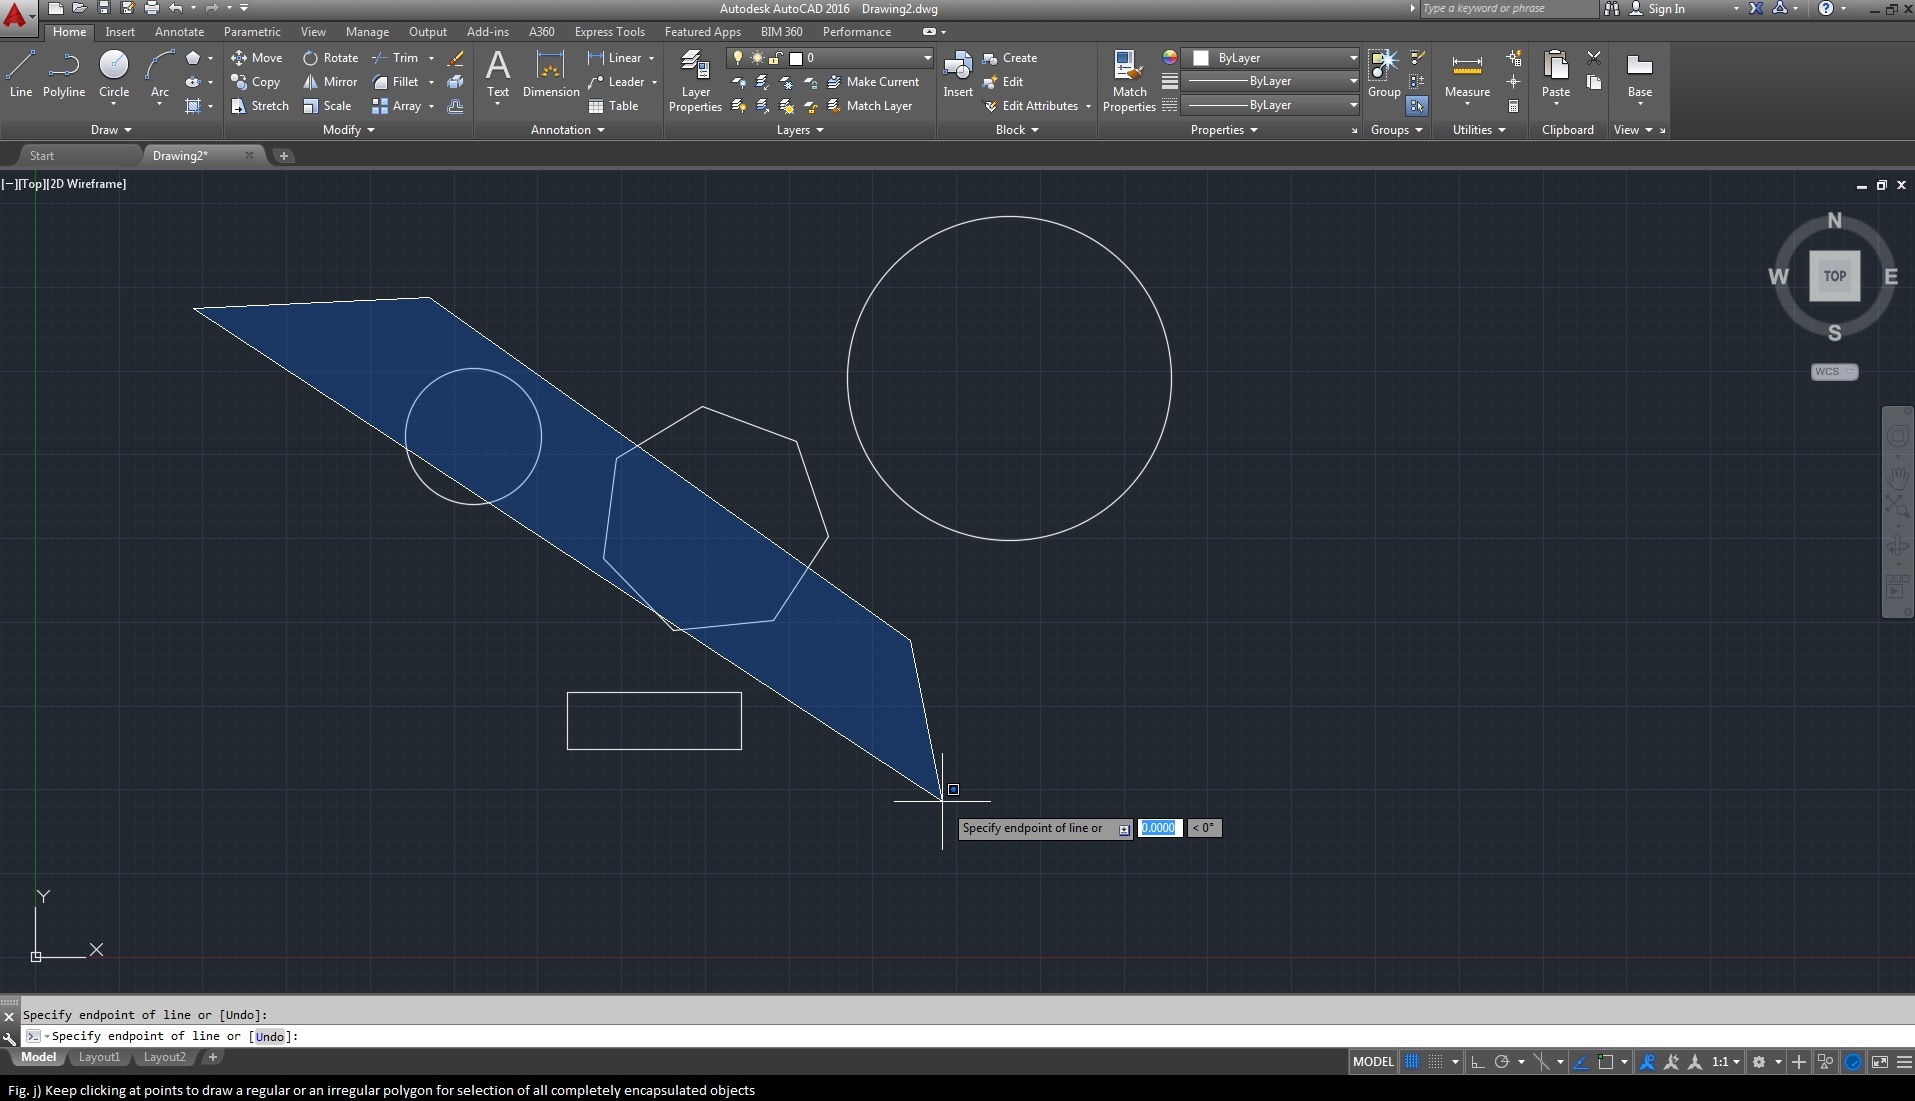
Draw the polygon in order to select elements, encompassing the items completely to be selected. see below for an (in)complete encapsulation comparison.
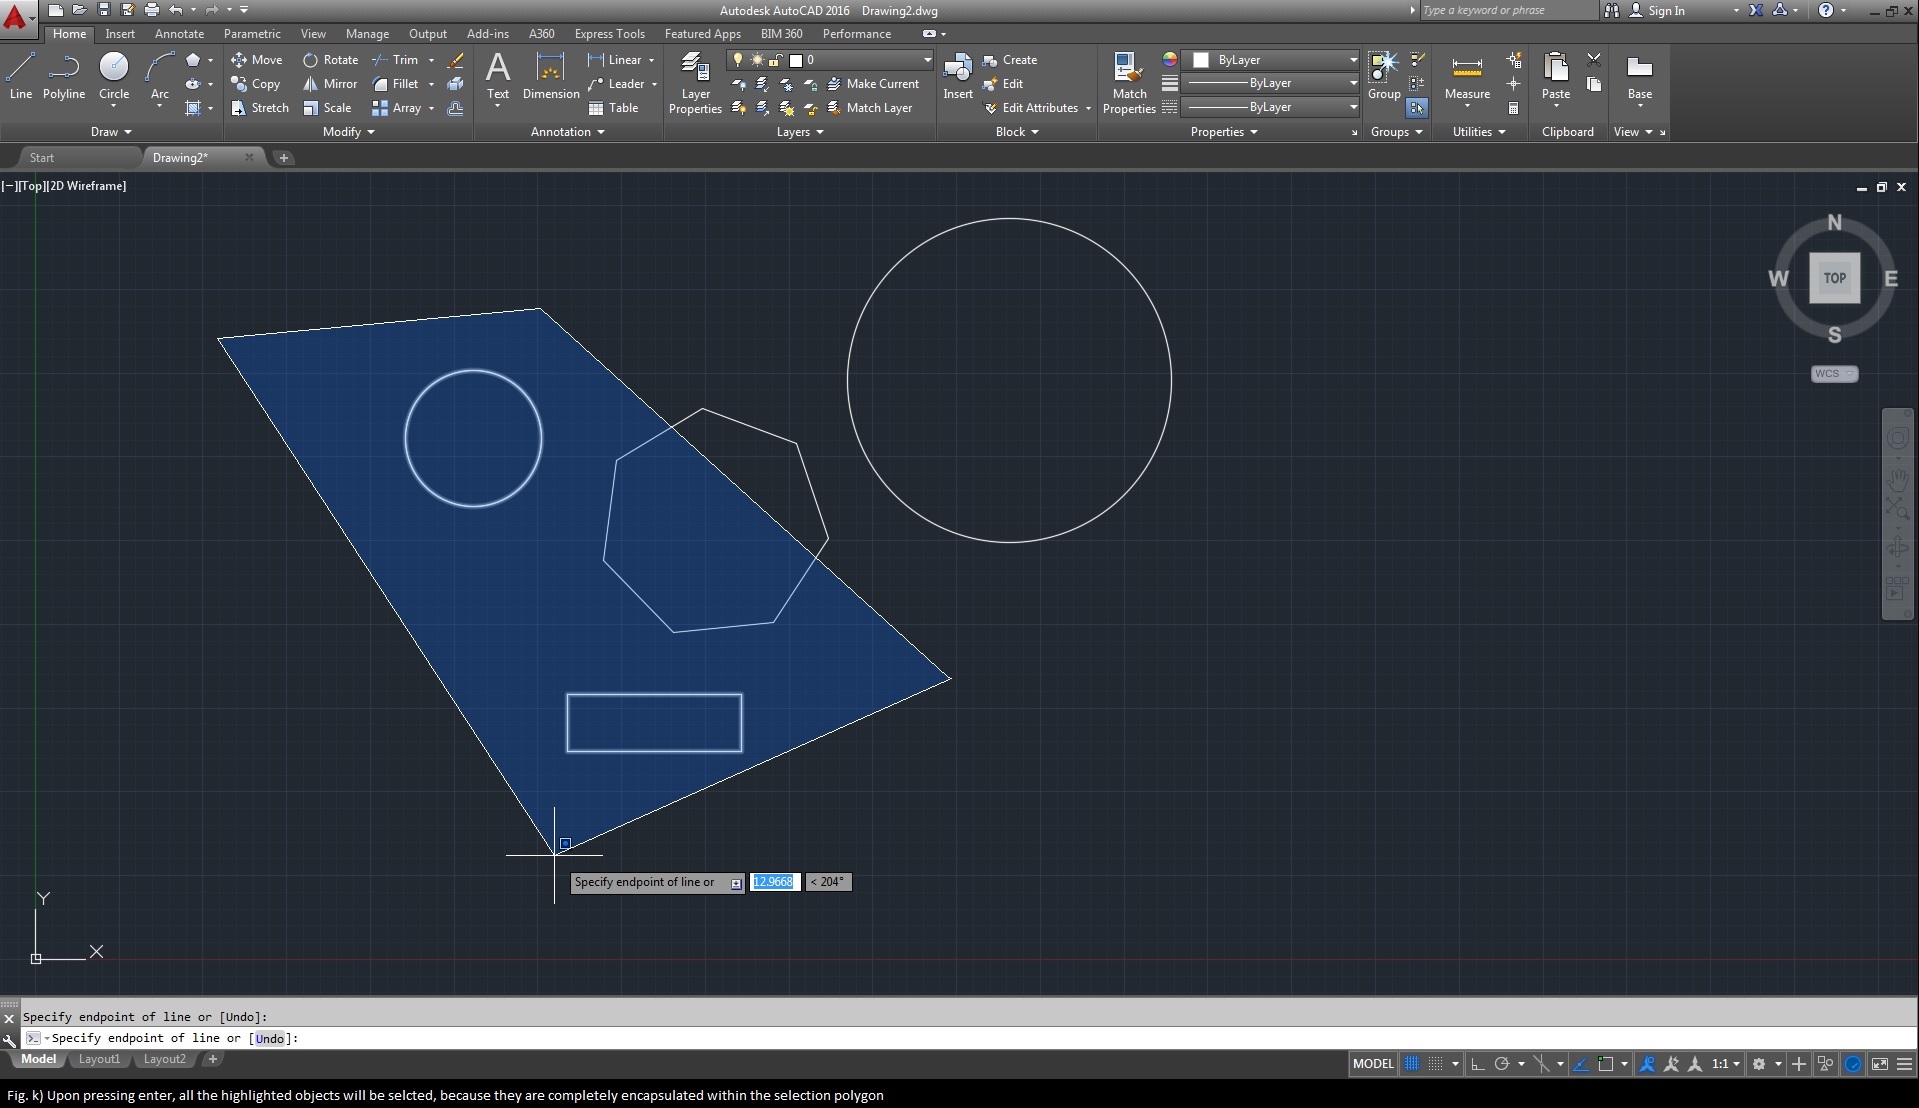
All objects touched by the fence stand selected:
4. Cross-window selection
The next selection technique is also an abstraction of the Window selection. The cross in cross-window means anything that crosses the path. Basically, two consecutive click from the right to left will make the same window as window selection, but will end up selecting every object in the window and also those that the window’s borders are touching. See demo below (fig. m).

Just for your reference –
| Selection | Window | Cross Window |
| Click sequence | Left to right | Right to left |
| Elements selected | Inside only | Inside and touching |
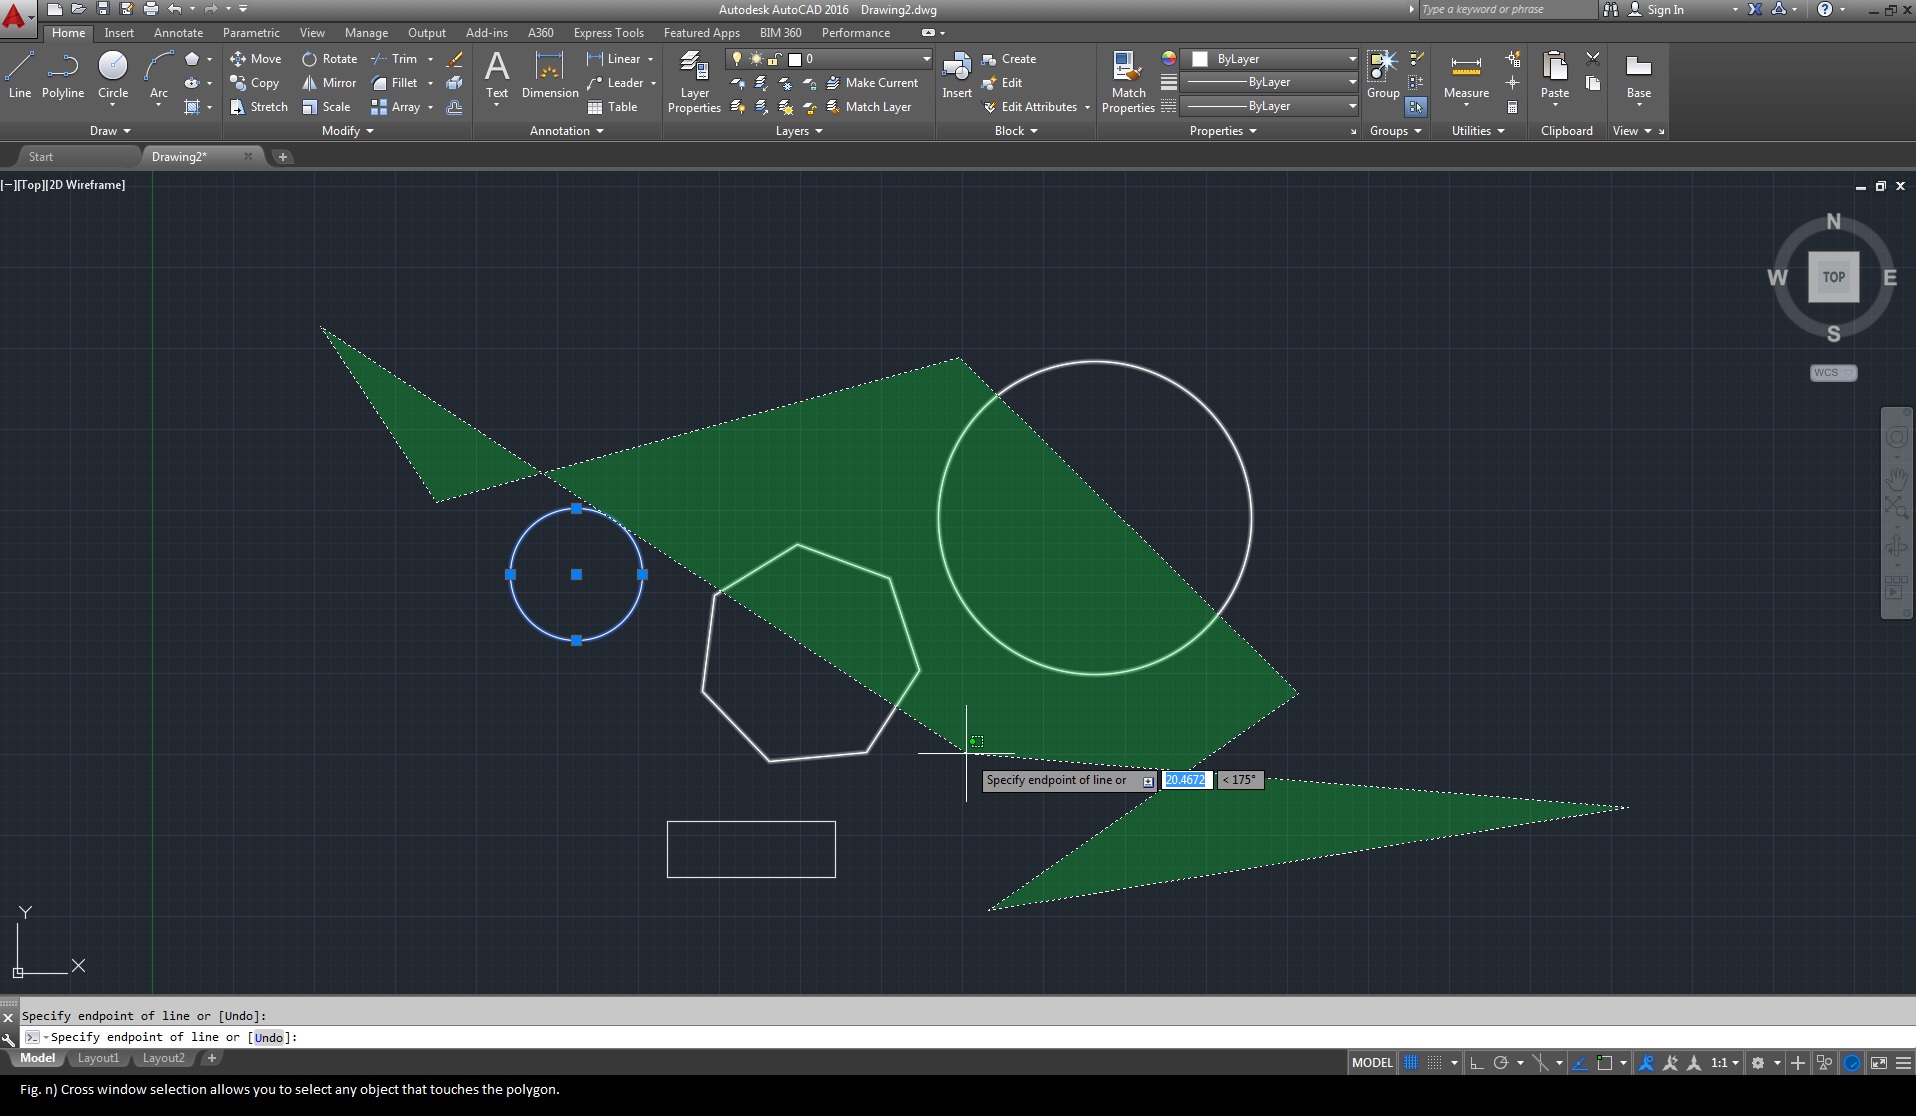
5. Cross-window polygon
The last of the window-selection abstractions is the cross-window selection. Yes, you guessed it, the polygon selects everything inside it and that tit touches/crosses. But what you may not have guised is that this option is activated by typing CP and pressing [Enter]. See below for demo (fig. n)
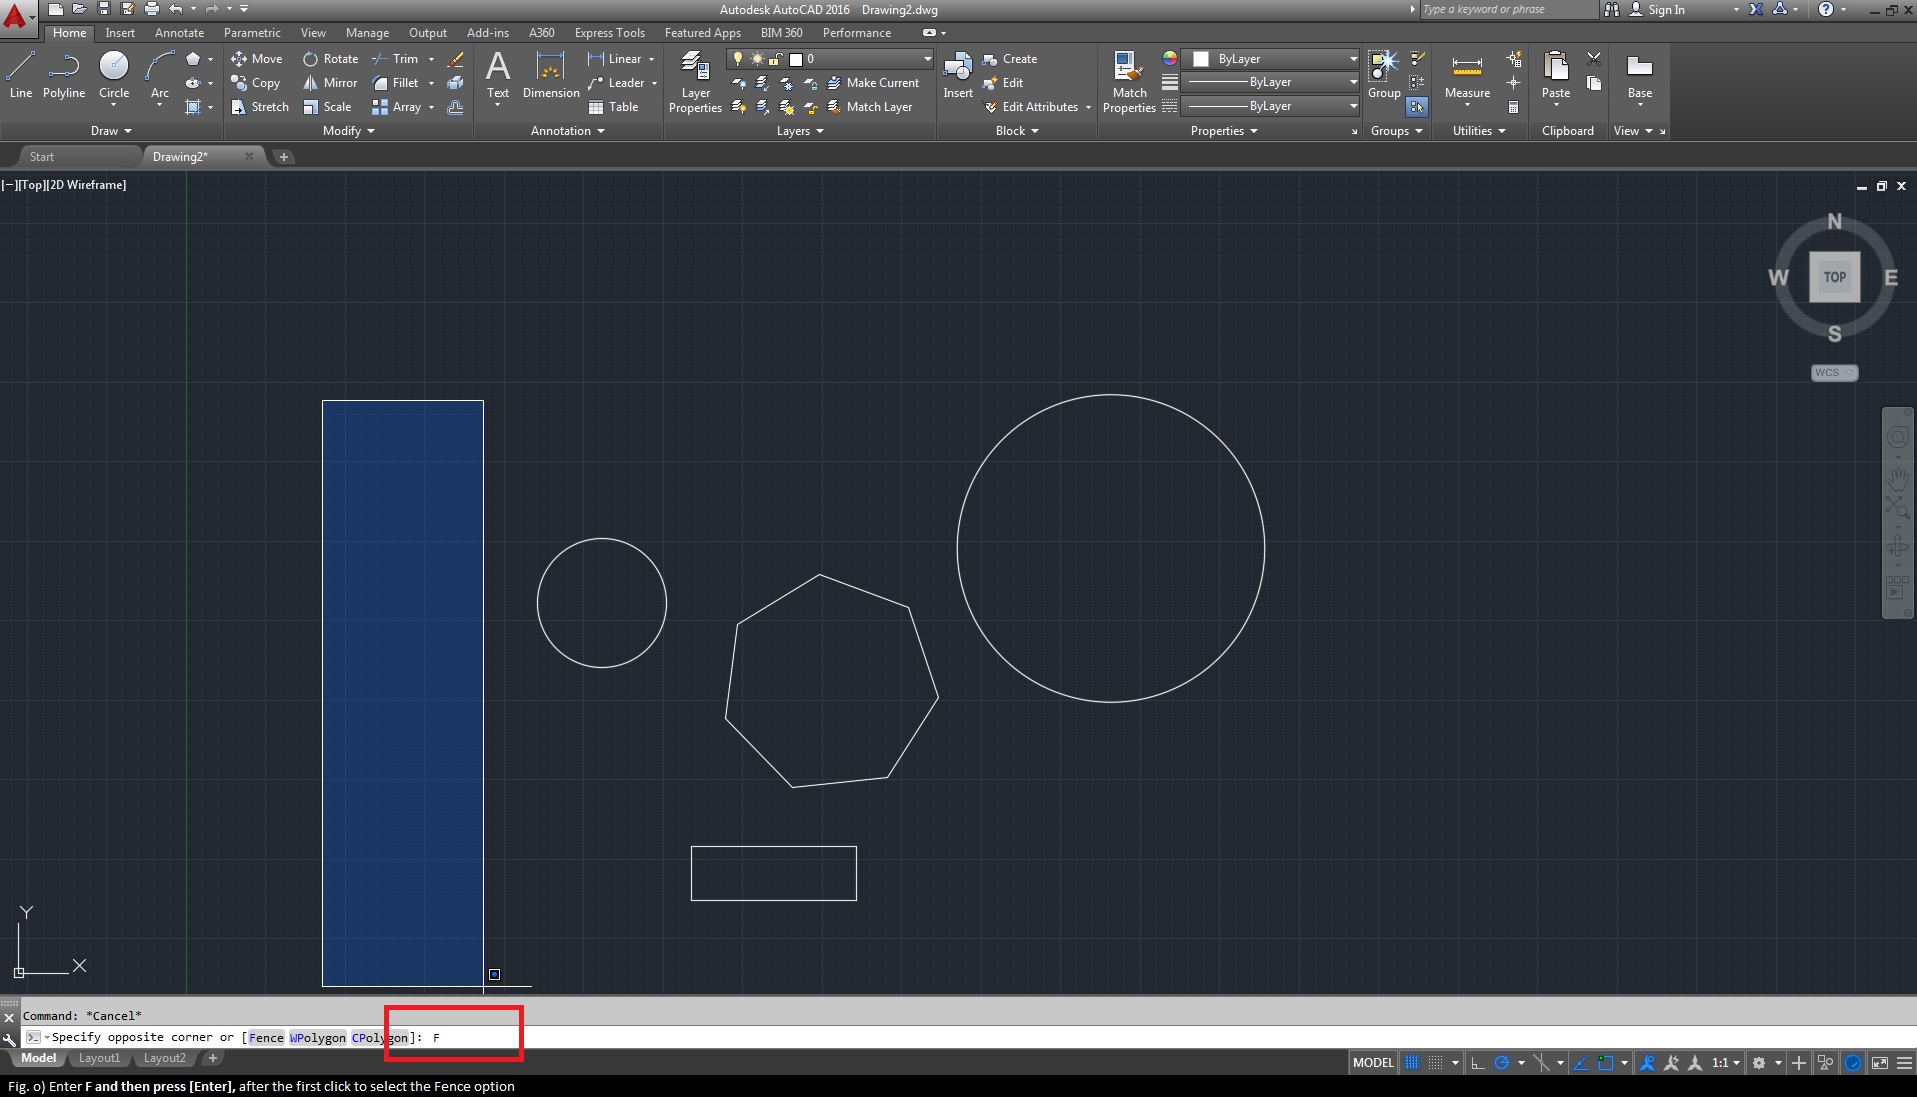
6. Fence selection
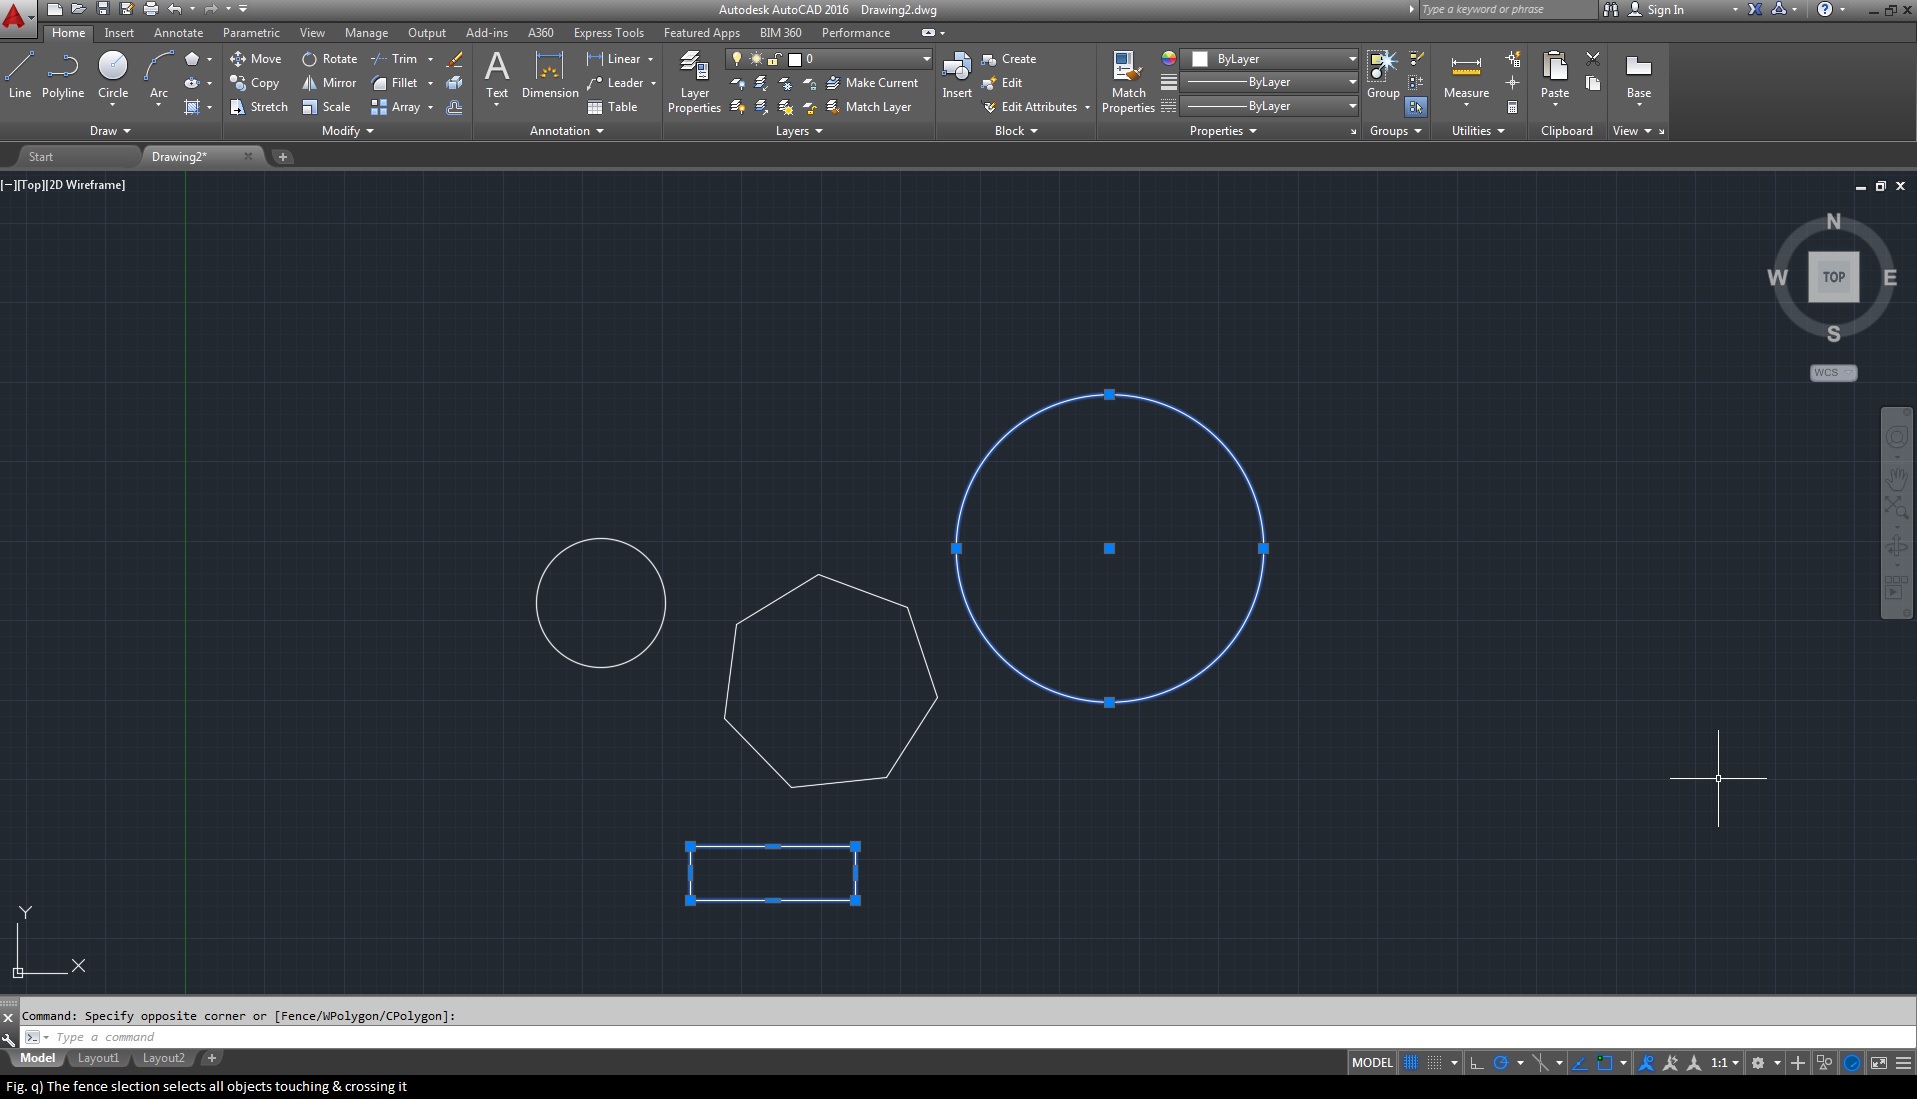
The fence selection is designed to mimic a fence, basically a line running through a distance, meant to select everything that it touches. You can define a fence (as shown below in fig. o) by typing F and then specifying the subsequent points of the fence (with clicks).
Once you’ve drawn your fence, which doesn’t necessarily need to be closed, press [Enter] and you’ll have selected any element that you’re fence touched or went through. See demo below in Fig. p.
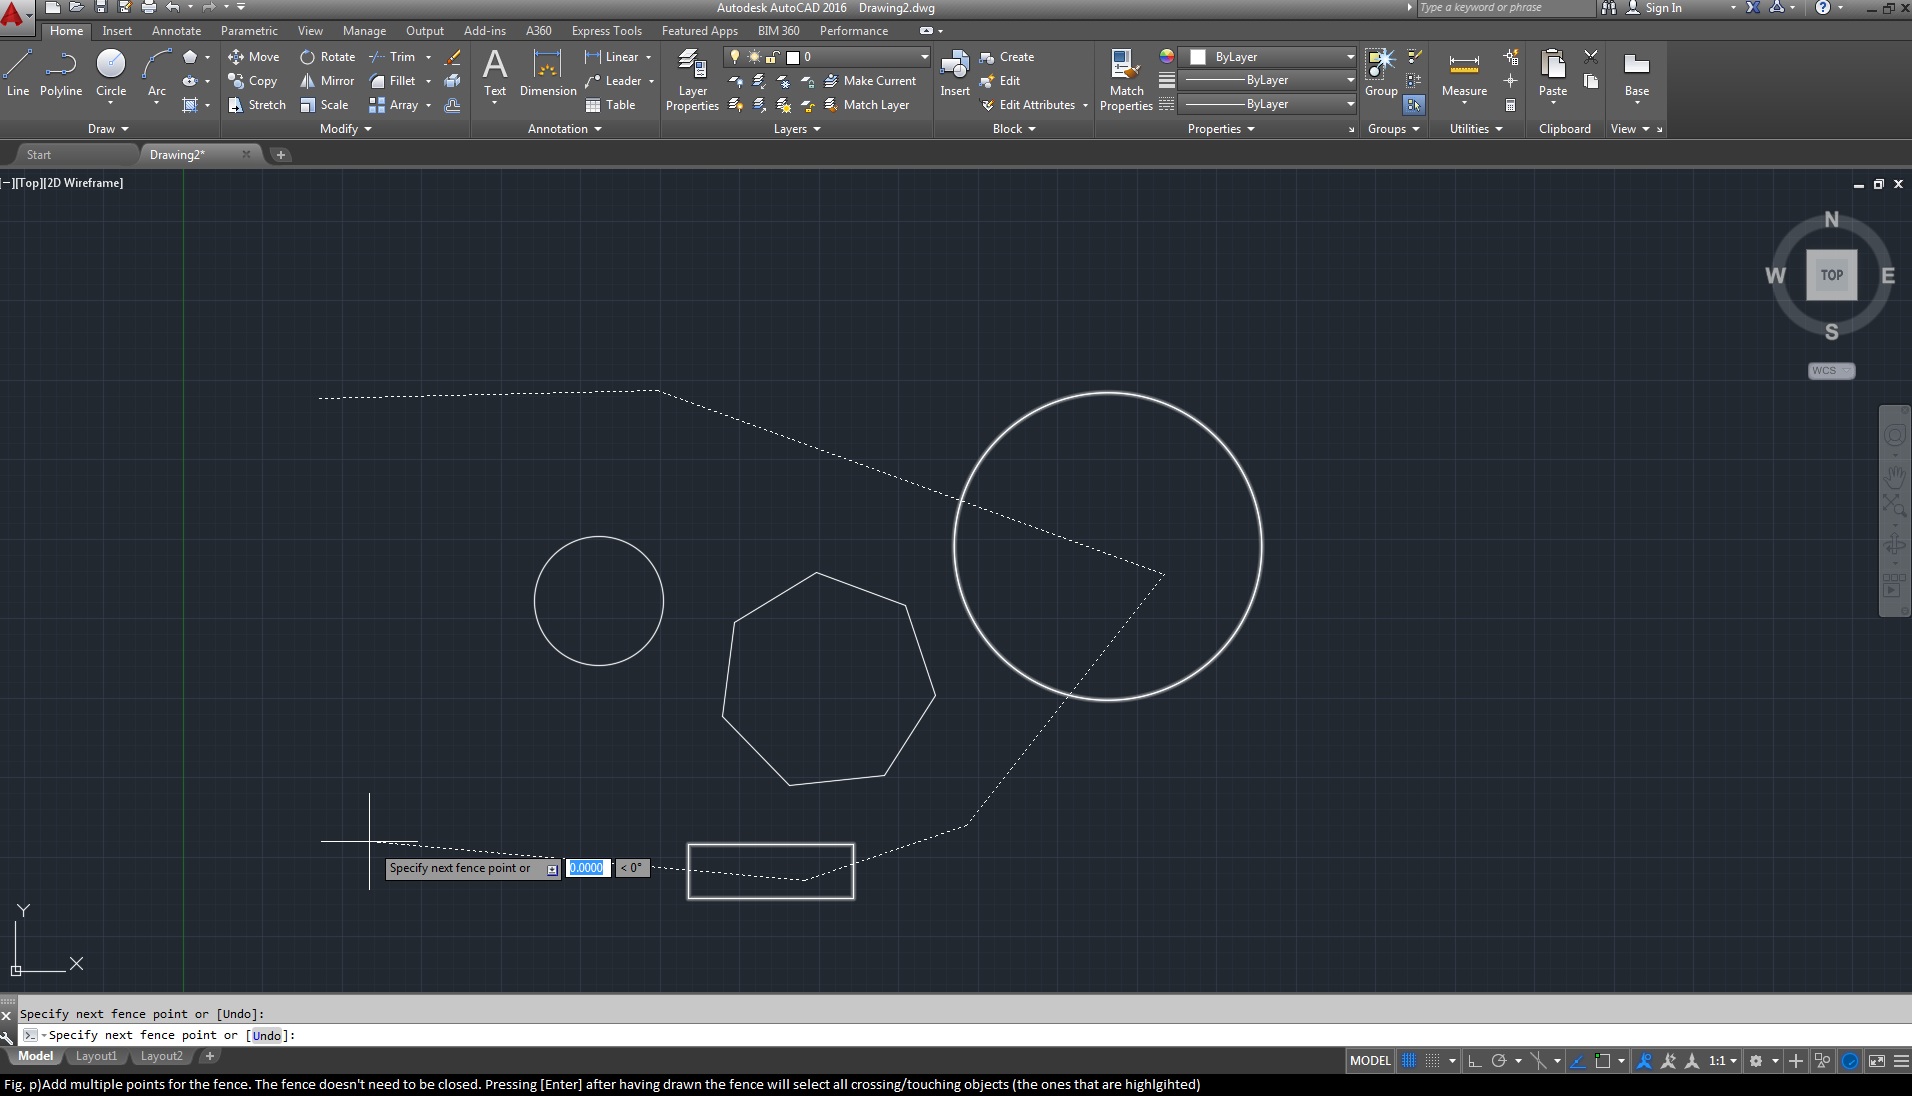
As stated, the items that the fence merely touched got selected as opposed to window-based selections.
7. Previous selections
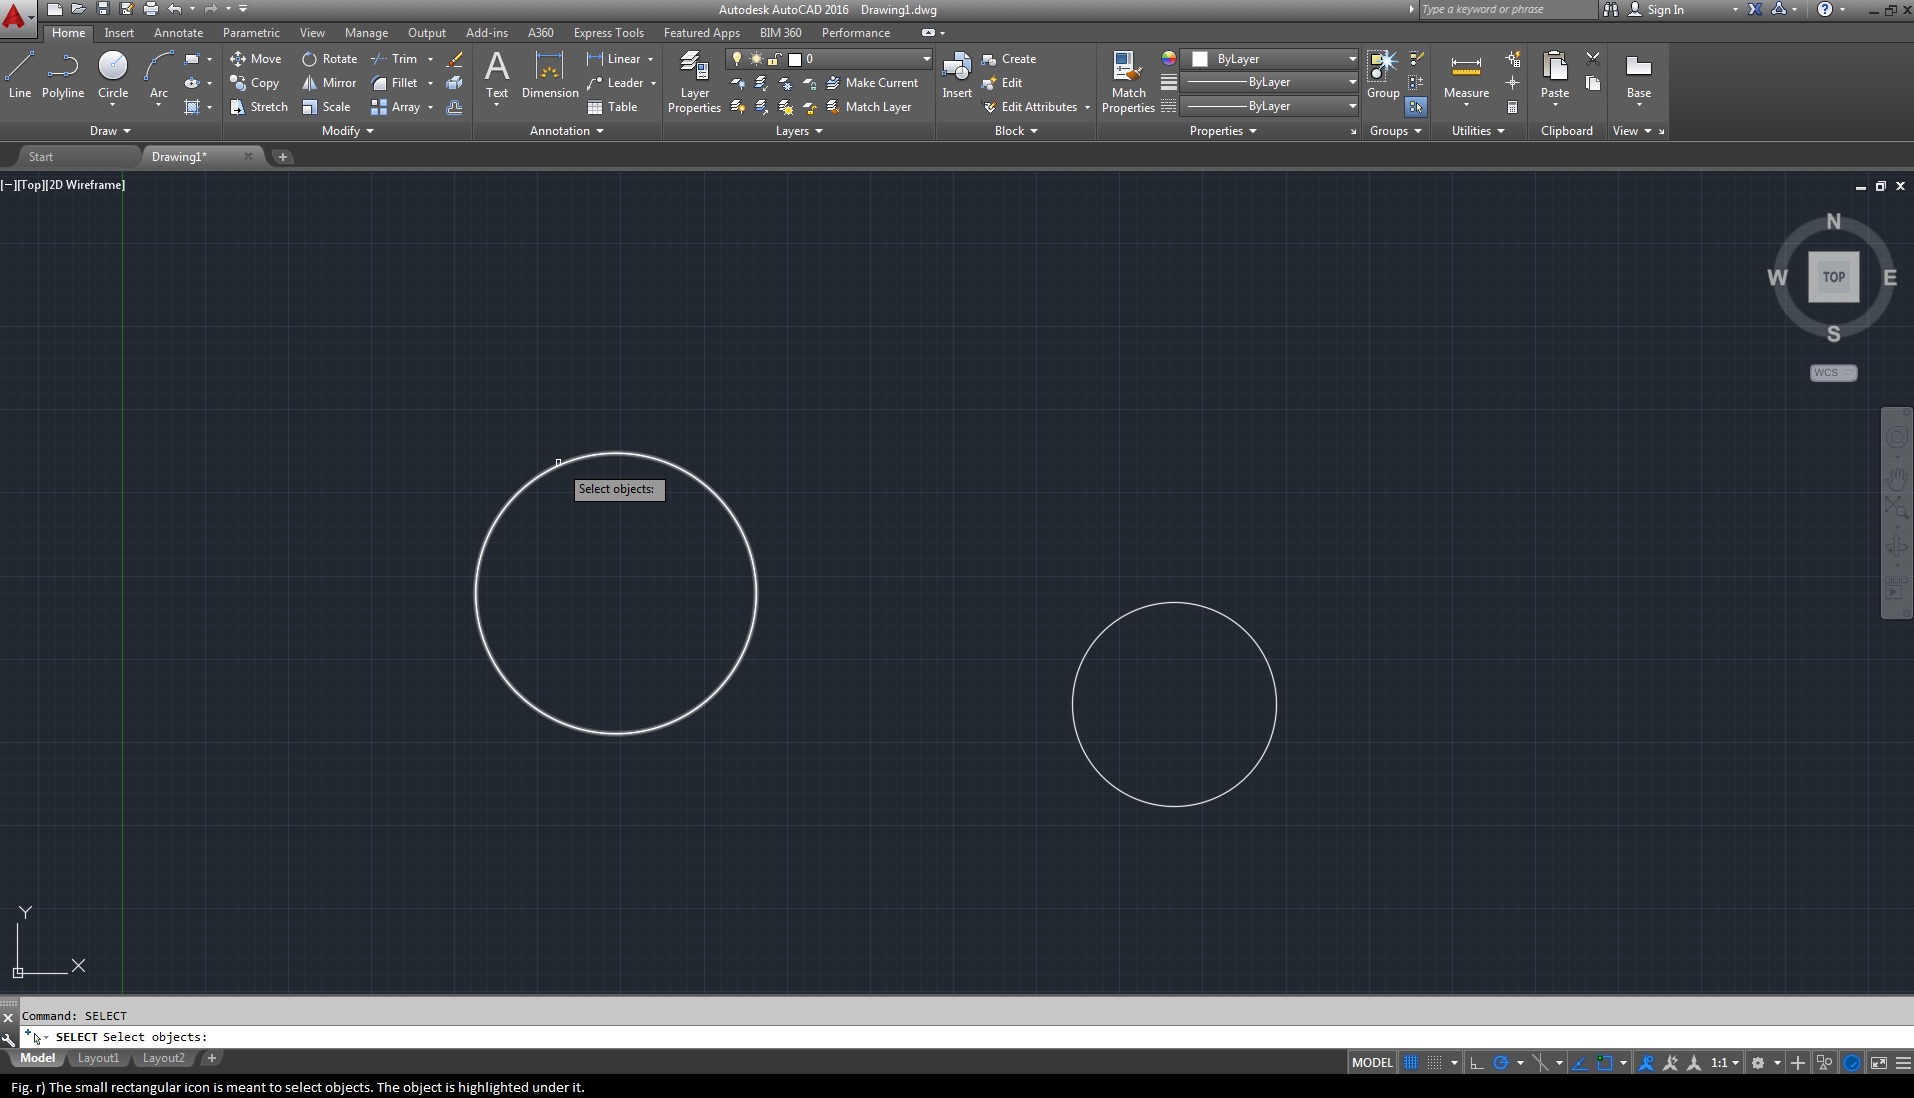
Your previous selections can be accessed as sets. This means you can you’re your last selection of objects/elements by using a command. Use the [Select] command to get the below (fig. r) icon for selection.
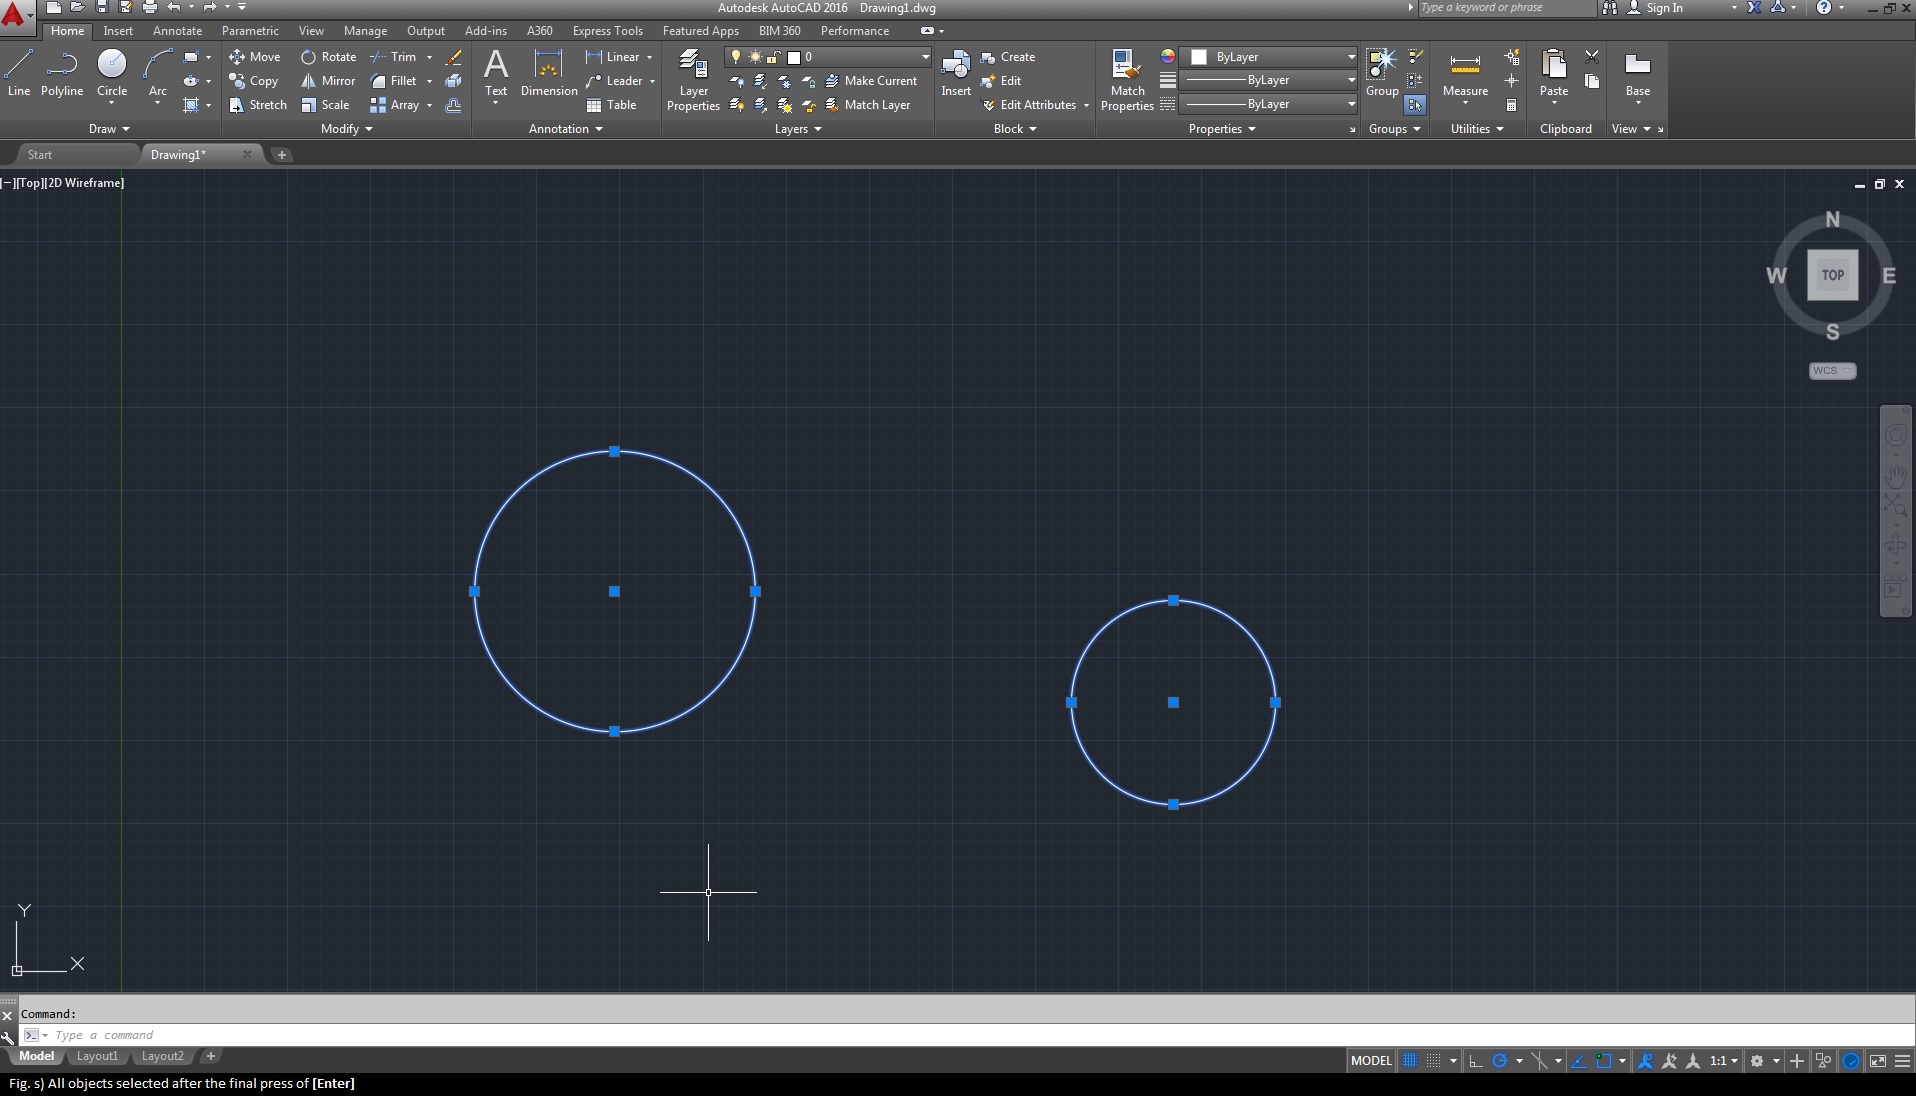
Select all objects using this icon and then press [Enter] for the final selection of all objects (as shown below in fig. s).
Once this selection is made, it is also saved as the most previous selection set. You can access this set by typing [Select -> p] as shown below in fig. t.

And voila, your previously saved selection set has been selected again (see below in fig. u). 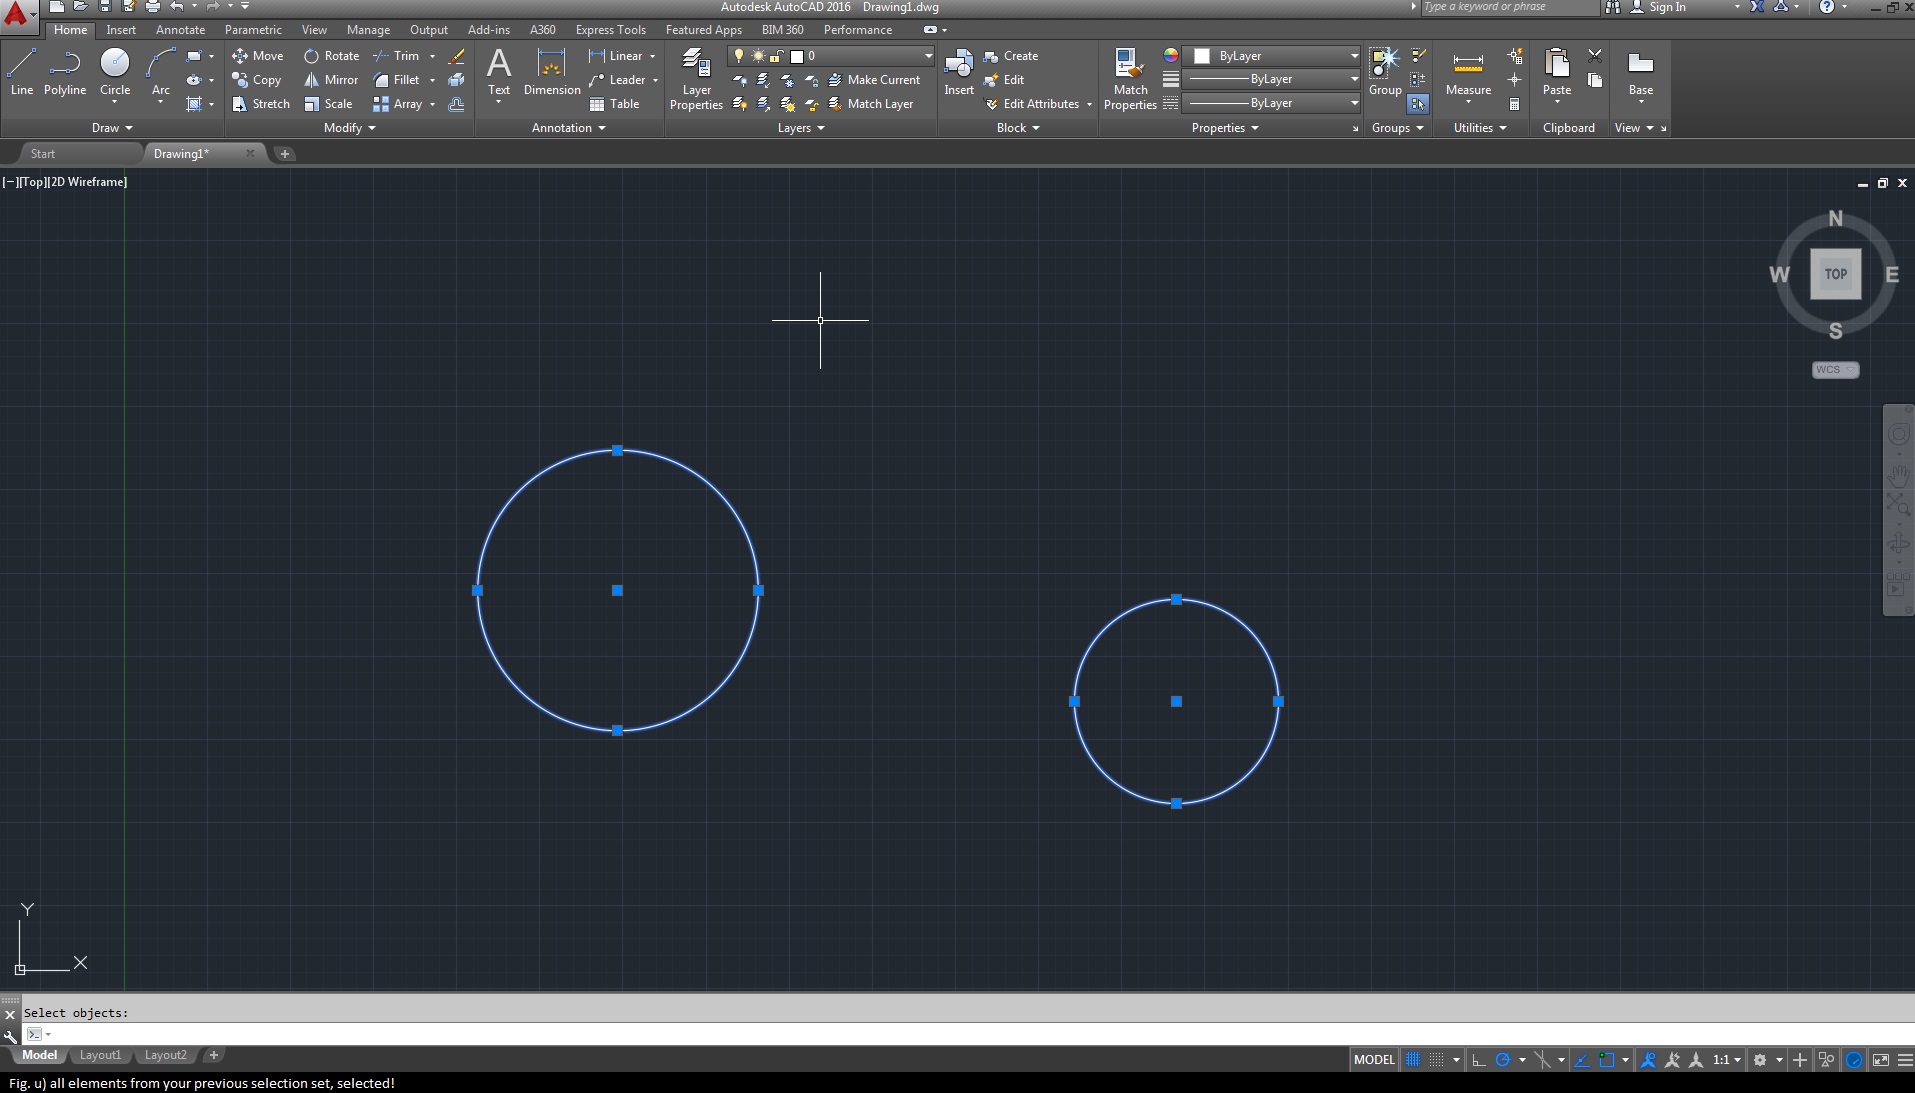
8. Removing/Adding selections
In the case you have multiple items selected and you wish to subtract items of your selection, holding down the [Shift] key will do that for you. One by one, you can deselect items. In order to add something to your current selection, the regular click will select the object. Check out the icons for removing/adding selections below (Fig. icons).
![]()
Up until now, we have talked about simple techniques hidden from regular view. From here on we’re going to talk about a few of the advanced techniques which either require commands or other inputs from the user.
9. Chain Selection
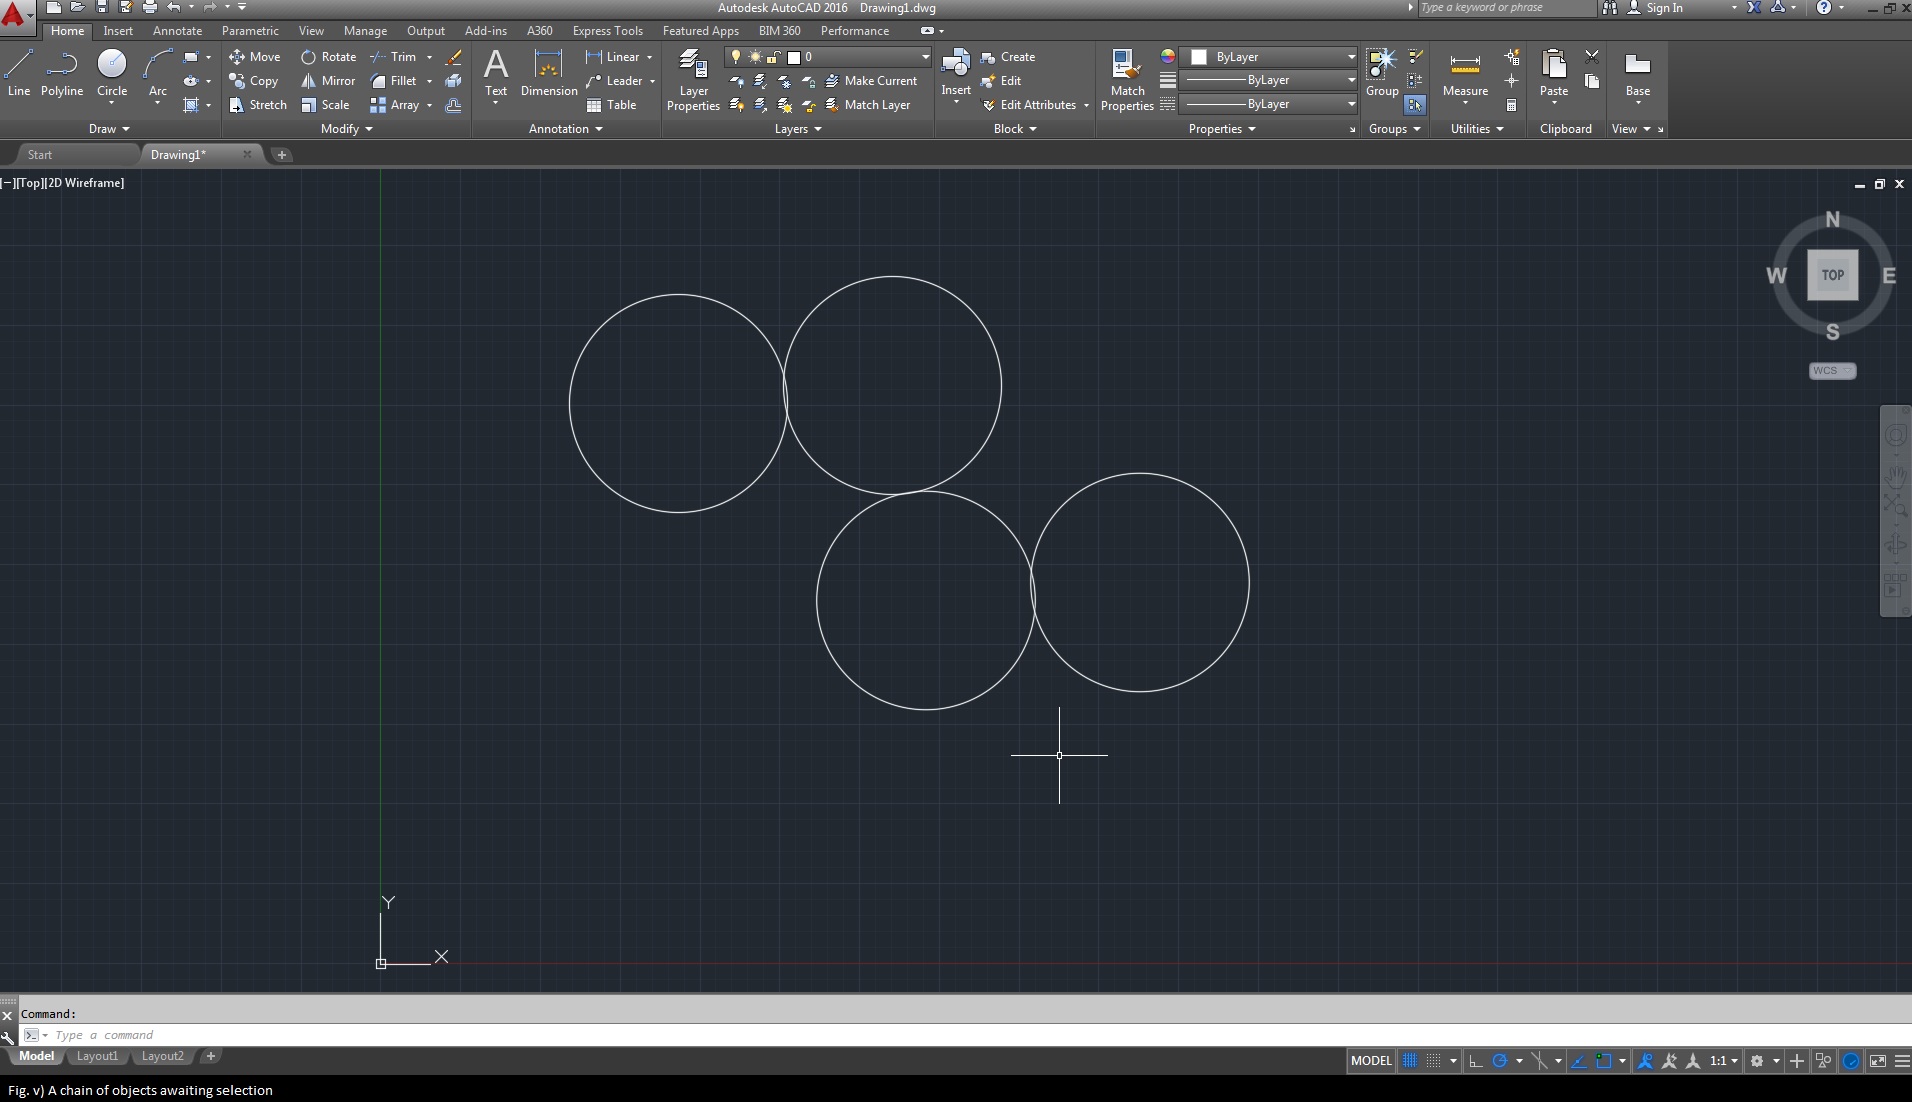
This kind of selection is used for a chain objects, with two default properties. The first is to select all objects touching the object of your selection. The second options goes a step further and selects all objects touching the objects touching your selection. Let’s talk about how this works. See below (Fig. v) the chain of objects touching each other at multiple points.
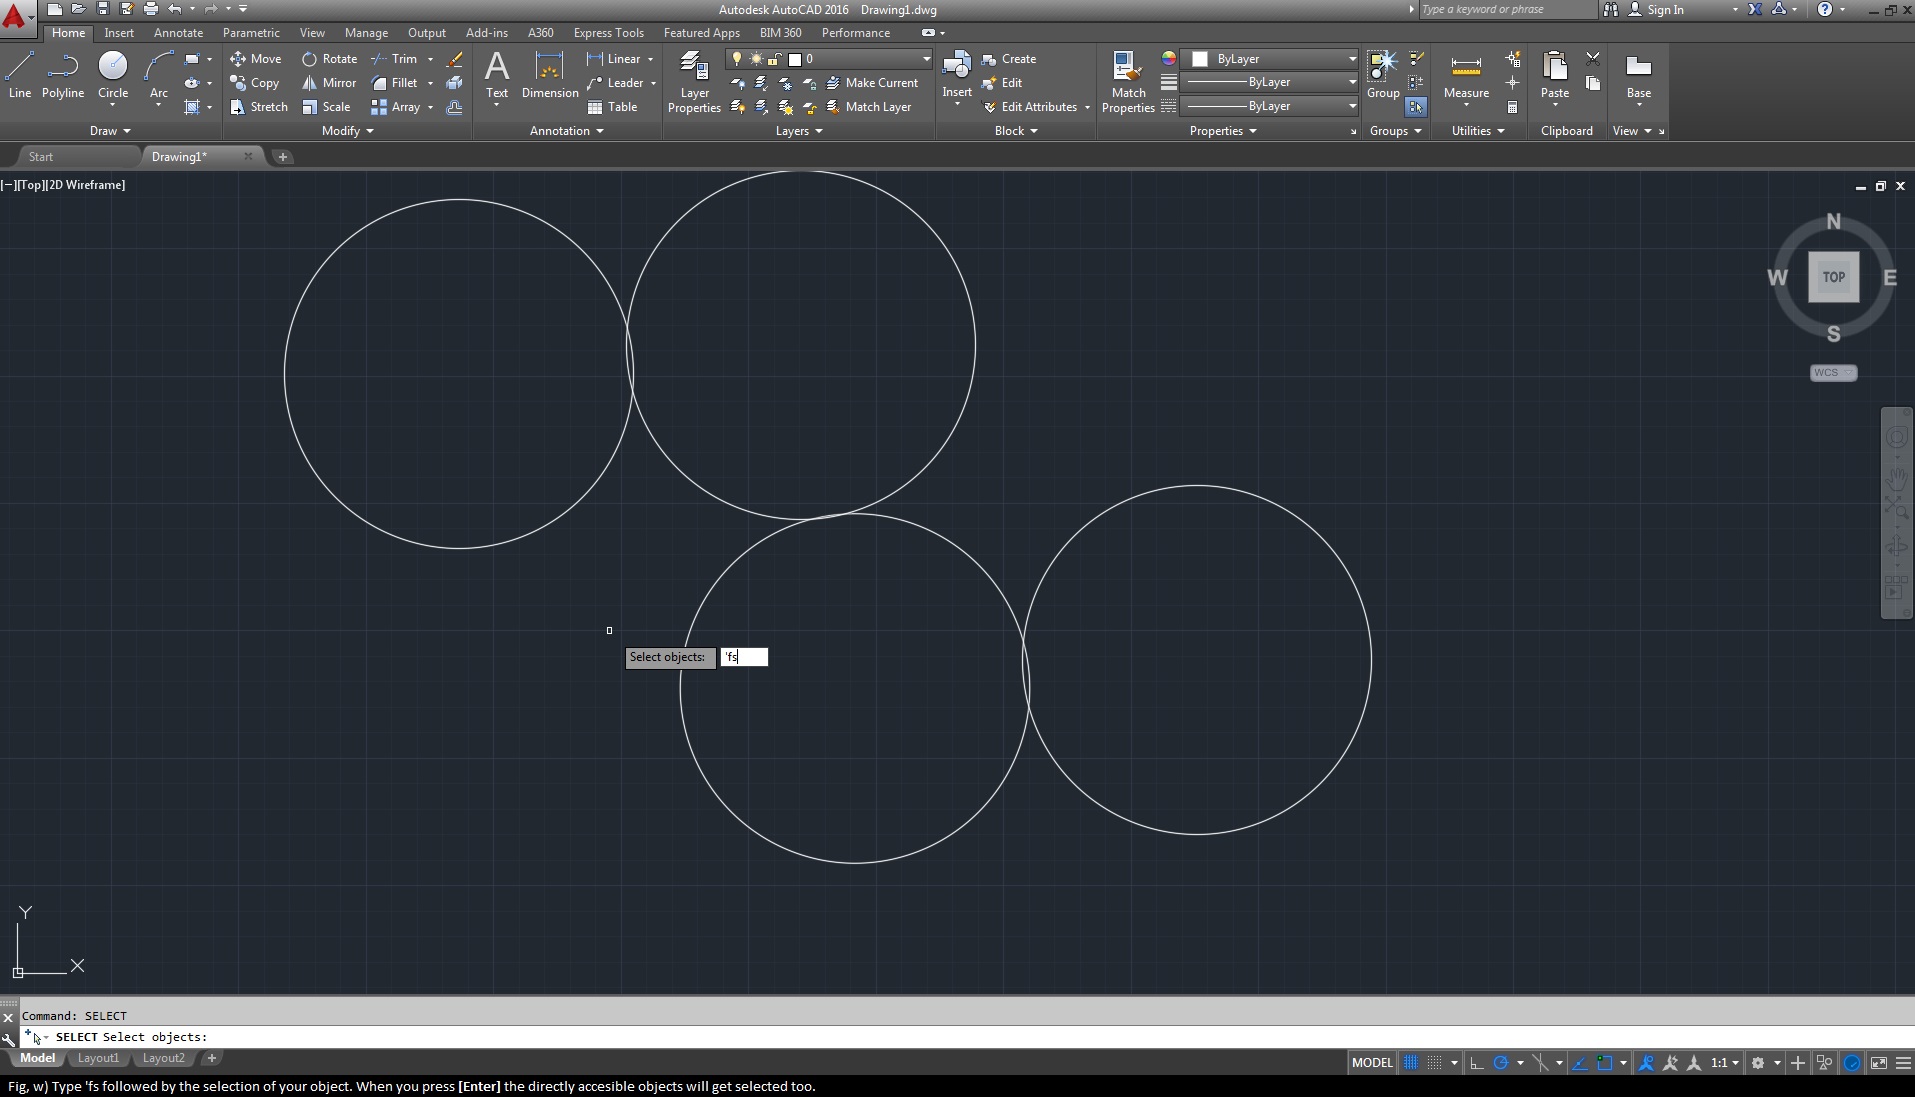
First we set the FSMODE to OFF. Off is the default property and allows you to select objects touching your selection directly. To set the FSMODE, type [FSMODE] followed by a space and then type [Off]. Now to select the chain of directly accessible objects, type [SELECT] followed by a space and then type [‘fs]. You will have to type the “ ’ ”in [‘fs] to work as shown below (Fig w.).
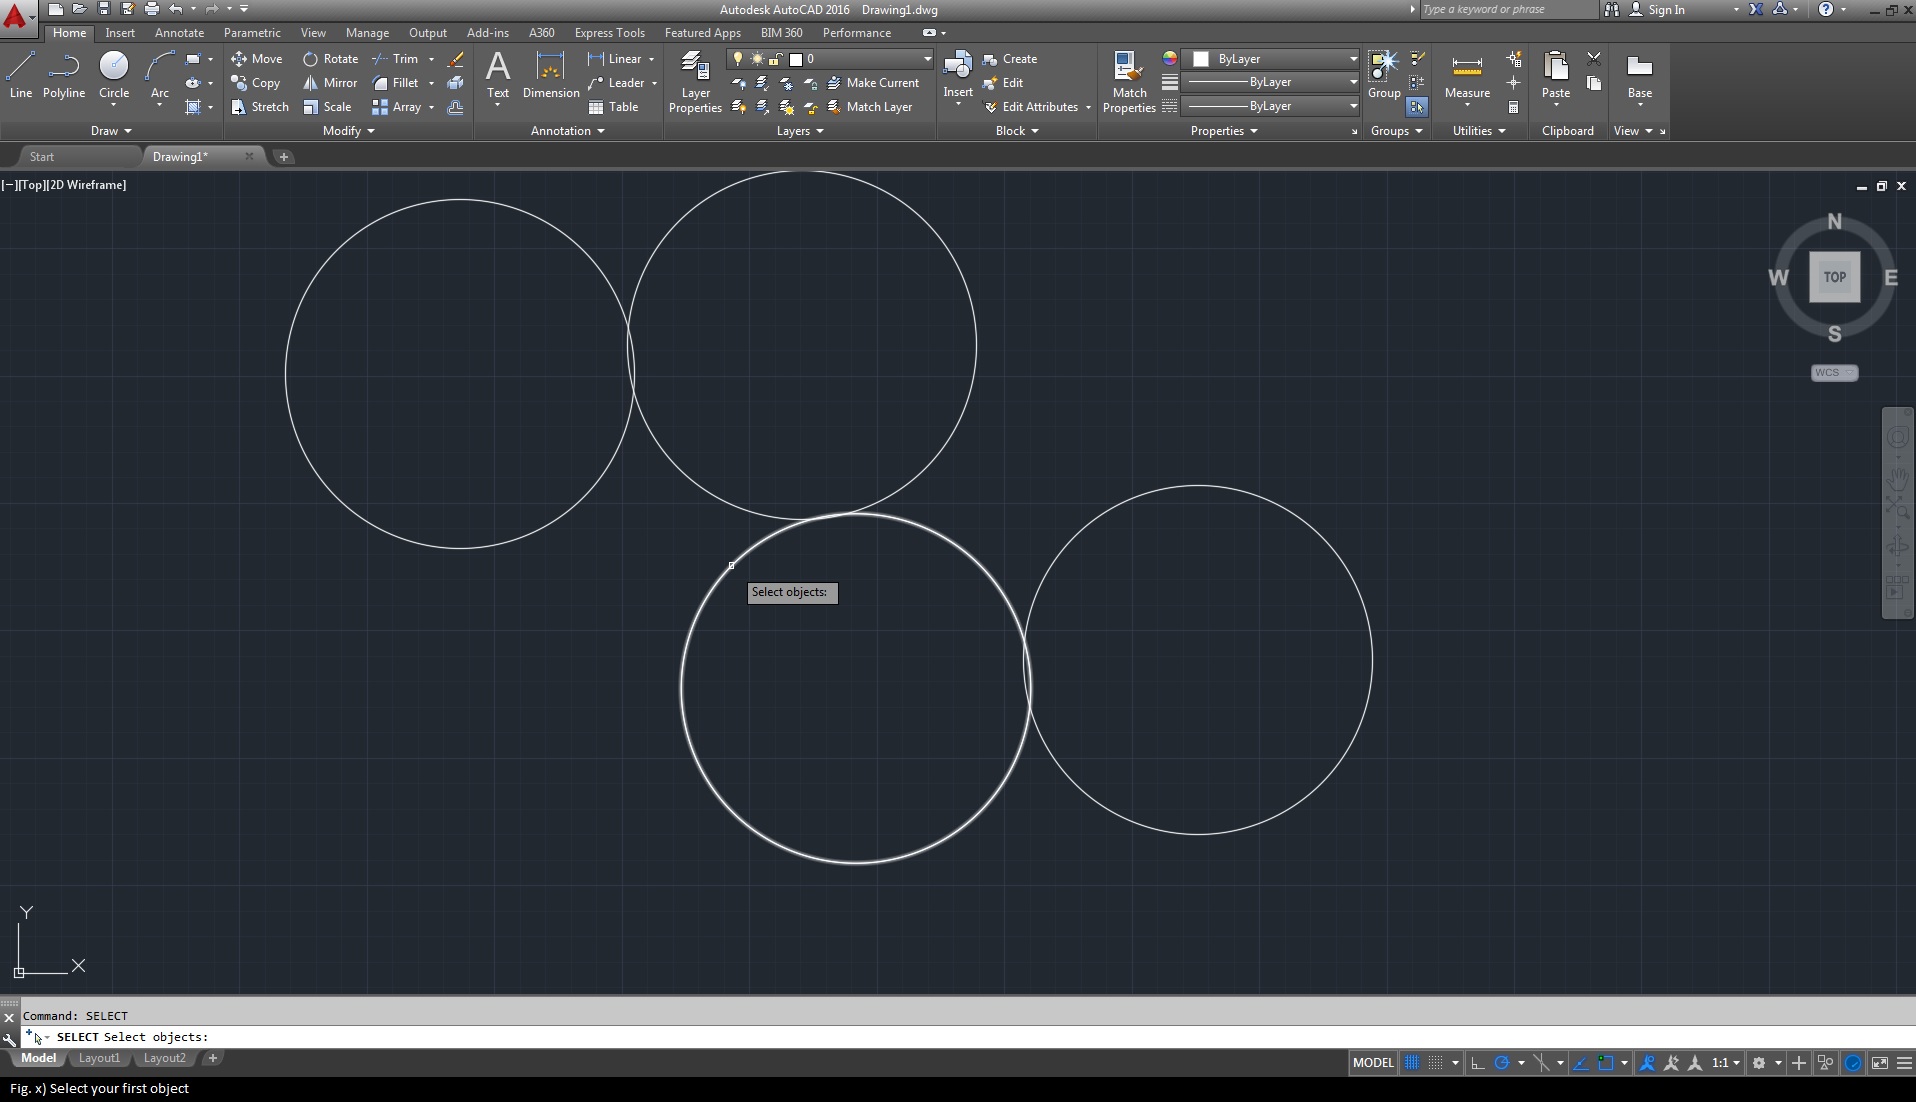
Now select your first object as below (Fig. x).
And all your directly accessible objects are selected as shown below (Fig. y)

To further select the whole chain of touching objects, you’ll have to set FSMODE to on, the same way you set it to off like the series below (Fig. z to a-c).
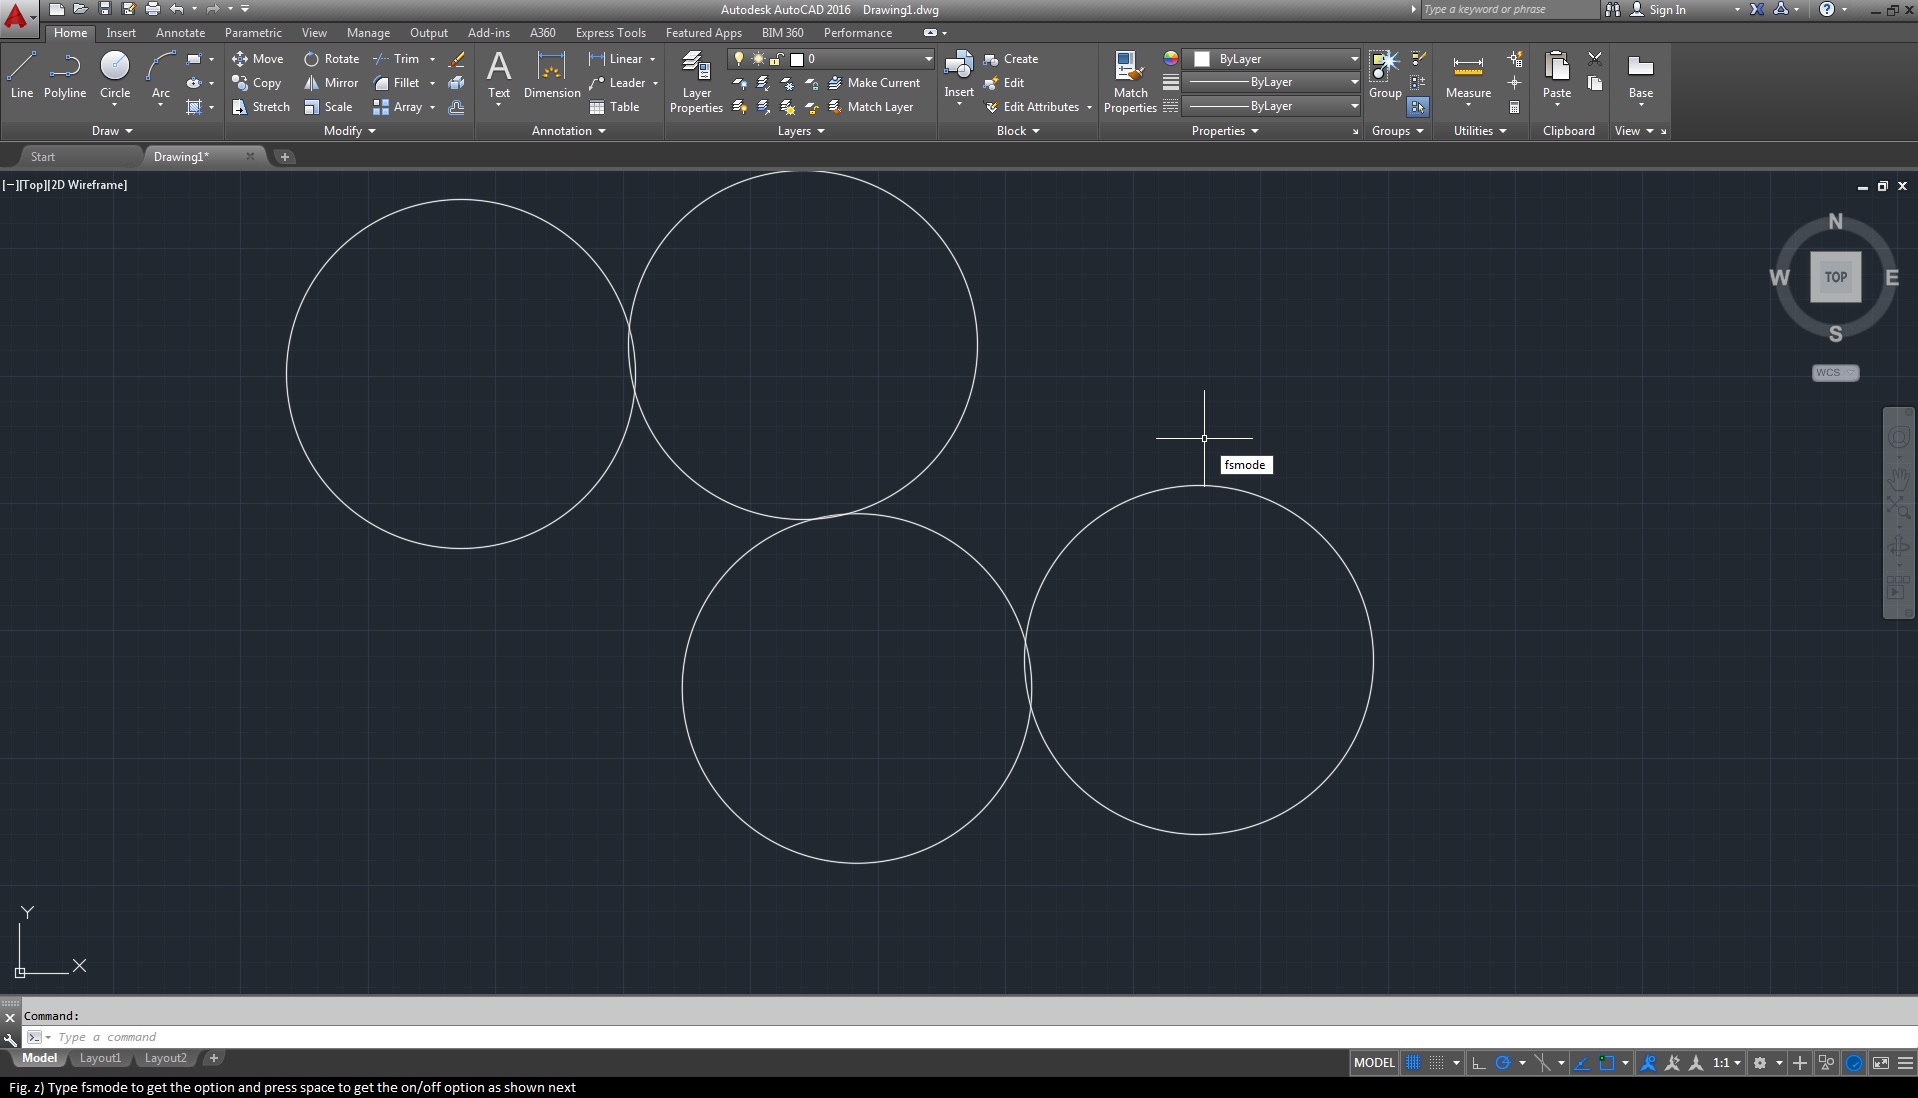
Typing [FSMODE] engages the option.
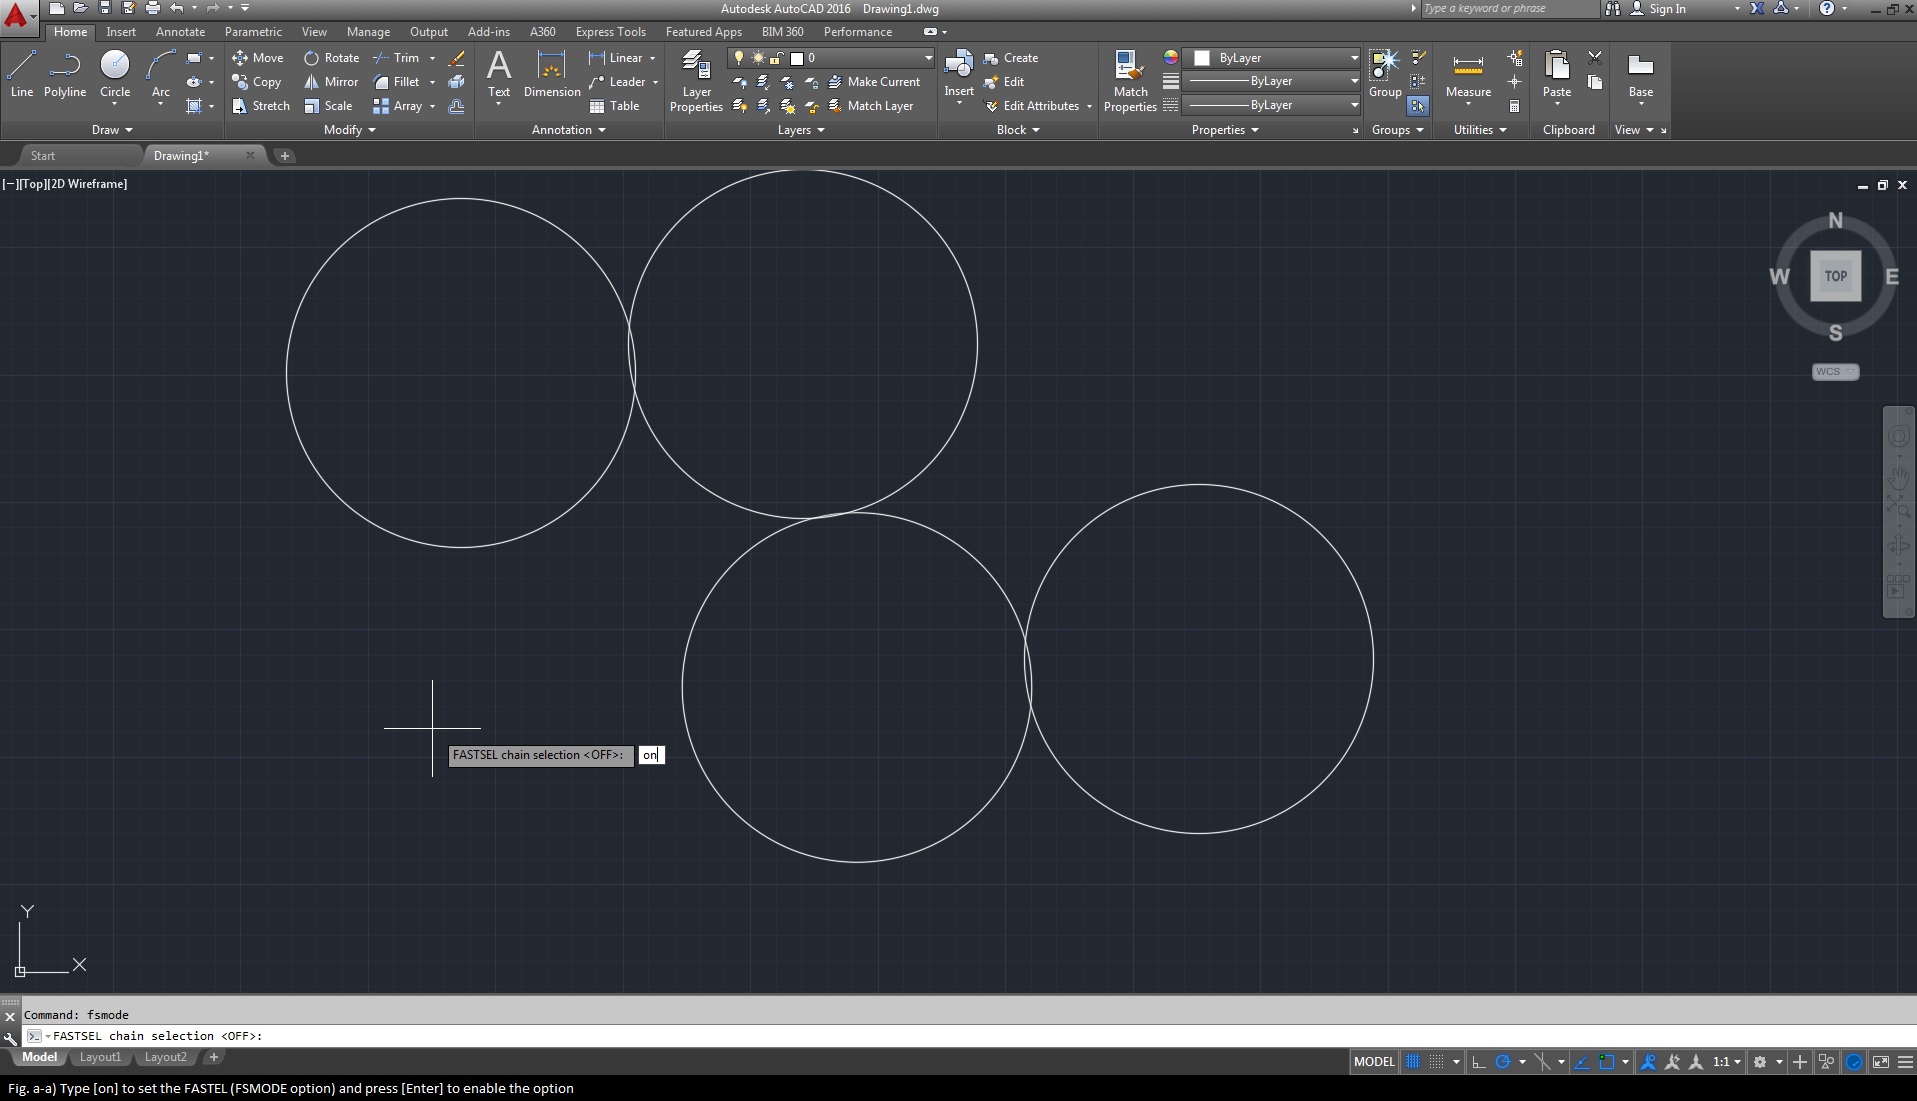
Typing [on] after it will enable the option as shown below.
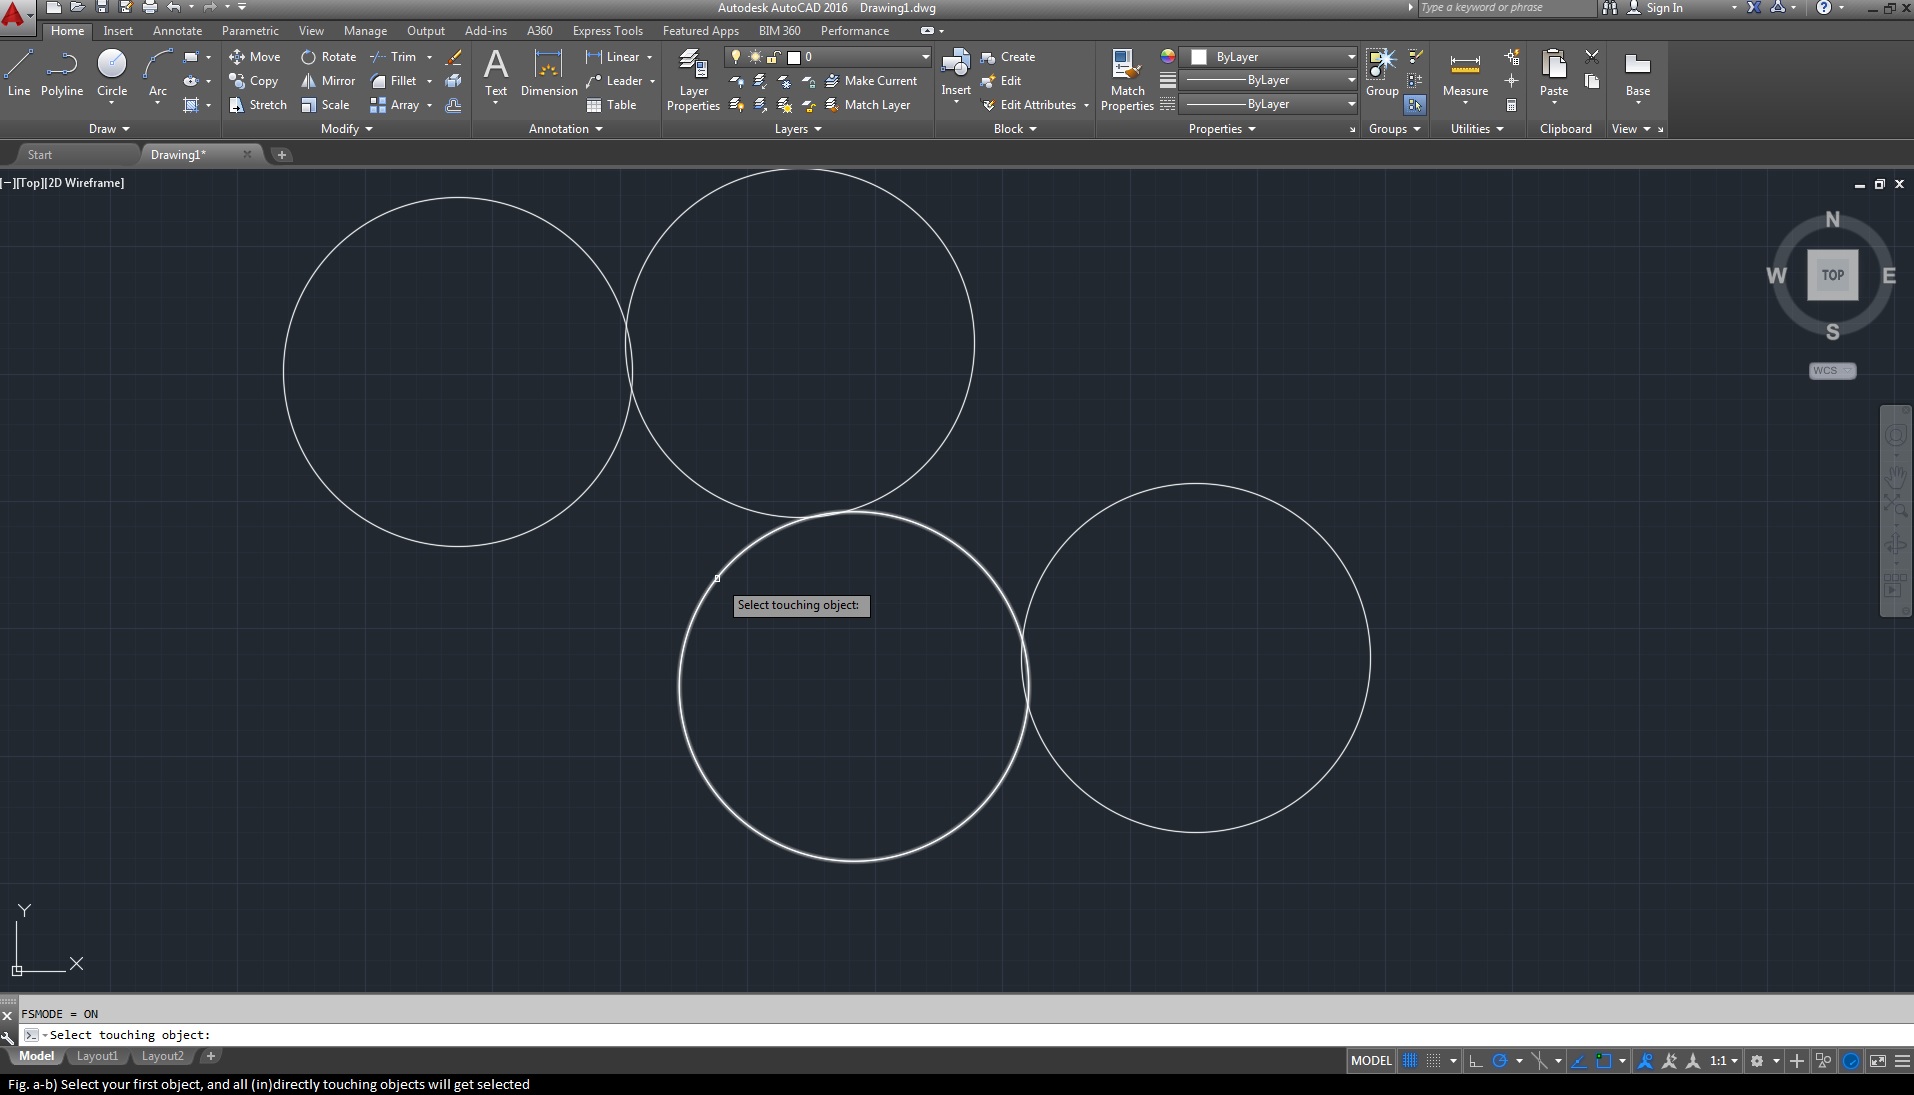
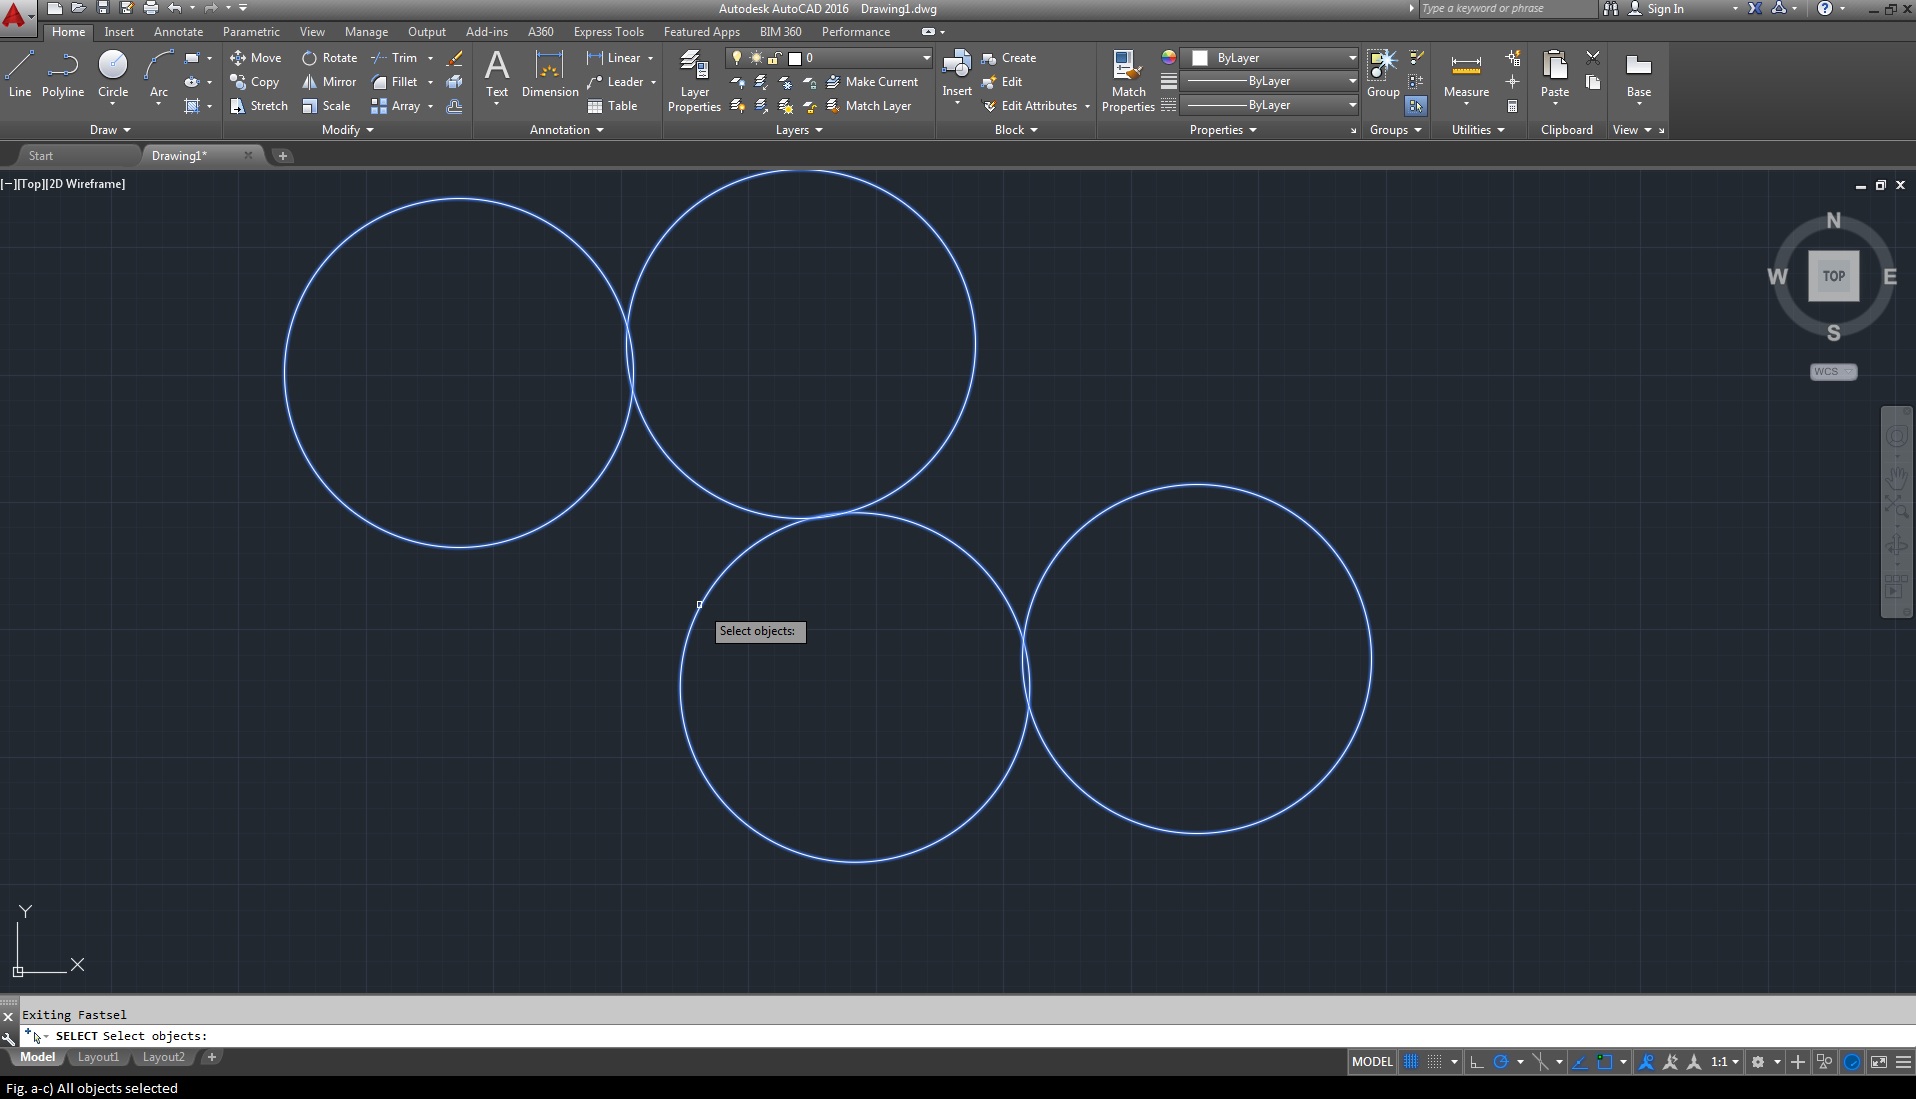
Once FSMODe is on, select all objects and then press [Enter]. Because of this, as shown below, the whole chain of elements touching is selected.
10. Lasso selection
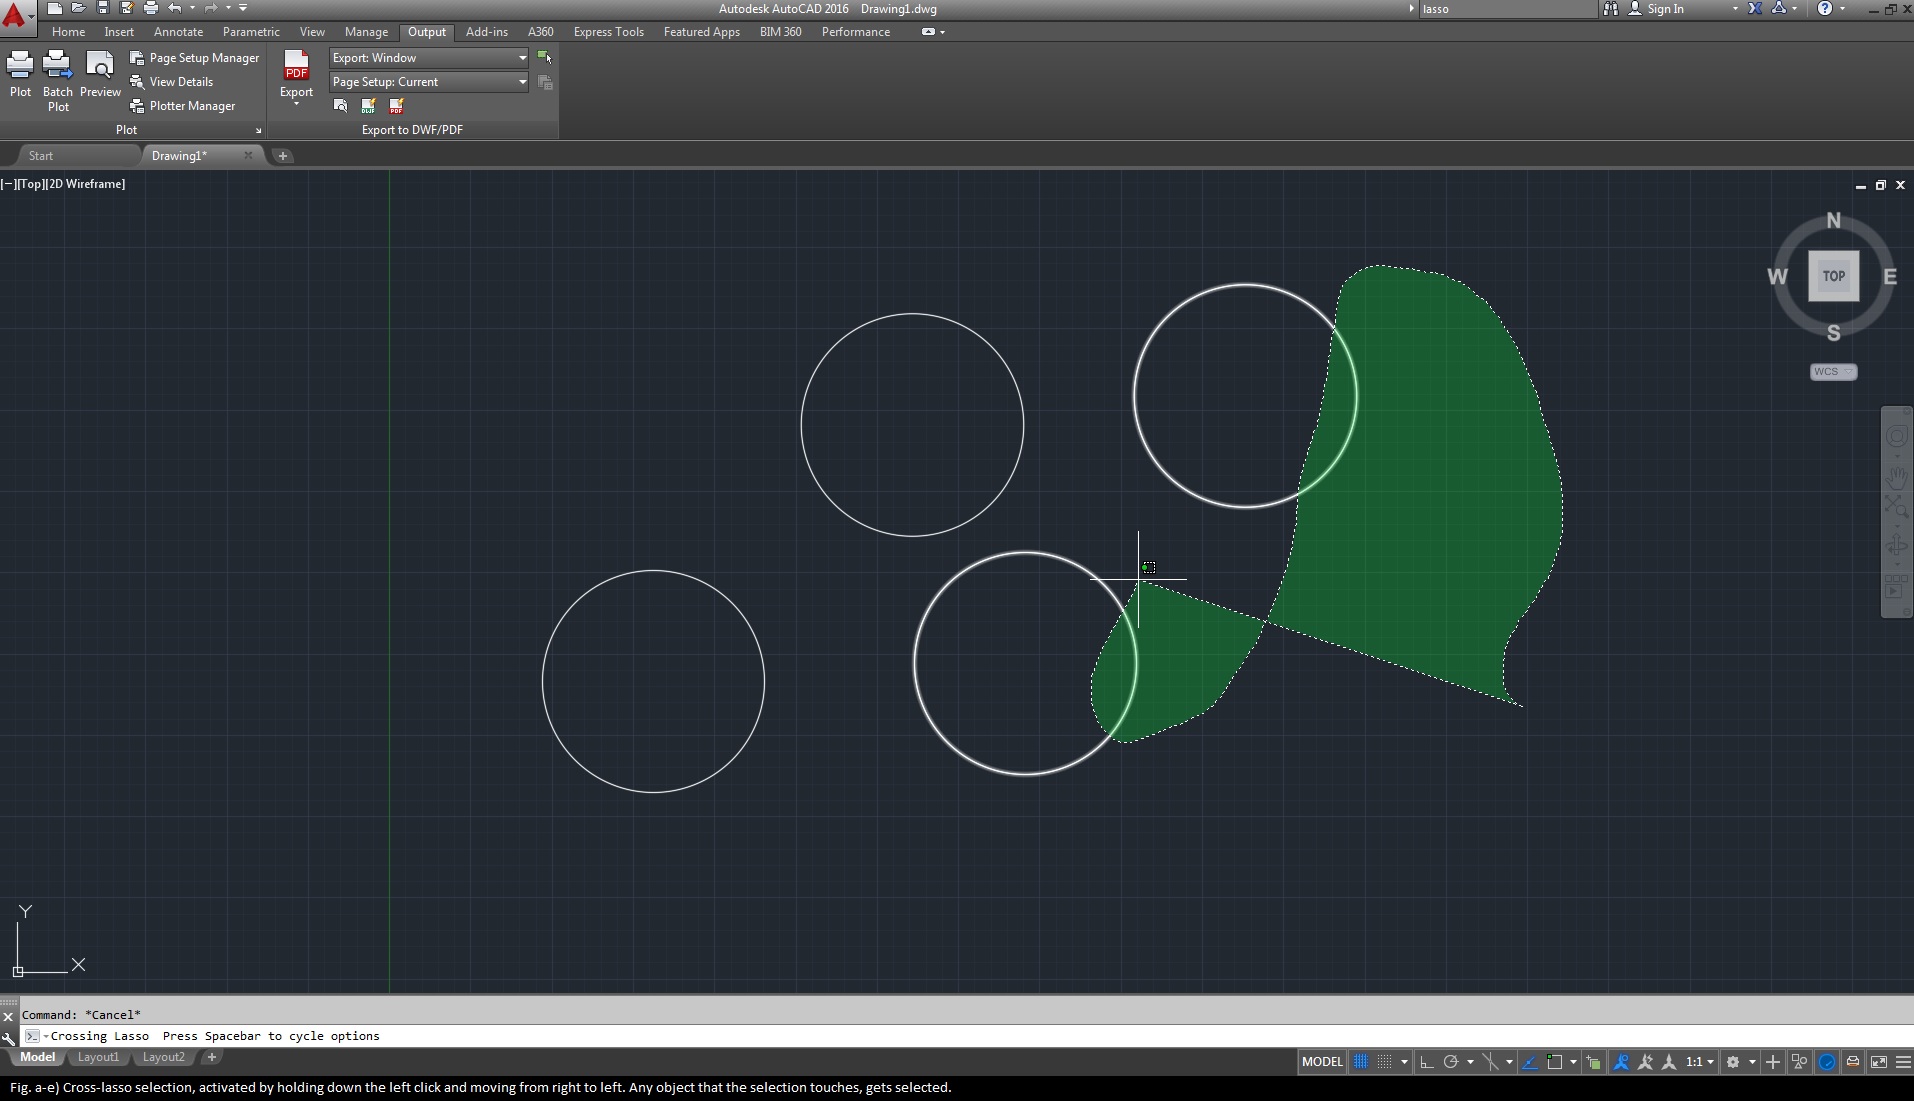
Anybody who’s ever used graphic design software knows about lasso selection. Autodesk introduced this option in AutoCAD’s 2105 and it’s very simple to use. It follows the window selection (and its abstraction’s) behavior and can be accessed by holding down the click of the mouse. Moving from left to right allows you to draw your selection window around any object that you want to highlight. The cross-lasso selection is accessed by holding the mouse key down and moving from right to left. This enables you to weave in and out of spaces and touch only what you want as shown below (Fig. a-d & a-e).
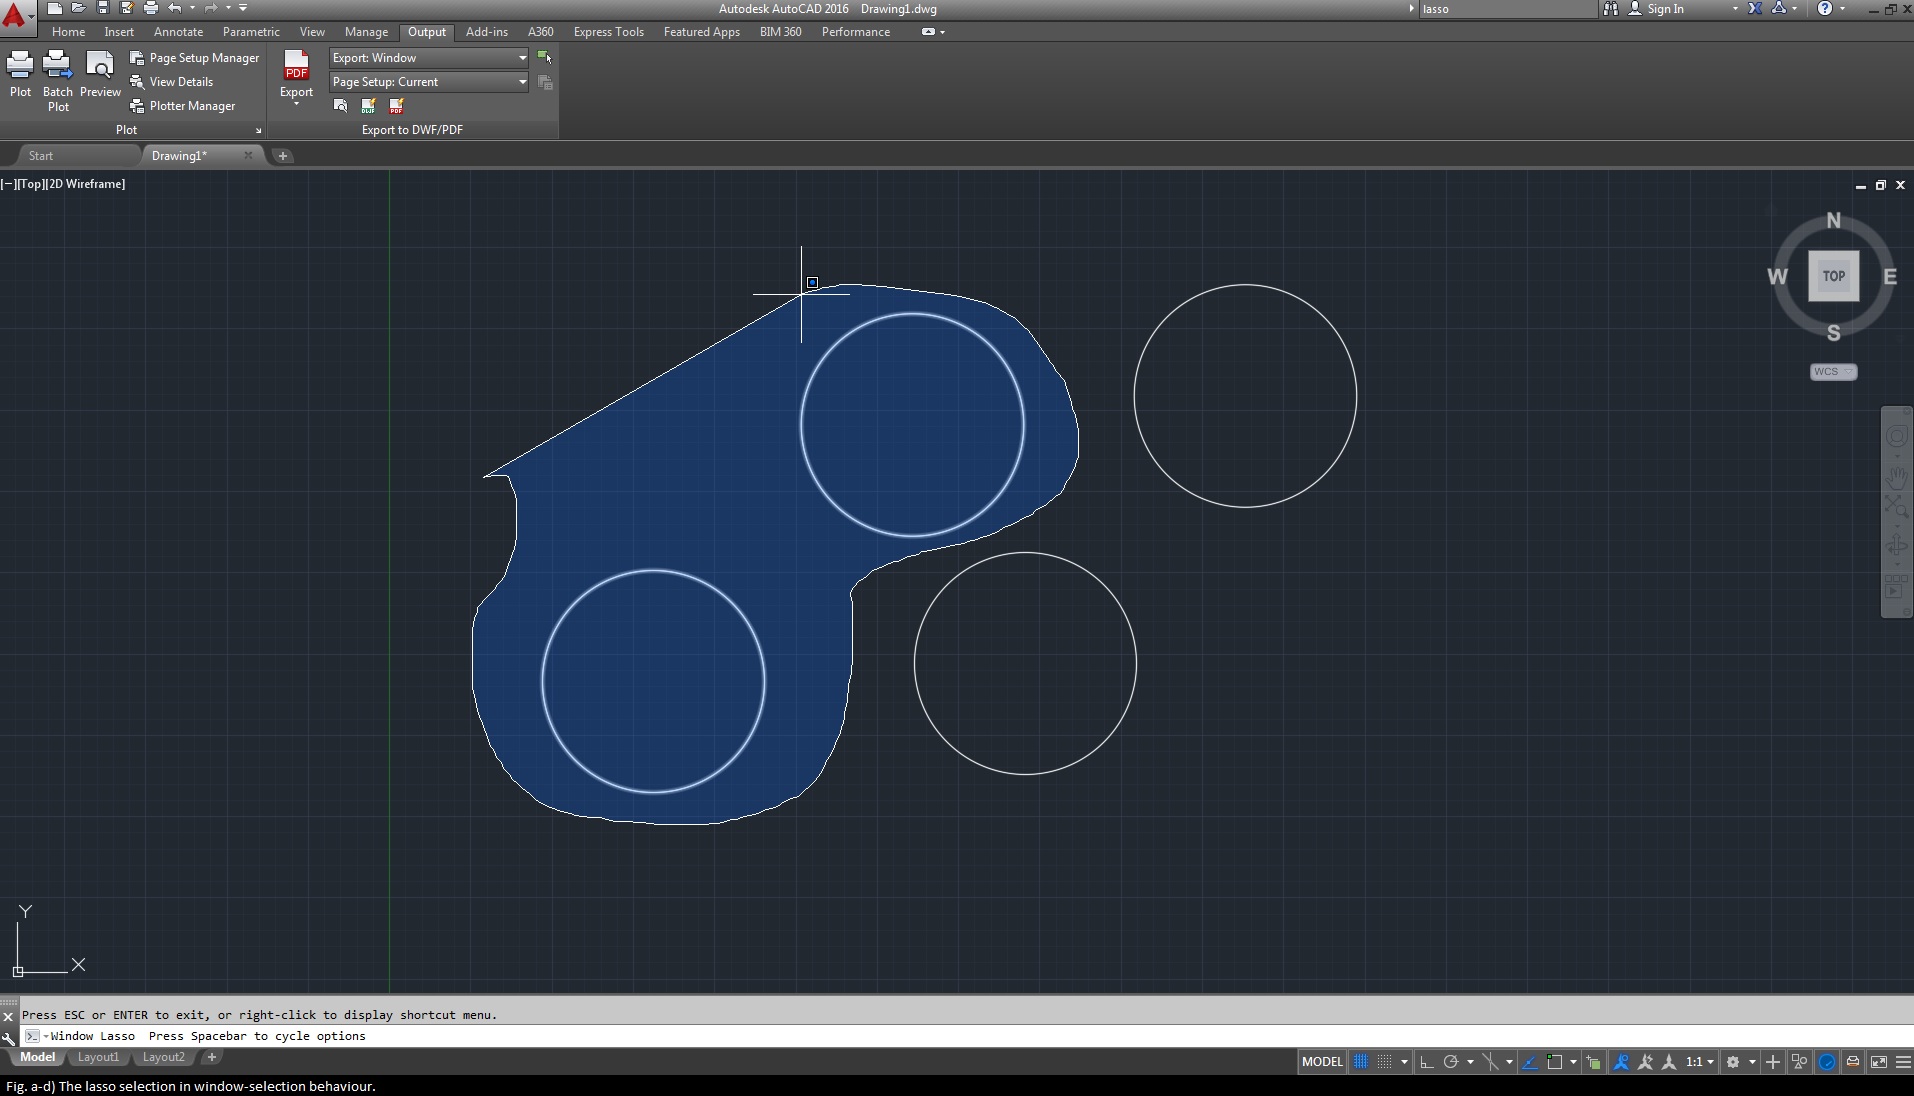
The window-based lasso tool selection allows you to selected completely encapsulated objects, where as below, the cross-window based lasso selection selects all elements touching the selection window.
Bonus Section!
The following isn’t a selection technique but it is a selection hack. If you wish to undo your selection, just type U and press [Enter]. This will undo your last selection.
Another great tidbit, the window selection will automatically turn into a cross-window selection if you move over to the left of your point of origin, and vice versa. Meaning, if you want to change your selection behavior for the window/cross-window property you can. But since it’s not logistically possible to redraw the lasso selection, this tidbit won’t work for the lasso selection. But don’t forget to try out these hacks yourself.