Here are simple few steps you can go through to create a 3D text in AutoCAD. You can as well use this technique to engrave a logo in a piece of material like shown on the image below
Obviously AutoCAD will let you create a peace of 3D text and here is how you can achieve this.
How to create a 3D text in AutoCAD
Step 1

Create a text using the MTEXT command.

- Click on A
- Specify two corners in the Drawing area where you will write
- Write your text
Step 2
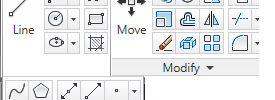
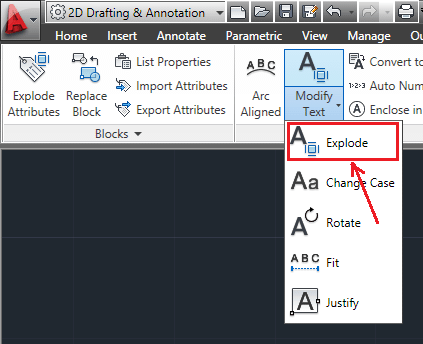
Go on the Express Tools tab

Step 3
Find the Modify Text >> Explode
- Click on Explode
- Select your text
- Press ENTER on your keyboard
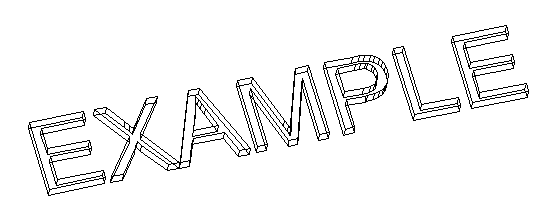
You should get something like this. (My text is EXAMPLE in CAPITAL letters)

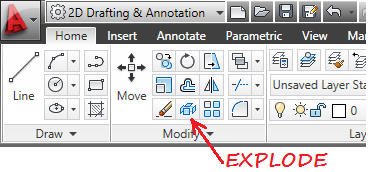
Step 4
Use the EXPLODE command to disassemble the text
- Select your text
- Click on EXPLODE
Step 5
Delete all those unwanted lines that appear on X, A, M and P. You should be left with this

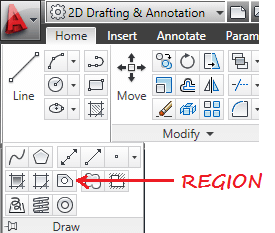
Step 6
Find the REGION command, click on REGION, Select the whole text and hit ENTER
The image seems not to have changed but actually, the REGION command just helped you convert a series of lines to block, Now each letter is a block.
Step 7
Use the EXTRUDE command

- Go on 3D Basics
- click on EXTRUDE
- Select the whole text
- Specify the height of Extrusion
While rotating the figure, you should get something like this
Here is your 3D text Autocad just allowed you to create. Now you can go ahead and use other techniques to engrave a logo in a piece of wood and more.