The creation of AutoCAD (automatic computer-aided design) completely changed the way the design industry works. It brought the world into a new era of design. In the past, designers would have to spend days using pen and paper to design and measure every line.

Created by Autodesk, it allows designers to create and edit designs in 2D and 3D. AutoCAD allows designers to focus more on the design itself without having to worry about the execution process, making it all the easier to manipulate designs. It’s primarily used in industries such as engineering, architecture, construction, and more.
Some businesses are making their living by taking commissions for outsourced product designs, such as RBC Medical’s medical device prototyping. It’s an example of businesses that have capitalized on this software to provide outsourcing solutions to those unable to make use of AutoCAD software.

The following paragraphs will delve into how to make a prototype using AutoCAD software and explain the rapid prototyping methods to go along with it:
1. Creating The Concept Sketch
The first and crucial step is coming up with your concept sketch, the only step that still requires you to use pen and paper. In the initial stages of creating your prototype, you’ll want to jot down as many details as possible as you never know which ideas will work and which will be thrown out.
An added benefit of the concept sketch is as evidence when you need to defend your intellectual property in the event of an ownership dispute as CAD files security isn’t always reliable.
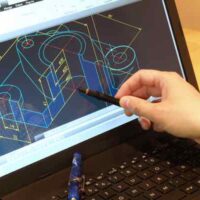
2. Creating The Digital Copy
Now that you have your concept sketch, the next step is to make a digital copy of your sketch in AutoCAD. Depending on your needs, you can render a 2D or 3D design of your prototype. The benefit of the 3D rendering is that you’ll be able to animate and rotate your digital sketch from all angles. This allows you to better visualize your product design.
Once this is done, you can further transform the 3D render into what’s called a photorealistic prototype. This is to give the designer an idea of what a physical version of the design will look like. This helps in planning. You can decide from here whether to continue making a physical prototype or, perhaps, take a step back and make some changes to the design.
3. Creating The Physical Prototype
Once you’re satisfied with the appearance of your virtual prototype and everything is rendered correctly, it’s time to move to the next step: creating the physical prototype. There are numerous ways to get your physical prototype done, however, only three types will be discussed here—3D printing, laser cutters, and CNC milling.
3D printing or additive manufacturing is the most common rapid prototyping process out there at the moment. It’s the most favored form because you can produce prototype samples in bulk and with speed using a simple method.
It’s primarily used in industries that make use of prototypes quite frequently and don’t mind them being disposable. For those into accessories, jewelry, and other consumer goods of that nature. The short downside to this method is that it can only be used for visual representation. It lacks functionality due to its fragile nature.
Laser cutters can also be used for prototypes using s method called ‘subtractive manufacturing.’ With laser cutting, one can make use of more robust materials to create a prototype, such as acrylic, metal sheets, or wood. It’s also possible to engrave logos and brands onto the prototypes with laser engraving.
With such a wide range of capabilities, this method is used frequently by the military, automotive, and aerospace industries.
Another subtractive manufacturing technique, CNC milling also produces great results when used in conjunction with rapid prototyping. A CNC mill is a precise cutting tool that’s lauded because it has very few limitations in the materials that it works with, from foam to glass to plastic to metal.
CNC milling allows for the creation of multiple parts in the prototyping process, as different parts have different functions or appearances. A milling head can be replaced with different heads, like a polishing or grinding head. This is one of its main selling points as it makes the technology noticeably more versatile than other prototyping methods
CNC is popular in the aviation industry, as well as in making industrial and medical equipment
Conclusion
AutoCAD has proven itself, time and time again, that it’s the market leader in product design software. The high-resolution digital copies of your design make it continuously sought after, despite the various design software types that have popped up over the years.