In this tutorial, I will show you how to make threads in SolidWorks while creating a hexagonal bolt. By following this tutorial, you will also learn about the basic menus in SolidWorks, how to draw polygons, how to use the CHAMFER command, and finally, how to add cosmetic threads to your design. A cosmetic thread is used in a variety of real-life applications. A few examples include bolts, screws, tapped holes, and several other applications.
What will you learn?
The following topics will be covered in this tutorial. You can skip to a specific topic by clicking on one of the headings.
[toc]

Creating a NEW Sketch in Solidworks
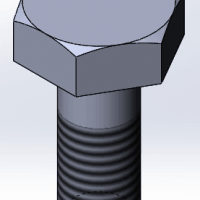
The tutorial will model a bolt with cosmetic threads using SolidWorks 2013. If you are using other versions of the software, do not worry because the procedure is the same. Also note that, there are many types of bolts but this example will design a bolt with a hexagonal head. Let’s get started!
First, select the Top plane and create a New Sketch.
How to Create a Polygon
Next, click on the Polygon icon in Command Manager.
Now, you will notice a new window to enter parameters of the Polygon. Since hexagonal bolts have 6 sides, enter 6 into the option box. Next, draw a polygon with center coordinates (0,0) for the X and Y positions, respectively. After doing so, click New Polygon.
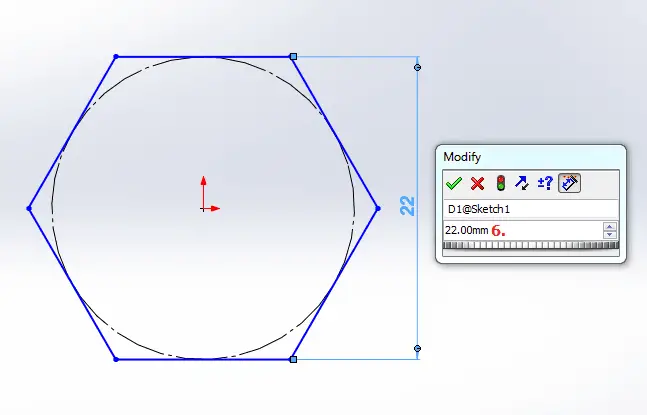
Next, We have to add dimension for keyholes. Click on the Smart Dimension in Command Manager and select two horizontal and parallel lines of the polygon. Then, type 22 mm and click OK. See Figure 5 below for details.
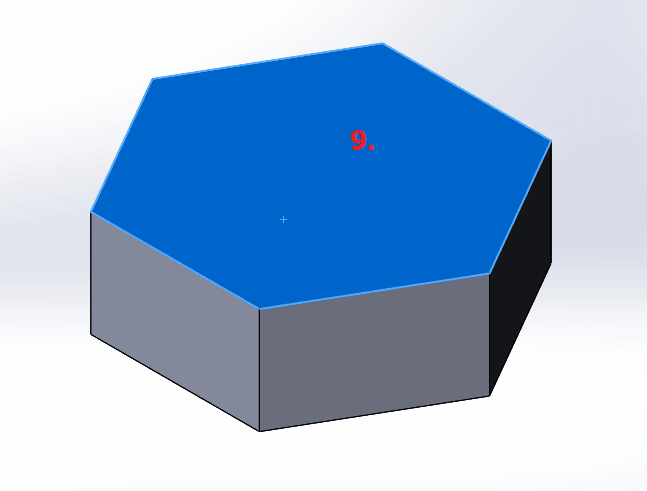
We will now add a 3rd dimension by extruding this Polygon. Click on Features tab in Command Manager and then on Extruded Boss/Base.
You will see a new window open on the left side with several options for extrusion. Type 8 mm in Depth box, and click OK.
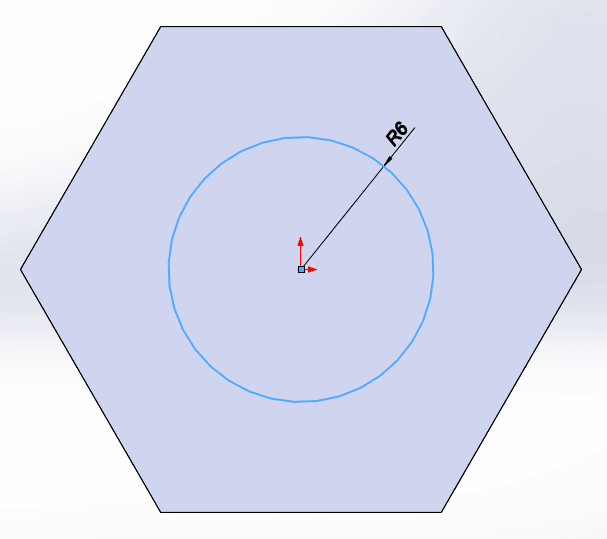
Select the Top Face of the polgyon and create a New Sketch. Draw a Circle with center in (0,0) and Radius of 11 mm and that Circle will tangent all edges of the polygon.
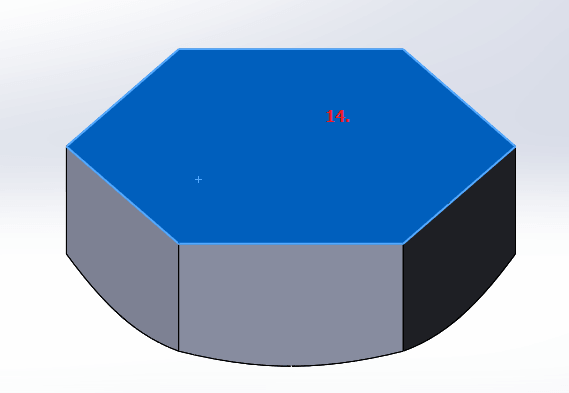
Next, click on Features tab in Command Manager and then on Extruded Cut.
A new window will appear on the left side. Follow these steps:
- Set Direction: Through all
- Check “Flip side to cut”
- Activate “Draft” by clicking on icon and type 60 degrees
- Click OK
How to add a Shank to a Polygon
Next, we have to add a Shank. To do this, create a New Sketch of the bottom Face.
In this Sketch, draw a Circle with a center in (0,0) and radius of 6 mm as shown in Figure 13.
Extrude this new circle by clicking on Extruded Boss/Base and type 30 mm in “Depth” field and click Ok.
How to make Threads in Solidworks
Before adding Cosmetics Thread, we have to CHAMFER edges. The location of this option is displayed in Figure 15. Click on Chamfer and set it to 1 mm with angle of 45 degrees. Then, select the bottom edge. Click OK.
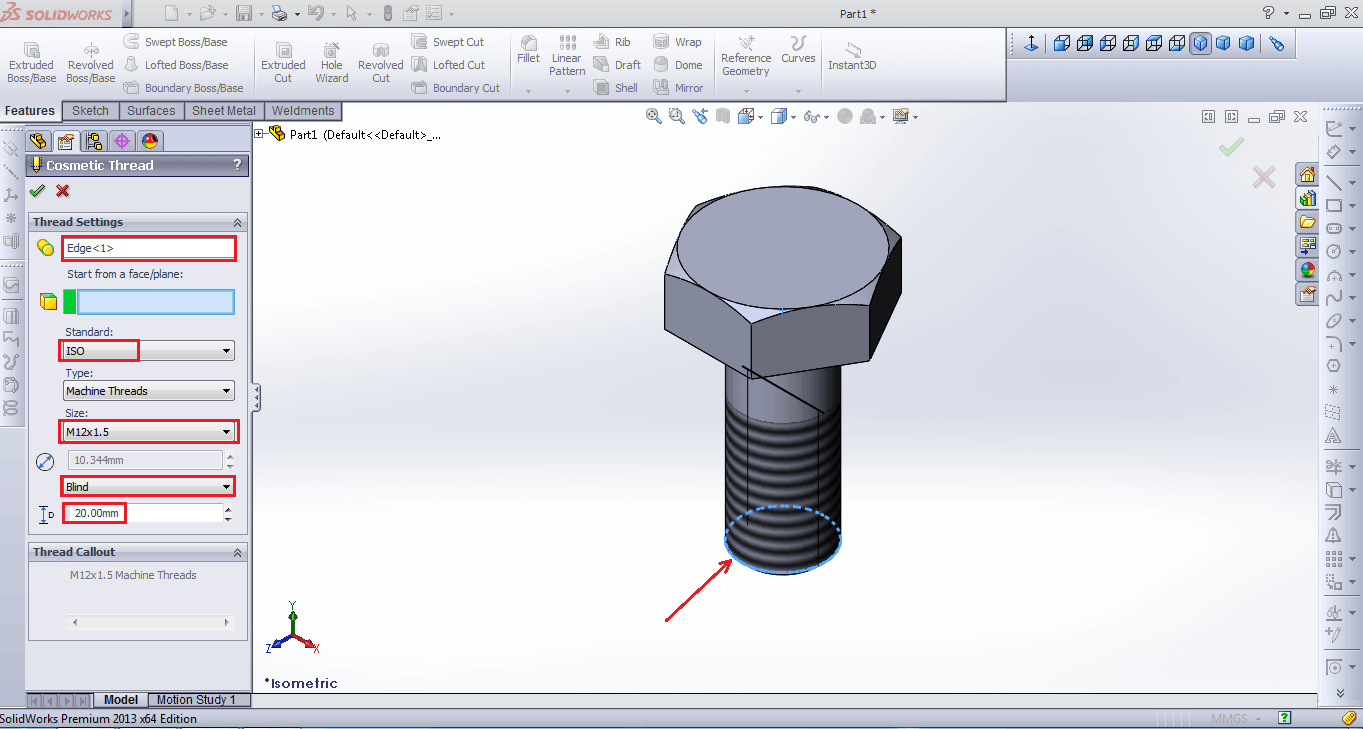
The final step is to add a Cosmetics Thread. Go to menu Insert -> Annotations -> Cosmetics Thread.
A new window will appear on the left side. Choose the parameters as shown in Figure 18 below:
After clicking OK, you are finished and have successfully created a hexagonal bolt with threads.
Final Thoughts
In this tutorial, I showed you the step-by-step procedure of creating a hexagonal bolt with cosmetic threads. Specifically, I wanted to explain how to make threads in SolidWorks, since it is an important skill to understand. You can now take these skills and create more detailed 3D CAD models.
If you have any questions, please leave a comment below. I hope you were able to learn from this SolidWorks exercise. Good luck!
Comments
2 responses to “How to Make Threads in SolidWorks”
[…] we’ll add a visual texture to simulate threads on the inside of the nut. Note that you can model true threads into the part using the Helix and […]
[…] out other tutorials about SolidWorks to apply such drawing views to actual designs, i.e. try this cosmetic threads tutorial. Good luck! Are you interested in becoming an expert in SolidWorks? If you are a beginner or […]