Drawing a circle in AutoCAD is one of the most fundamentals while learning how to use the software.
In AutoCAD there are many ways to draw circles, and all these ways depend on your inputs and the feature you want your future circle to have. The simplest procedure “by default” is to indicate the center point of your circle and the its radius.
1- Center point and Radius (Using the command windows)
To draw a circle in AutoCAD, you can:

- Write the word “CIRCLE” on your keyboard. (Just start typing, you will see your word appearing in the command window)
- Type “600,600“
- Type “40“
Remember to hit the ENTER key to validate each stage.
What just happened is; you’ve drawn a circle of radius 50 and the center of your circle is right at the point of coordinate (600,600).
2- Center point and Radius
Now you can use this same method to draw a circle but this time not using the command windows.
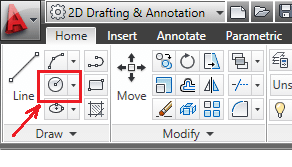
- Click on the circle icon
- Click on the drawing window to specify the center of your circle
- Give a value representing the radius of your circle and hit ENTER (or simply click somewhere on the drawing area as you see what your circle will be when you move your mouse without clicking)
3- Center point and Diameter
If you noticed while using the 2 methods above, on the second stage, where you did specify the radius, the command window looked like this
Specify radius of circle or [Diameter] <50.0000>:
In this step, if you had entered “D” , you would have seen this
Specify diameter of circle <12.0000>:
AutoCAD would be asking your the value of the diameter instead of the value of the radius. It is true that the diameter of a circle is twice its radius, but if you feel more comfortable indicating the diameter, AutoCAD gives you this alternative.
You may need to learn how to use the command windows in AutoCAD.
4- Drawing a circle in an isometric view
Its is sometime a headache to draw a circle in an isometric view and to see the circle having the expected position. To help draw a circle in an isometric view it is always good to have a 3D face helping you to harmonize the position of your circle with.
Having a 3D object drawn help you.
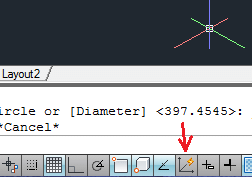
Make sure the Dynamic UCS is allowed to be able to use this method.
It will help you easily get circle on a face you like.
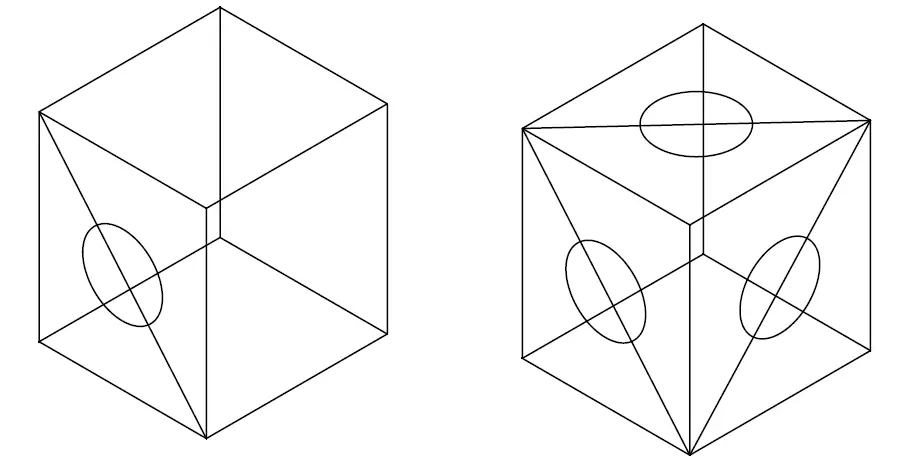
I used those diagonals to help me find the center of the circle (this technique is very helpful as you can observe in these AutoCAD 3D tutorial), and when allowing the Dynamic UCS I can easily orientate my circle planar to each face. You can use this technique to draw circle in isometric view.
U can as well use the UCS command to rotate the UCS if you have to 3D face to use as a reference.
U can rotate the x, y, or z axis as needed.
Here is a post where I worked on rotating the UCS using the UCS command in AutoCAD.
5- Drawing a circle
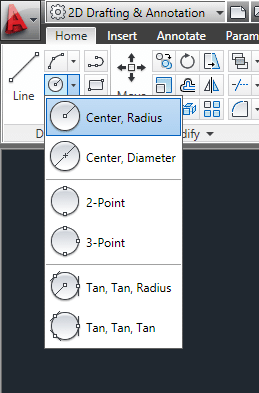
Each one of these icons can help you draw circle in a totally different way compared to all methods seen above. You can draw a circle specifying:
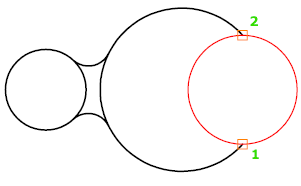
Two endpoints of the diameter
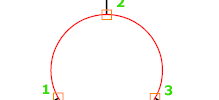
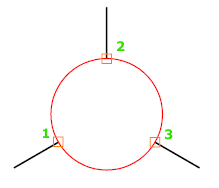
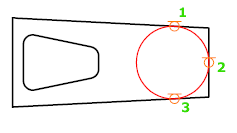
3 points of the circle circumference
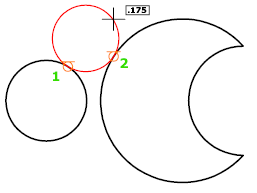
A circle with a specific radius and tangent to two objects (this has been extensively used in this AutoCAD exercise in case you would like to see what this can help you do)
Circle tangent to 3 objects
Go ahead an do these AutoCAD exercises as self assessment.
Comments
2 responses to “Drawing a circle in AutoCAD”
[…] Click on the RADIUS icon and draw circles. […]
[…] given all dimensions, which will make the task simpler. Today’s difficulty is simply to learn how to draw a circle with specified radius tangent to two objects. As you can see from the figure below, we need to be […]