
We’ve looked at many basic tricks one should know when starting with Draftsight.
Here are few more thing we should look at in the following paragraph. they will in the future help us more understand what we are doing in Draftsight while working on real project.
I would like to mention that these are just some very basic information you need to know while working with this CAD software. You will surely need to further sharpen your skills on these while walking toward becoming an expert in Draftsight.

You are ready to start drafting with Darftsight, what else do you need to know before you start?
I need to bring this image for the second time for you to see clear in what I am just about to say below.
 The Status bar in Draftsight

Snap
Set constraints guiding the displacement of the cursor in the drawing area. When this is activated, you have a “finite” set of point in the drawing area where you can stick the cursor. This can allow you to draw object a fixed distance from each other more easily.
You can change the default settings of SNAP by right clicking on it and selecting Settings…
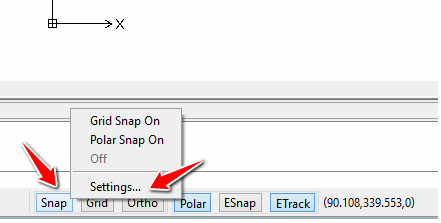
After a click on Settings… you will have the following.
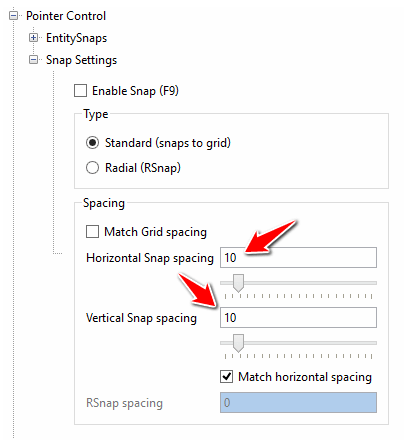
Allowing you to change the spacing in the x and y direction if needed.
Grid
Display a series of vertical and horizontal lines in the drawing area. (Those lines wont be visible on the printed version of your project)
Ortho
Constrains the cursor to either vertical or horizontal movement. While drawing a line for example, you will be able to draw either vertical or horizontal lines.
Polar
This forces the cursor to jump to certain angle while drawing. The default angle is set to 90 degrees.
A right click on Polar and a click on Settings… will give you access to the following settings
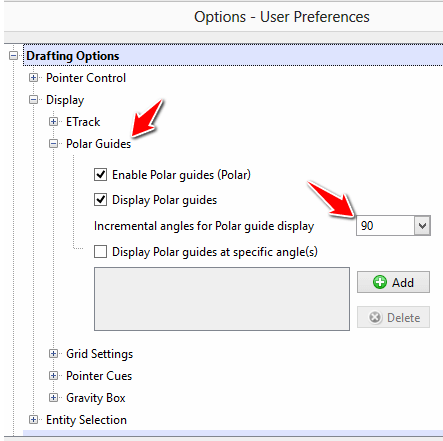
where you can change the 90 degrees default angle.
Esnap
Helps precision while working. will allow you to stick your cursor to existing point making it easy to start a line at the edge of a rectangle for example.
This is an important setting. you will have to use its features more often.
If you check the Esnap settings, you will notice the following
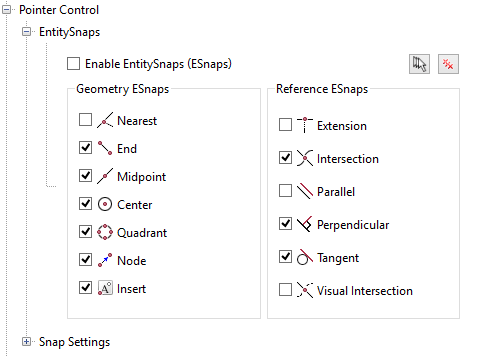
where for example, the feature Midpoint allows you to stick the pointer at the precise middle of a line while certain commands are activated.
The command window
Using the command window is a quick way of accessing certain command and a nice alternative to accessing command using Draftsight. The Command window is often a reference guideline to the input Draftsight needs from the user while working on a specific command; lets take an example of drawing a simple line.
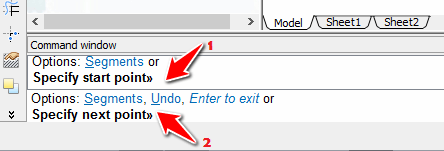
After hitting LINE on the Draw toolbar, you can see that Draftsight is prompting me to Specify start point, when I do that it then prompts me to Specify next point.
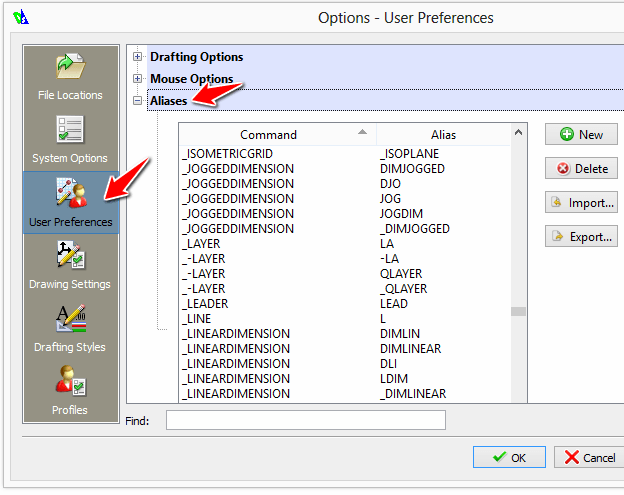
For every command available via toolbars correspond a command line. And every command line has an alias.
For example, the command corresponding to a line is LINE, and its alias is L, (you can customize these alias in such a way that you will use your own personalized alias to activate a specific command, for example choosing K for line if that makes more sense to you)
The list of all commands and aliases can be found here.
Start with Draftsight command window
To activate a command, you can do one of the following:
- Click on its corresponding icon via its toolbar
- Write the command corresponding to it via the command window and hit ENTER
- Write the alias corresponding to it via the command window and hit ENTER
Toolbars
Toolbars are where you find your tools. You have the Draw, Modify, Layer toolbars already present on your workspace. If you have not given the previous post a read, go and learn how you can add more toolbars to your workspace in Draftsight.
Using your mouse
The mouse you are using is either making or breaking you. Please check what a good CAD mouse should be like.
The mouse primarily helps for zooming and panning using the wheel.
Zoom in and out by rolling backward and forward. Click on the wheel, hold and move the mouse for panning.
Drawing setting
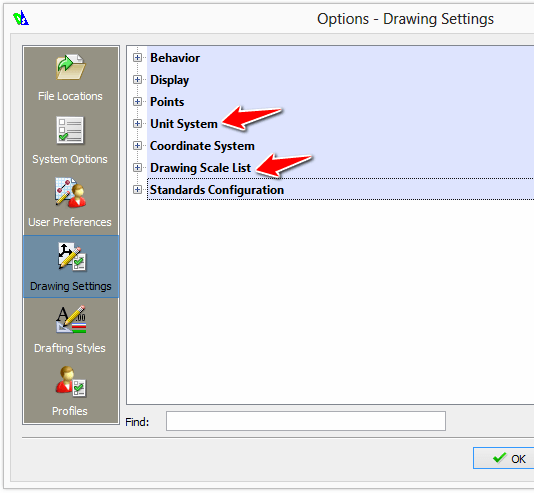
You might want to spend sometime setting the right Unit system for your project.
Unit System
You can change the 0 degree Base angle Draftsight is using, but make sure to remember it while working.
You can as well change the length and Angle units.

Drawing Scale
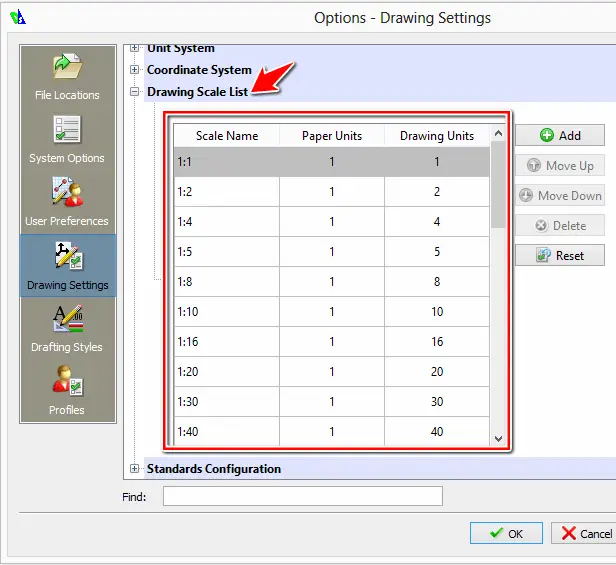
It is important to know what the scale is, when you are working on a project. The Drawing scale list allows you to choose a proper scale to your drawing.
What does one unit in Draftsight correspond in real dimensions while printing your project? If you are working on a project where you need to set the drawing scale, you will preferably need to do it at the beginning of your project.
Drawing boundaries
You can access the Drawing boundaries settings of your sheet and set your drawing space to a certain limit.
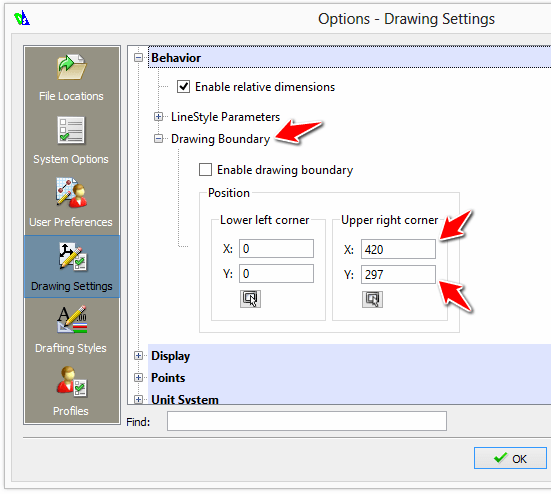
Let’s say you want to print your final work on a A4 paper (210 mm × 280 mm), you will need to set the Upper right corner to x=210 and y=280 or vice versa meaning x=280 and y=210 (or a little less if you want to take margins into consideration), set your Drawing scale to 1:1, and set your Block units format to Millimeters to be sure that whatever you draw will nicely fit in your paper when printing your project.