This is nice exercise to put to practice what we have learned so far.
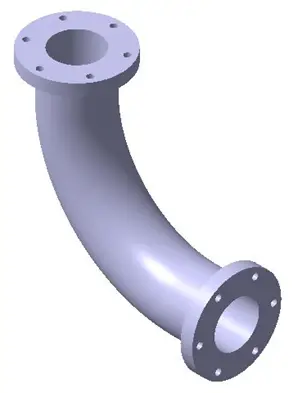
We are going to create in CATIA a pipe fitting component (elbow). After learning commands from Sketcher and Part Design workbench it should be easy to create this part.
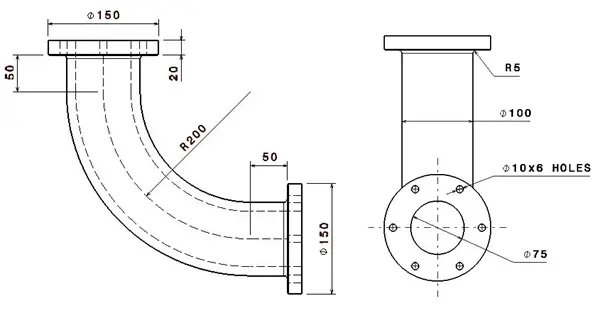
This elbow may be used to connect two pipes of I.D.75 mm, perpendicularly to each other. The importance of elbow is it allows fluid to pass uniformly without any obstruction.

let dive into it!
3D Exercise using CATIA
Step 1
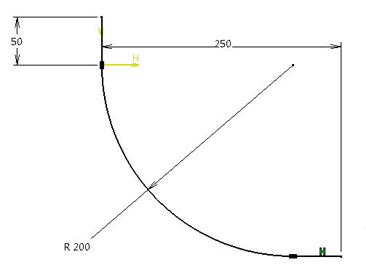
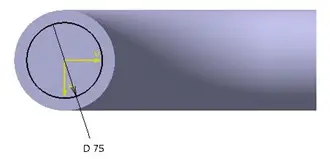
We will draw this center line on the front plane.
In the Front view, you can see the center line of the pipe.
Step 2
We need the cross section of the pipe. Here we are first going add the material using Rib and then we will remove material with Slot. This will give us basic pipe like object. First draw a cross section for Rib.

Step 3
Using Rib command we will get Outer Diameter (O.D.) of the pipe.
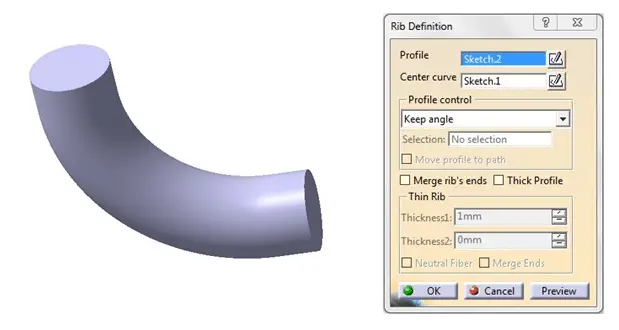
While using Rib definition, select circle with 100mm dia. as Profile; and for Center curve use the center line drawn in step 1.
Step 4
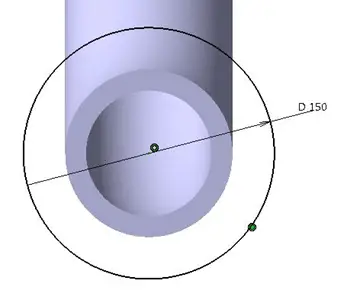
To get Inner Diameter (I.D.), we will use Slot. For that, first draw the section as shown.
Make this circle Concentric with 100 mm dia. circle.
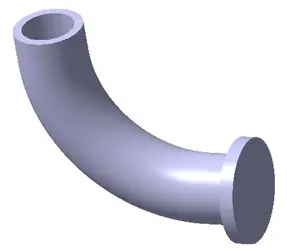
Now with the help of SLOT command, we will remove the corresponding part to get the image below.
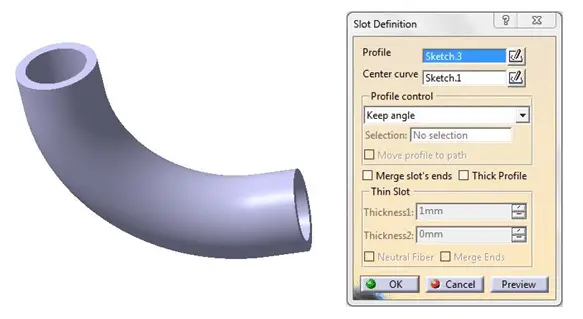
Here, for Center curve, use the same sketch used for Rib.
Step 5
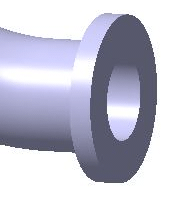
After creating most of the Elbow, we will now create the remaining flanges. Let’s create bottom flange first.
On the pipe’s bottom end face, draw the sketch as shown.
Now extrude it to 20mm distance.
Using Hole or Pocket command with diameter of hole 75mm and depth 20mm, we will remove the material from flange to get an open end.
Now, to fasten a long straight pipe with this part, there are 6 holes provided on the flange. We will make circular pattern of a hole to get these 6 holes. Using Hole definition, create a hole as shown. Use the technique we did use while creating this circular pattern to create holes around the flange.
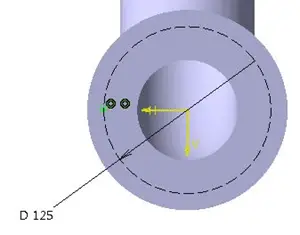
As shown in the side view, there is a fillet provided on the backside of flange. Create this fillet using Edge Fillet option with radius equal to 5mm.
Now our bottom flange is ready.
Use the same procedure to create top flange and complete the part.
Having issues getting this done!? leave a reply below.
Leave a Reply