
This post is to illustrate some important commands and in Sketcher Workbench.
You need to remember that a part always starts with a sketch.
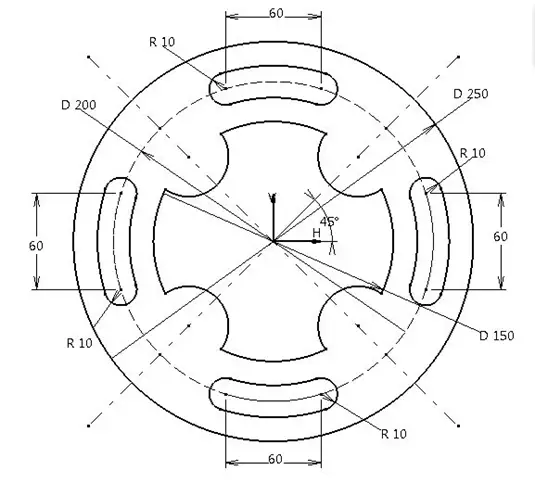
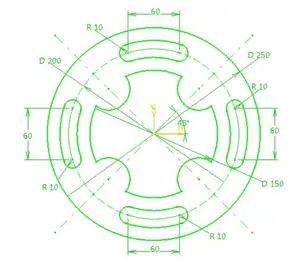
The simple exercise below will serve as the object of our tutorial. If you are rather an AutoCAD user, you will find these AutoCAD exercises more helpful, them come back and use this exercise to test your abilities on AutoCAD.

Sketcher Workbench in CATIA
To draw this figure in CATIA you shold:
Step 1
Enter the Sketcher Workbench by clicking![]() (Sketch) option. Some prerequisite are needed which we will handle here. The first and most important toolbar in Sketcher is the Profile toolbar.
(Sketch) option. Some prerequisite are needed which we will handle here. The first and most important toolbar in Sketcher is the Profile toolbar.
It includes options to draw Profile, Rectangle, Circle, Spline, Ellipse, Line, Axis and Point and so on. Tools found on the Profile toolbar allow us to draw different shapes with connected lines.
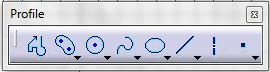
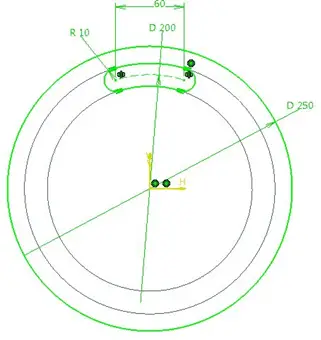
Now, draw a circle its centre at (0, 0) location using Circle option. You will notice that the default colour of the circle will be white. Give proper dimension to circle using ![]() Constraint option. The colour of the circle will now change to green.
Constraint option. The colour of the circle will now change to green.
This greencolour indicates that the circle is constrained (the degree of freedom of the circle is restricted)
Step 2
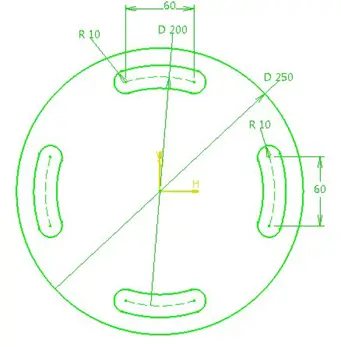
Expand the drop down list under Rectangle option.
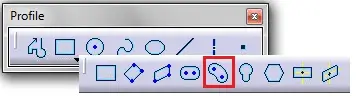
You will find Cylindrical Elongated Hole option. Click this option to draw an elongated hole like profile along an arc. To draw this, first select the centre point for the arc; then select the starting point and ending point for the elongated hole.
Using same technique, draw another elongated hole as shown in figure below.
We will now use Mirror command to make remaining two elongated hole profiles. In the Operation toolbar you will find Mirror option.

Using MIRROR Command
- Select the object.
- Click on MIRROR command.
- Select appropriate mirror center line.
Step 3
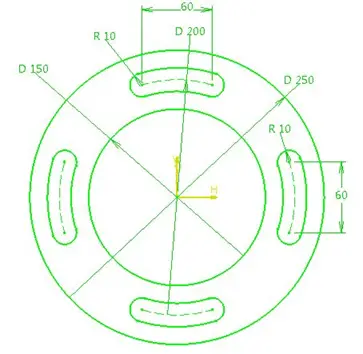
Create an inner circle with the same center as the bigger circle with diameter of 150 mm as shown below.
Step 4
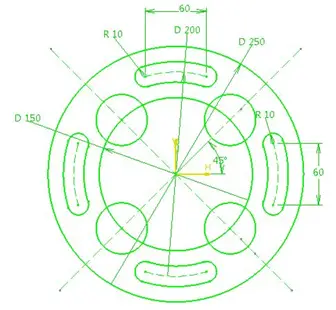
Using Axis option, draw two axes passing through (0, 0) (Remember the point 0,0 is the center of our figure) at an angle of 45 degrees. Now draw four circles at the intersection of those axis with circle of 150 of diameter.
Step 5
Using Quick Trim command, we will trim unnecessary lines. You will find Quick Trim option under Operation toolbar.
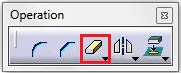
Quick Trim allows you to trim the geometry easy and fast.
The default colour for fully constrained (Iso-Constrained) sketch is Green, but we can change the colour to desired one.
Feel free to drop a comment below if something is missing in this CATIA tutorial. Do not forget to like if this helped you.