An image can be relatively “ugly” if you fail to use tools appropriately. Here is how you can easily change the render background in AutoCAD.
On the picture below, notice the difference between both pictures. the same object rendered in two different way. The results are far from being similar.
To change the image background in AutoCAD, you may want to follow this:
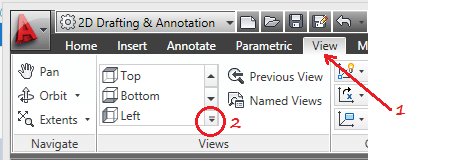
1- Click on a tab View, and click on 2 as shown on the figure below
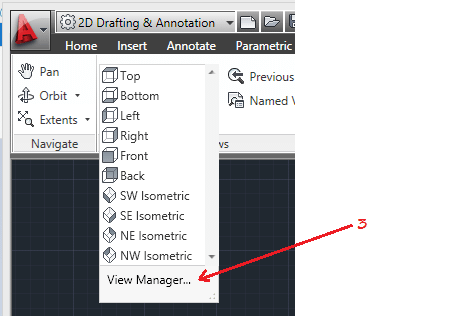
2- Click on View Manager
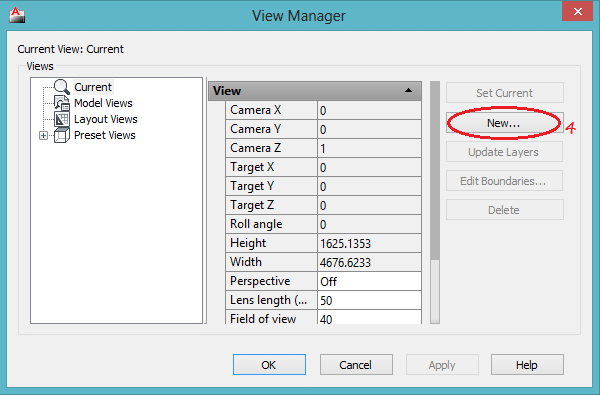
3- Create a new view
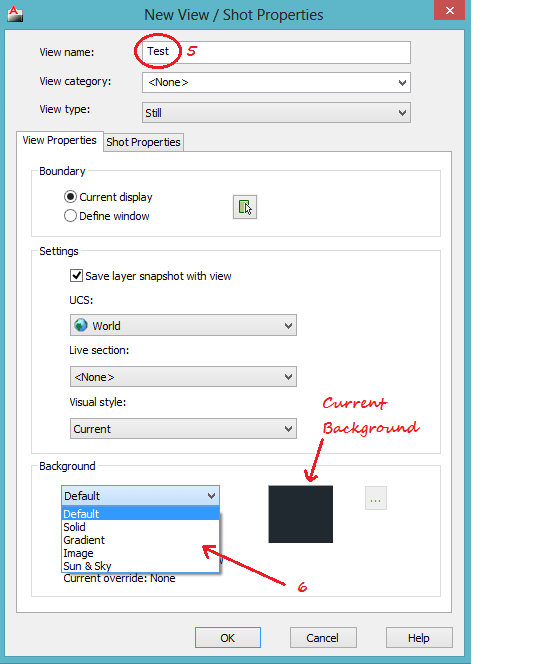
4- Give a name to the your new View, Select the background you would like your render to have, You can test each style, from solid, Gradient, Image (You will need to upload an image), to Sun & Sky. I will recommend going first with Sun & Sky, it is easy to set and it gives a pretty nice render.
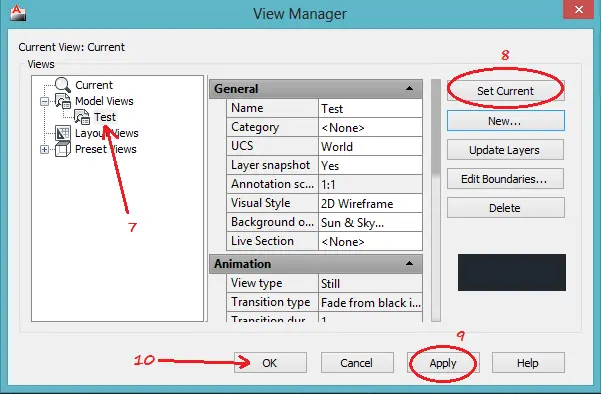
5- The last step consist of setting your new View as Current. Select the View (7), Set it as Current on (8), apply changes on (9) and hit the button OK and you are ready to go.
You can now try Rendering, and notice how this change affect your background and the quality of the rendered image.


