This is a simple exercise for AutoCAD beginners.
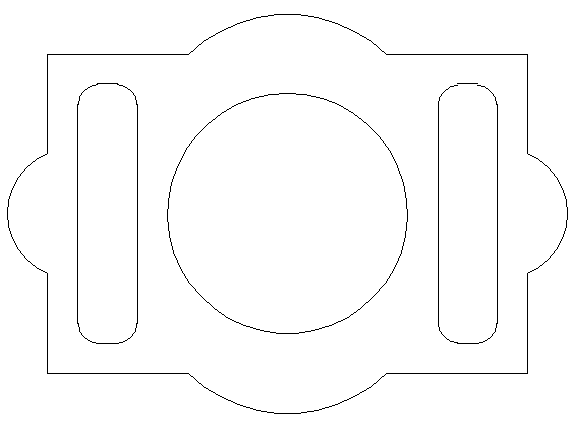
In this exercise we will have a step by step demonstration on how to use AutoCAD command to obtain the figure below.
How to draw a Simple 2D
step 1
We will start by drawing a rectangle with the following dimensions.
 Step 2
Obtain the figure below, make sure you have changed your settings as mentioned in Things you should learn on your day 1 using AutoCAD.
You should be able to find the middle of each side, so create a gap of 100 and 60 centered at the middle of each side. And draw a line perpendicular of 20 of length. The line will help draw arcs since will need 3 points to draw each of our arcs.
You also need to draw a diagonal, this will serve to draw the circle, we need to be able to draw a circle centered right at the center of our rectangle.

Here we can draw our circle with no hassle using the diagonal of the rectangle, and we are sure the circle is at its right place.

Step 3
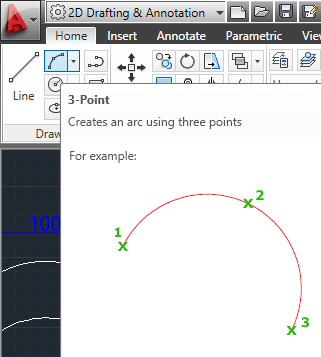
Use the ARC command to draw arcs. In this task you can choose to draw only 2 arcs, and use the MIRROR command to obtain the 2 others.


Step 4
In this step we are trying to draw those rectangle with rounded corners. There is a trick which allows you to start the beginning of a line at a specific distance from a point. To use it, you need to activate the LINE command, come near the end of a line, stay for a second, move now slowly horizontally or vertically, you should notice those green dotted line, leave now your mouse in that position, and type a digit using your keyboard, if you did it well, you should notice that the beginning of the line has been created at the distance and toward the direction you specified.
You can try using this technique to find the starting point of the triangle we are trying to draw.
But if you are not able to follow this, you can simply draw lines, use them, and delete them when you are done with them. It should not be a problem, The end justifies the means 😉

Step 5
Now we need to get those rounded shapes of radius 10 on each edge of the rectangle we have just drawn.
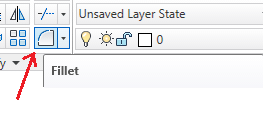
Use the FILLET command.

To use the FILLET command;
- Click on the icon shown on the figure above
- Type “R” on your keyboard and press ENTER
- Type “10” and press ENTER
- Select the first side of the corner to round
- Select the second side of the corner to round
Repeat this for the other 3 corners. Notice You do not have to go through 2 and 3, for the other corners, go from 1 to 4, 5. AutoCAD have saved the dimension of the radius you specified and will keep it like the default value while using this command until you decide to change it. By default the value of this radius is set to zero, that is why you changed it.

You should obtain this.

Step 7
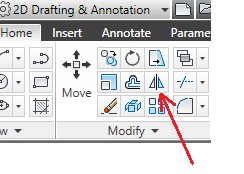
Now use the MIRROR command to obtain the rectangle on the right, since it is a symmetry of the figure we have just drawn. Use the center of the circle as center of the symmetry.


And there we are.


Comments
2 responses to “How to draw a Simple 2D in AutoCAD”
thanks for the exercises, they have been of help. would love to see more
great exercises. thanks a ton!