Hello!
here is the 3D object we will exercise on today.
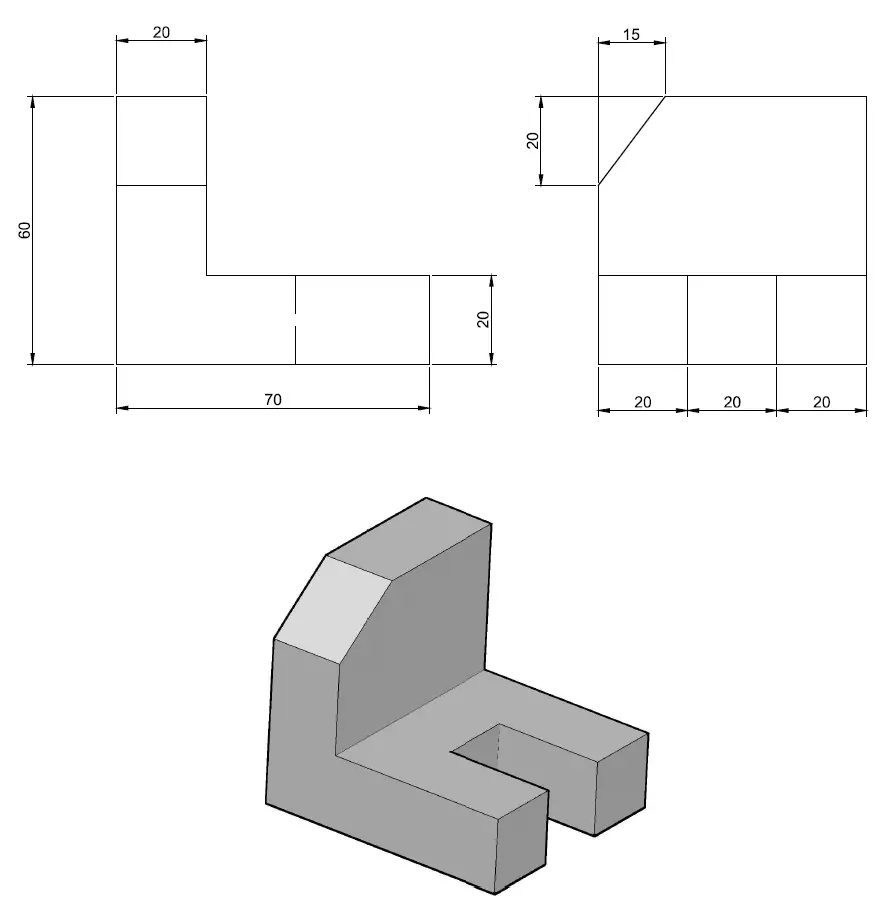

As you will notice, it is not far different from the one we have already done here. This one will help us use the CHAMFER command in 3D. Let’s do it!
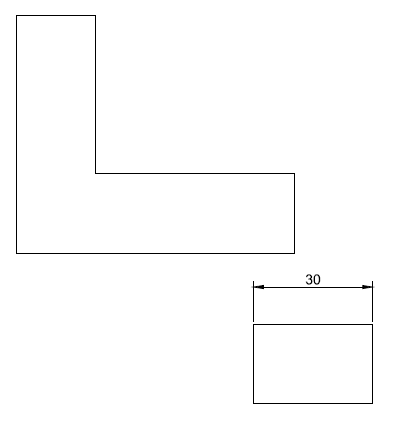
Step 1
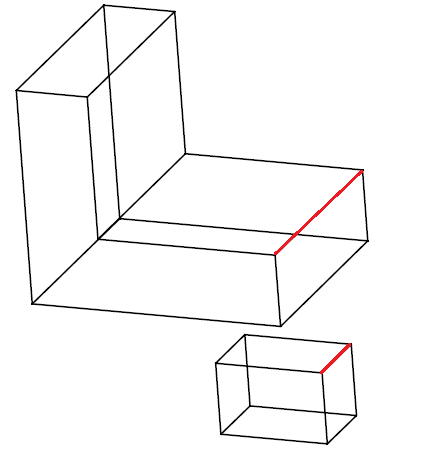
Draw these two 2D object, EXTRUDE the small one with 20 and the big one with 60.
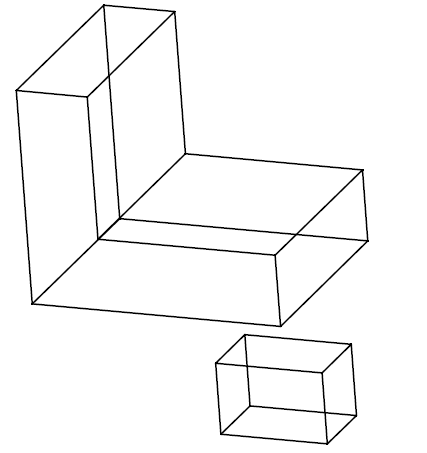
Step 2
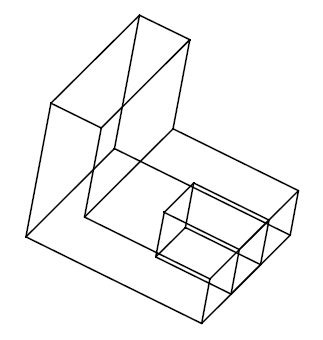
In an isometric view, you should have something similar to the figure below.
Step 3
The same technique we used in last AutoCAD 3D tutorial is being used here as well. We need to grab the small box from the center of its edge marked with red and stick on the big object on the center of the red line.
You should be able to get the figure below.
Step 4
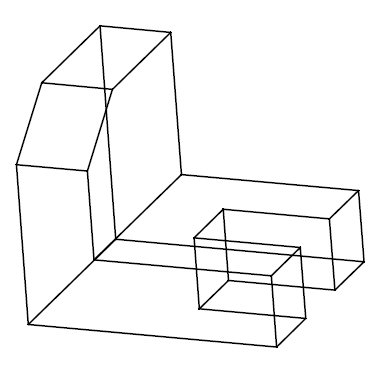
We are now going to use the CHAMFER command on one of the upper edge of our object.
Using the CHAMFER command
- CHAMFER
- (TRIM mode) Current chamfer Dist1 = 0.0000, Dist2 = 0.0000
Select first line or [Undo/Polyline/Distance/Angle/Trim/mEthod/Multiple]: d- Specify first chamfer distance <0.0000>: 15
- Specify second chamfer distance <15.0000>: 20
- Select first line or [Undo/Polyline/Distance/Angle/Trim/mEthod/Multiple]:“Select the upper base”
Base surface selection…- Enter surface selection option [Next/OK (current)] <OK>: “HIT ENTER”
- Specify base surface chamfer distance or [Expression] <15.0000>:“HIT ENTER”
- Specify other surface chamfer distance or [Expression] <20.0000>:“HIT ENTER”
- Select an edge or [Loop]:“Select the edge”
- Select an edge or [Loop]:“HIT ENTER”
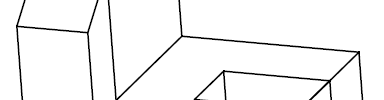
You should end with the following figure.

Step 5
The last step is to use the SUBTRACT command. We need to subtract the small figure from the big one.
using the SUBTRACT command
- Command: SUBTRACT
Select solids, surfaces, and regions to subtract from ..- Select objects: “Select the biggest object”
- Select objects: 1 found “Hit ENTER”
Select solids, surfaces, and regions to subtract ..- Select objects: “Select the smallest object”
- Select objects: 1 found “Hit ENTER”
This bring us to the end of this exercise. Feel free to write your thought in the comment section below.

Comments
One response to “AutoCAD 3D Tutorial – Part 3”
The chamfer command doesn’t work for me stating that a blend may not be set on the boundary? There are no blends I thought?