
Today’s 3D exercise is the following.
Simple one right!

Without further comments let’s dive into it.
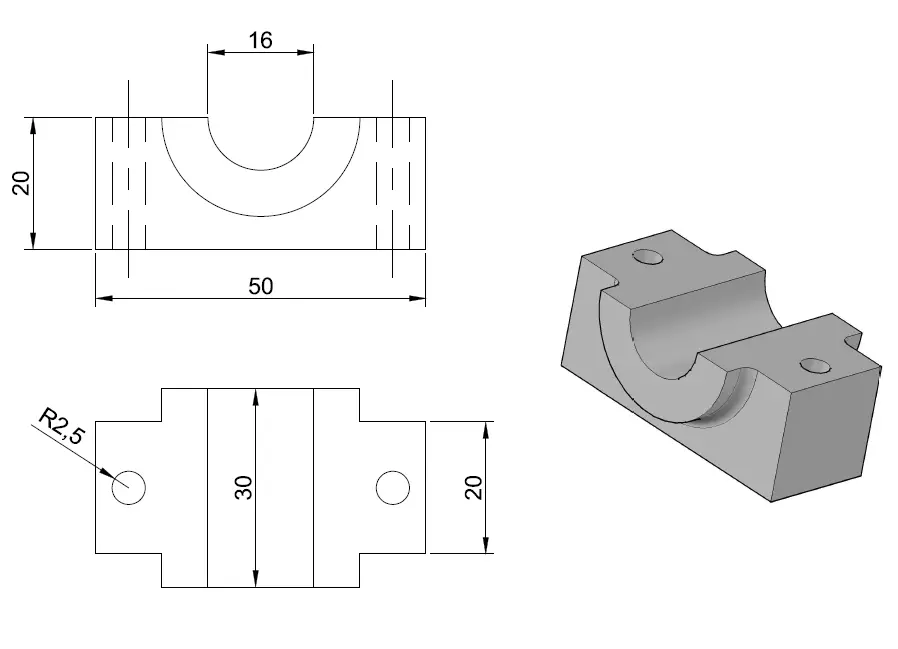
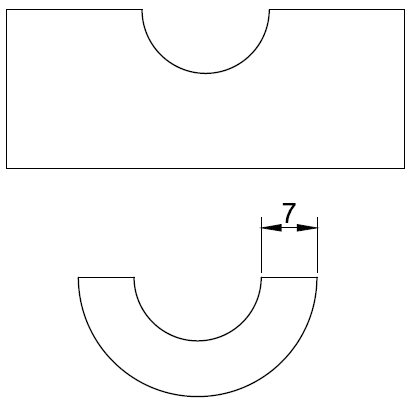
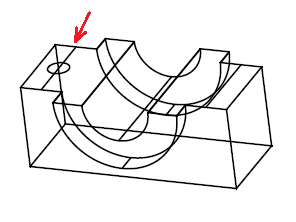
Step 1
Draw these two objects.
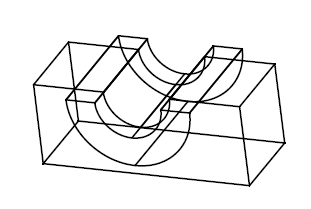
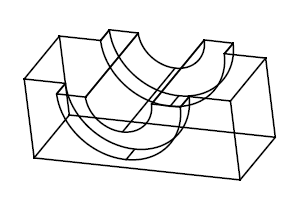
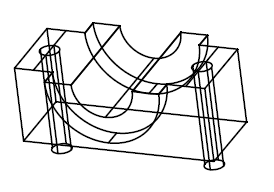
Step 2
Long story short, using the same technique that we used in previous exercises, we will EXTRUDE those object each with its respective dimension, and place it in the design like shown in the figure below.
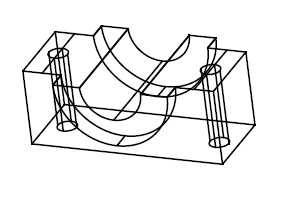
Step 3
Use the UNION command to unite them.
Using the UNION command
- Command: UNION
- Select objects: “Select one of the two objects”
- Select objects: 1 found “Select the other”
- Select objects: 1 found, 2 total
- “Hit ENTER”
Step 4
Draw the reference line from centers of edges like shown below, and use this line to draw a circle at the center of the face.
Step 5
Do the same on the other side and use the EXTRUDE command to extrude both circles to obtain cylinders. Make sure your cylinders are longer than the whole object.
Step 6
Use the SUBTRACT command to subtract those cylinders from our object.
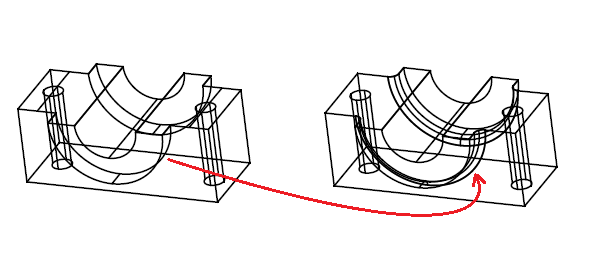
Step 7
The last thing to do is to use the FILLET command in 3D to have edges have a rounded shape. The FILLET command is known and was used in past exercises. if you are not familiar with it, feel free to check this AutoCAD 3D exercise.
Remember on this figure your need to use the FILLET command on each side. (on the right and left side of the object we are designing)
And here we are!
Remember to Like and share if this has helped you!

Comments
4 responses to “AutoCAD 3D Tutorial – Part 4”
Please give me a tutorial . How to draw internal and external thread for bolt and nut . (step by step explanations) am new for 3d Autocad. Am using autocad2007. Please mail me the tutorial ez*******@gm***.com
Have a look at how to draw a spring in AutoCAD if you are still having issues drawing it, let me know. You will need the SWEEP command, but I dont know if AutoCAD 2007 features this command. You can try
Thank u mr.antone
missing fillet radius?
why?